Skip to content
How to Set Up a Splash Pad Correctly
# Your Trusted Inflatable Supplier In US

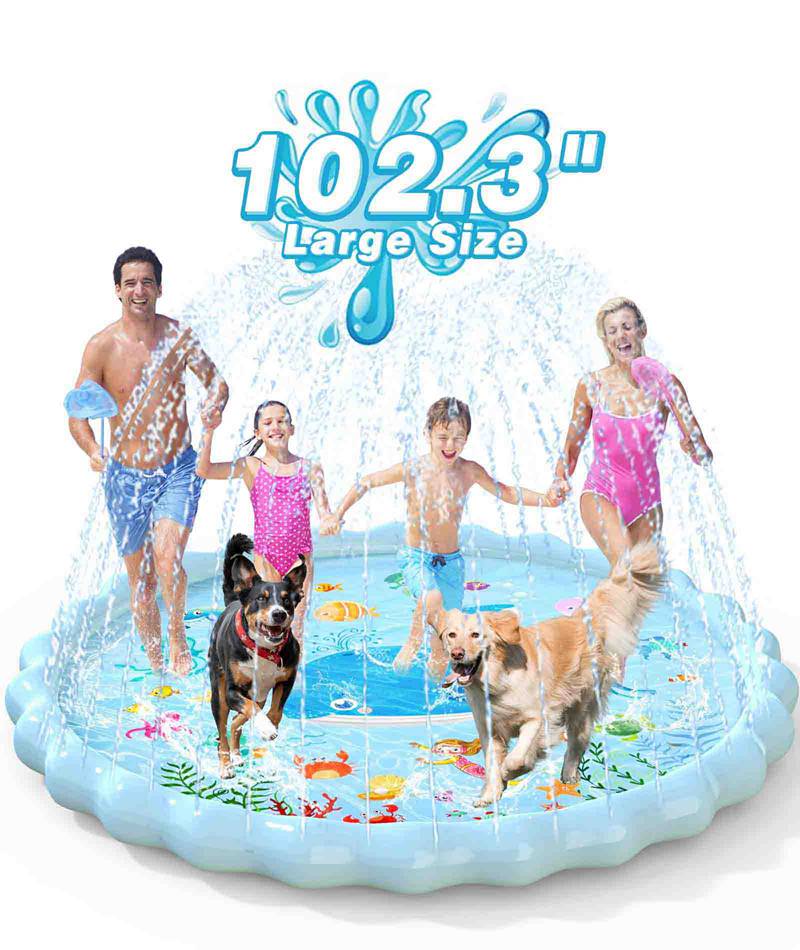
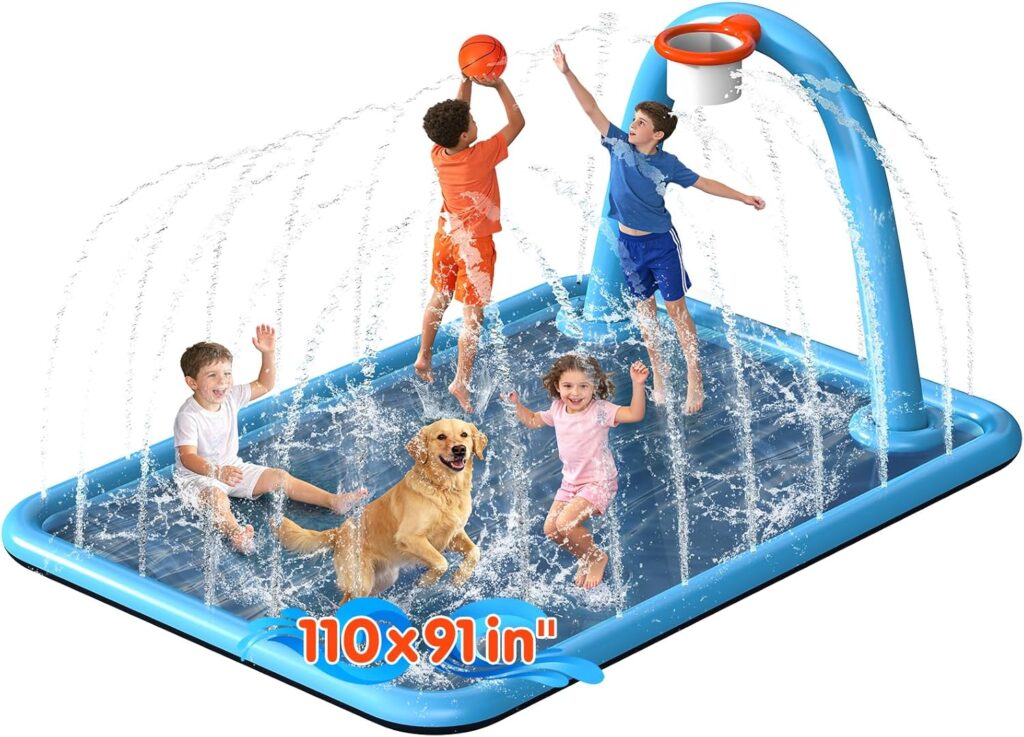
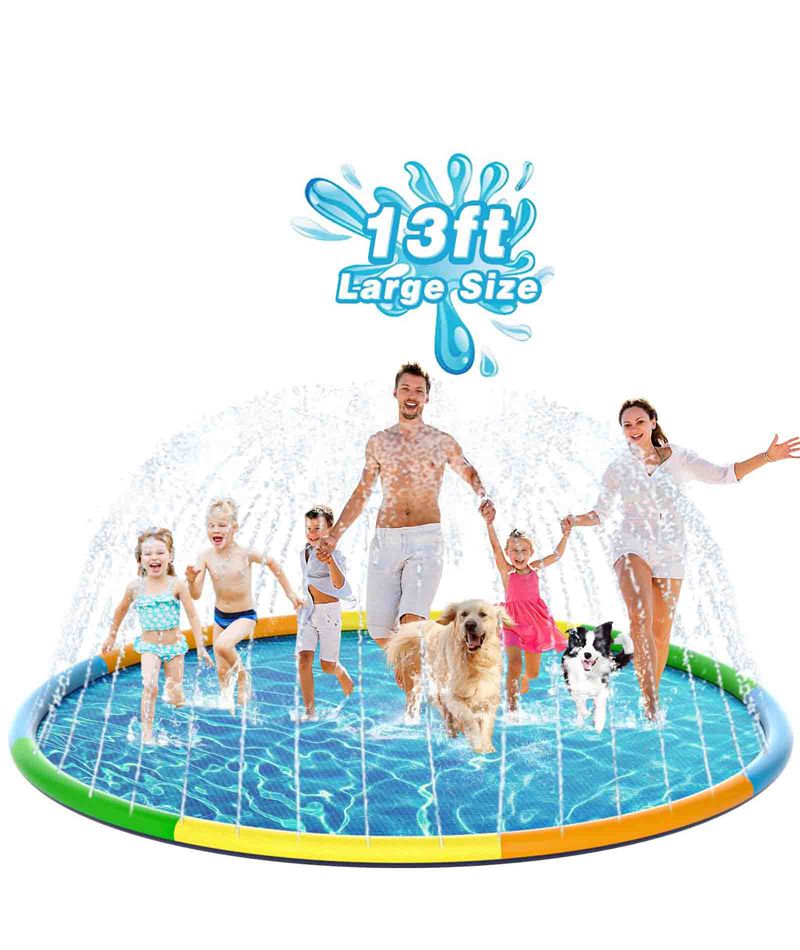
A splash pad can turn a normal backyard into a summer play area in just a few minutes, but the way it is set up makes a bigger difference than many families expect. One family may get soft inward spray, shallow water in the center, and an easy afternoon of play. Another family may deal with leaking at the hose, spray shooting outside the mat, children slipping, or a damp pad that smells after storage. In many cases, the difference is not the splash pad alone. It is the ground, the hose angle, water pressure, drainage, and how the pad is dried after use.
To set up a splash pad correctly, place it on flat, clean ground, connect it to a garden hose without twisting the connector, start with low water pressure, adjust the spray gradually, supervise children and pets, drain all water after play, dry both sides, and store it loosely in a dry place. These steps help reduce leaks, slipping, mold, odor, and early wear.
That sounds simple, but each step has a small detail that matters. A tiny stone under the mat can become a pressure point. A hose pulled at an angle can make the connector leak. Too much water pressure can turn a fun sprinkler effect into a messy and uncomfortable spray. Folding the pad while damp can trap moisture between layers and create odor before the next weekend.
EPN, a brand under American Epsilon Inc., develops PVC and composite outdoor water products for families, kids, pets, and seasonal backyard use. For splash pads, the company focuses on material thickness, edge stability, water flow, spray distribution, hose connection structure, folding behavior, and repeat-use performance. But even a well-made splash pad needs the right setup at home. A good product and a careful setup work together.
Think of it like setting up a small backyard pool, sprinkler, and play mat in one. The product provides the structure. The user creates the play environment. When both are done well, the splash pad feels safer, cleaner, more durable, and easier to reuse.
Where Should a Splash Pad Go?
A splash pad should be placed on flat, clean, open ground with no sharp debris underneath and enough space for water to drain away. Short grass is usually the best backyard surface because it feels softer under bare feet, offers better grip than smooth concrete, and allows water to soak into the ground more naturally.
The right location is not simply the biggest empty space in the yard. It should be the place where the splash pad can stay flat, the hose can connect without pulling, and children or pets can play under easy adult supervision.
A good splash pad setup area should have:
- Flat ground without visible bumps or holes
- Short grass or another smooth outdoor surface
- No stones, sticks, roots, mulch, or sharp garden debris
- Enough space around the outer ring for children to move
- A hose path that does not cross the main play area
- Natural drainage away from doors, patios, and walkways
- Clear visibility for parents or caregivers
This matters because most setup problems begin under or around the mat. A small stone can create a pressure point. A sloped lawn can make water collect on one side. A tight hose can pull the connector and cause leaking. A wet patio nearby can become slippery before anyone notices.
For EPN splash pads, the setup area should support repeated stepping, shallow water movement, and stable inward spray from the outer ring. The pad needs room to spread naturally. The edge should not press against fences, garden beds, stones, patio furniture, or sharp landscape borders.
| Setup Point | Best Choice | What It Helps Prevent |
|---|---|---|
| Ground type | Short, clean grass | Bottom abrasion, slipping, discomfort |
| Ground level | Mostly flat surface | Uneven spray, water pooling, mat shifting |
| Debris check | Remove stones, sticks, roots, mulch | Punctures, pressure marks, surface wear |
| Hose path | Straight with slack | Connector leaks, tripping, twisting |
| Drainage | Natural runoff away from the house | Mud, standing water, slippery edges |
| Play space | Open area with adult view | Collisions, rough play, poor supervision |
| Sun exposure | Partial shade when possible | Hot surface, faster material aging |
How to Place a Splash Pad
Place the splash pad with the printed surface facing up and the hose connector facing the water source. Spread the mat fully before connecting the hose. Smooth out large folds by hand, especially near the outer ring, because the ring needs to fill evenly for the spray holes to work properly.
A simple placement routine works well for most families:
- Clear an area slightly larger than the splash pad.
- Place the connector toward the faucet.
- Unfold the pad completely before adding water.
- Smooth the center and outer ring by hand.
- Keep chairs, toys, rocks, and garden tools away from the edge.
- Leave extra hose length near the connector.
- Check the spray direction before children enter.
Do not drag the splash pad once it is filled with water. A dry splash pad is easy to move, but a water-filled splash pad is much heavier. Pulling it across the lawn can stress seams, scrape the underside, or bend the hose connection area.
For larger splash pads, two adults can make setup easier. One person can hold the hose side while the other spreads the opposite edge. This helps the mat stay centered and reduces twisting before water enters the ring.
Can a Splash Pad Go on Grass?
Yes, a splash pad can go on grass, and grass is often the most comfortable surface for family play. It gives children a softer base, helps pets keep traction, and usually handles water better than patios or driveways. The best grass surface is short, clean, and level.
Before placing the splash pad, check the grass slowly. Look for small stones, dry twigs, sharp weeds, broken sprinkler heads, exposed roots, ant nests, and uneven soil. These small things may not look serious when the mat is empty, but water weight and foot movement can push the PVC surface against them.
Grass works especially well for:
- Toddlers who need a softer play surface
- Kids who may step or move quickly through water
- Dogs that need more paw grip
- Backyards where water can drain into the lawn
- Families who want a lower-impact setup than concrete
Short grass is better than tall grass because it helps the pad lie flatter, makes debris easier to see, and dries faster after play. Tall grass can trap moisture under the mat and slow down drying, which may increase odor risk if the splash pad is packed away too quickly.

What Surfaces Hurt a Splash Pad?
Surfaces that are rough, sharp, hot, or uneven can shorten the life of a splash pad. Gravel, broken concrete, rough brick, mulch, exposed roots, cracked patio tiles, and wooden decks with splinters should be avoided. These surfaces can rub against the bottom, create sharp pressure points, or make the pad unstable when wet.
A splash pad is designed for outdoor water play, but it is not meant to be used like a heavy-duty ground tarp. Even thick PVC performs best when the surface underneath is clean and smooth. Damage does not always happen on the first use. More often, small scratches, repeated pressure, and folding stress build up over time.
Avoid these setup areas when possible:
- Gravel paths
- Rocky soil
- Rough concrete
- Sharp patio edges
- Mulch beds
- Wooden decks with gaps or splinters
- Sloped driveways
- Areas with exposed roots
- Outdoor flooring that becomes slippery when wet
Heat is another issue. Dark concrete or stone can become very hot under summer sun. If children are barefoot, the surface around the splash pad may be uncomfortable. Heat can also make PVC feel softer during use. If a hard surface must be used, choose a smooth area, rinse it first, and test the temperature with your hand before children step on or around it.
Why a Flat Splash Pad Matters
A flat splash pad helps water flow evenly, keeps the spray direction more stable, and reduces tripping risks. When the ground is uneven, one side may fill faster, one side may spray higher, and the center may collect water in the wrong place. Children may also step on folds or low spots when running through the spray.
The outer ring of most splash pads works like a water-filled channel. If the ring is twisted, raised, or sitting on bumpy ground, pressure does not spread evenly. That can affect spray height and place extra strain on certain parts of the edge.
A flat setup does not need to be perfect like a sports court. It simply needs to be stable enough for shallow water play. A good test is to place the empty splash pad down and check from different angles. If the pad has large raised wrinkles, one edge sits much higher, or the hose connector points upward at a sharp angle, adjust the location before turning on the water.
Flat ground also helps parents watch play more easily. When the pad stays centered and water remains inside the play area, children are less likely to chase spray into slippery grass or hard surfaces outside the mat.
How Does a Splash Pad Connect?
Most splash pads connect to a standard garden hose. The hose sends water into the outer ring, the ring fills with water, and small holes around the edge create the sprinkler effect. A straight hose, firm hand-tightened connection, good rubber washer, and low starting pressure help prevent leaking near the connector.
The hose area is one of the most important parts of the setup because it handles both water flow and physical movement. A splash pad may look like a simple backyard toy, but the connector area is where home water pressure, hose angle, and user handling all meet.
Connection issues often happen because of small setup mistakes:
- The hose is attached at an angle.
- The rubber washer is missing or worn.
- The hose is stretched too tightly.
- The faucet is turned on too quickly.
- The connector is overtightened with tools.
- Children step on or pull the hose during play.
EPN splash pads are developed for repeat backyard use, where families may connect and disconnect the product many times through summer. Correct setup helps the connection area work as intended and reduces avoidable leaking.
| Hose Setup Detail | Good Practice | Problem It Reduces |
|---|---|---|
| Hose direction | Keep the hose straight | Connector stress |
| Hose slack | Leave extra length near the pad | Pulling and twisting |
| Washer | Check rubber washer before use | Dripping at threads |
| Tightening | Hand-tighten firmly | Damaged connector |
| Water start | Open faucet slowly | Sudden pressure shock |
| Play path | Keep hose outside running area | Trips and hose movement |
Does a Splash Pad Need a Hose?
Yes, most portable splash pads need a garden hose. The hose supplies the water that fills the edge and creates the spray. Without a hose, the splash pad may hold some shallow water, but it will not work as a sprinkler mat.
A standard outdoor garden hose is enough for most home setups. Spray height depends on several real-world factors:
- Household water pressure
- Hose length
- Hose diameter
- Faucet flow
- Hose kinks or bends
- Connector fit
- Ground level
- Whether the outer ring is lying flat
If the hose is very long or bent in several places, water flow may be weaker. If the faucet pressure is very strong, the spray may be too high for younger children or pets. The goal is not maximum spray height. The goal is steady inward spray that keeps play comfortable and easy to supervise.

How to Attach a Splash Pad
Attach the garden hose by aligning the hose end with the splash pad connector and tightening it by hand until it feels secure. The hose should thread smoothly. If it feels stuck, crooked, or difficult to turn, stop and realign it. Forcing the hose can damage the threads or create a weak seal.
Before water is turned on, check the hose washer. This small rubber ring inside the hose end is easy to overlook, but it plays a major role in preventing leaks. If the washer is cracked, missing, or flattened, water may drip even when the hose feels tight.
A good attachment process is simple:
- Check that the hose washer is in place.
- Hold the splash pad connector steady.
- Line up the hose straight.
- Tighten by hand.
- Keep the hose relaxed, not stretched.
- Turn on water slowly.
- Watch the connection for 10–20 seconds.
Do not use pliers or metal tools unless the product instructions specifically say so. Overtightening can damage plastic fittings and make the connection harder to remove later. A firm hand-tightened connection is usually the safest choice.
Why a Splash Pad Hose Leaks
A splash pad hose often leaks because the hose is not aligned, the washer is missing, the connection is loose, the hose is pulling sideways, or the water pressure is too high. Leaking at the hose does not always mean the splash pad is damaged.
Before assuming the product has a problem, check these points first:
- Is the rubber washer inside the hose?
- Is the washer cracked, flattened, or missing?
- Is the hose attached straight?
- Is the connector hand-tightened firmly?
- Is the hose pulling the connector sideways?
- Was the faucet opened too quickly?
- Is water pressure too high for the first start?
Turn off the water, remove the hose, inspect the washer, and reconnect the hose straight. Then turn on the faucet slowly. If the leak stops, the issue was likely setup-related. If water still leaks heavily from the same place after these checks, inspect the connector and product instructions more closely.
How Much Pressure Does a Splash Pad Need?
A splash pad usually needs low to medium water pressure. Start with a gentle flow, wait for the outer ring to fill, then increase pressure slowly until the spray points inward and reaches a comfortable height. Higher pressure is not always better, especially for toddlers, cautious dogs, smaller lawns, or first-time use.
Water pressure controls the whole play experience. It affects spray height, water movement, surface wetness, hose stability, and user comfort. Too little pressure may create weak spray, but too much pressure can make the pad shift, send water outside the play area, or make young children avoid the spray.
The best pressure depends on who is using the splash pad:
| User Group | Starting Pressure | Spray Goal | Setup Tip |
|---|---|---|---|
| Toddlers 3+ | Low | Gentle edge spray | Keep water calm |
| Kids 4–8 | Low to medium | Clear inward spray | Raise slowly |
| Older kids | Medium | More active splash | Avoid spray outside the mat |
| Dogs | Low | Soft water movement | Let pets enter naturally |
| Mixed kids and pets | Low to medium | Balanced comfort | Watch both movement styles |
| Backyard party | Medium | Fun but controlled | Keep adult supervision close |
EPN splash pads are designed for adjustable backyard play because spray height can be controlled through the faucet. This makes one splash pad useful for different summer moments: calm toddler play, everyday family use, dog cooling, and more active play for older kids.
How to Start a Splash Pad
Start a splash pad by connecting the hose, opening the faucet slightly, and letting the outer ring fill before raising the water flow. The spray may be uneven for the first few seconds while water moves through the ring. Wait until the edge takes shape before adjusting pressure.
A clear starting routine can reduce most first-use issues:
- Place the splash pad flat.
- Attach the hose securely.
- Open the faucet slowly.
- Let the outer ring fill.
- Check the hose connection.
- Watch the spray direction.
- Smooth the edge if needed.
- Adjust pressure in small steps.
- Let kids or pets enter after the spray is stable.
Do not let children jump onto the pad before the ring is filled. A partly filled splash pad may move more easily, and the edge may not support an even spray pattern yet.
If the spray shoots outward instead of inward, reduce pressure and check the edge. The outer ring may be twisted, folded, or sitting on uneven ground.
Why Low Splash Pad Pressure Helps
Low water pressure helps users start safely and comfortably. It gives children time to adjust, helps pets approach calmly, reduces sudden hose movement, and makes it easier for adults to check leaks or uneven spray. Low pressure is especially helpful for first use.
Many families assume that taller spray means better fun, but that is not always true. For young children, strong spray may hit the face or feel too intense. For pets, loud or high spray can make the splash pad feel stressful. A lower spray still creates cooling, movement, and water play without overwhelming the user.
Low pressure also protects the setup. When water enters the outer ring slowly, the PVC edge can settle into shape. The hose connector has less sudden force, and adults can spot any problem before play becomes active.
For everyday family use, medium-low pressure often gives the best balance. It keeps the spray visible, the center shallow, and the surrounding lawn less soaked. It also helps reduce slipping caused by excess water spreading outside the pad.
How to Raise Splash Pad Spray
Raise the spray by increasing the faucet flow slowly. Do not turn the water fully open at once. Wait a few seconds after each adjustment so the outer ring can respond. The spray should rise evenly and fall inward toward the center.
If one side sprays higher than the other, check for three possible causes. The pad may not be flat. The outer ring may be twisted. The spray holes may be pressed against grass or a fold. Lower the water first, smooth the edge, and then raise the pressure again.
The right spray height should match the play situation:
- For toddlers, keep spray low and soft.
- For children 4–8, use a clear but gentle sprinkler effect.
- For older children, use medium pressure if the ground is stable.
- For dogs, keep pressure low unless the pet clearly enjoys stronger water.
- For mixed family play, use the lowest setting that still feels fun.
A good splash pad does not need to spray high to work well. The best spray is steady, inward, and comfortable enough that children continue playing without avoiding the water.
When Splash Pad Pressure Is Too High
Splash pad pressure is too high when water shoots beyond the mat, the connector leaks heavily, the outer ring bulges unevenly, children step away from the spray, pets refuse to enter, or the mat shifts during play. These signs mean the faucet should be turned down.
Watch for these signs:
- Spray lands outside the splash area.
- The hose connection begins dripping or spraying.
- The outer ring looks swollen in one area.
- Young children cover their faces or avoid the water.
- Dogs back away or bark at the spray.
- Water pools heavily around the mat.
- The lawn becomes muddy too quickly.
- The splash pad moves when children step on it.
High pressure creates several problems. It can make spray uncomfortable. It can soak the surrounding lawn, patio, or walkway. It can increase slipping near the edge. It can also place extra stress on the hose connector and water-filled ring.
More pressure may look exciting for a photo, but it is not always better for real play. Medium-low pressure often gives the best balance: visible spray, shallow center water, easier supervision, and less mess around the lawn.
How Can a Splash Pad Stay Safe?
A splash pad stays safer when the ground is clean, water pressure is controlled, children are supervised, pets are introduced gently, and the surface is checked during play. The safest setup is not the strongest spray or the largest water area. It is the setup that matches the youngest child, the most cautious pet, and the actual backyard space.
Water toys can feel low-risk because the water is shallow, but children can still slip, collide, become tired, or drink water during play. Pets can scratch, bite, dig, or become overexcited. A splash pad works best when adults treat it as active outdoor play rather than a toy that can be left alone.
A practical safety routine should include:
- Check the ground before setup.
- Start water pressure low.
- Keep the hose outside the running area.
- Set simple play rules before children enter.
- Keep dogs calm during first use.
- Stop rough sliding, pushing, or jumping.
- Take breaks during longer play sessions.
- Stop use if the mat shifts, leaks heavily, or becomes too slippery.
| Safety Area | What to Check | Why It Matters |
|---|---|---|
| Ground | Stones, sticks, roots, slope | Reduces puncture and trip risk |
| Water pressure | Start low, adjust slowly | Prevents harsh spray and slipping |
| Hose | Keep outside play path | Prevents tripping and connector pull |
| Children | No pushing or rough sliding | Reduces falls and collisions |
| Dogs | Trim nails, prevent chewing | Protects pad and pet |
| Weather | Heat, wind, surface temperature | Improves comfort |
| Play time | Take breaks | Prevents fatigue and overexcitement |

What to Check Before Splash Pad Play
Before splash pad play, check the ground, hose connection, spray direction, water pressure, and play area. These checks take only a few minutes and can prevent most common problems.
A good pre-play check includes:
- Ground is flat and clean.
- No stones, sticks, mulch, or sharp debris under the pad.
- Hose is attached straight.
- Hose does not cross the running area.
- Water pressure starts low.
- Spray points inward.
- Center area is not heavily wrinkled.
- Children understand the play rules.
- Dogs have trimmed nails if pets are joining.
- Adults can see the full play area.
Parents should also check the temperature of the surface around the splash pad. On very hot days, patios, decks, or dry grass near the pad can become uncomfortable for bare feet. Let water run briefly and check with your hand before children start.
Can Dogs Use a Splash Pad?
Yes, dogs can use a splash pad when the product is placed on a comfortable surface, the spray is low, and play is supervised. Many dogs enjoy splash pads as a cooling area during warm weather, especially when the water is gentle and the center stays shallow.
Dogs need a different setup style from children. They may turn quickly, scratch lightly, hesitate near moving water, or become excited by spray. A good pet setup should be calmer and more controlled.
For dog use, follow these points:
- Trim nails before play.
- Start with low water pressure.
- Place the pad on grass when possible.
- Let the dog approach naturally.
- Do not force the dog onto the mat.
- Remove chew toys from the pad.
- Stop digging or biting immediately.
- Rinse away pet hair and dirt after play.
- Dry the pad fully before storage.
A dog splash pad is not chew-proof or claw-proof. Even durable PVC can be damaged by sharp nails, rough digging, or biting. Supervision is the best way to protect both the product and the pet.
How to Stop a Splash Pad From Slipping
Stop a splash pad from slipping by placing it on flat ground, keeping water pressure moderate, avoiding hard slick surfaces, and preventing rough running. Grass is usually better than smooth concrete because it gives more grip and drains water more naturally.
Slipping usually comes from a mix of surface, water, and movement. A smooth patio with strong spray can become slippery quickly. A sloped lawn can make water collect on one side. Children running at full speed may slip even when the product is set up correctly.
Better grip starts with setup:
- Choose level grass when possible.
- Avoid smooth tile, polished concrete, and steep slopes.
- Keep spray lower for younger children.
- Move the hose out of the running path.
- Stop pushing, sliding, or jumping games.
- Check the surrounding area as it gets wet.
- Pause play if the mat shifts.
Do not add soap, bubble liquid, oil-based cleaners, or slippery toys to the splash pad. They may look fun, but they can make the surface unsafe. Water alone is enough for safe backyard play.
How Do You Store a Splash Pad?
Store a splash pad only after it has been fully drained, rinsed, dried, and folded loosely. The pad should be kept in a dry place away from sharp objects, heat, direct sunlight, and heavy items. Dry storage helps prevent mold, odor, sticky surfaces, and crease damage.
Many splash pad problems start after play, not during play. Families finish using the pad, fold it while damp, and place it in a garage, shed, or storage box. Moisture then stays trapped between PVC layers. Add grass clippings, sunscreen, pet hair, or warm summer air, and the pad may smell musty the next time it is opened.
A better after-play routine is simple:
- Turn off the water.
- Disconnect the hose gently.
- Drain the outer ring.
- Rinse off dirt, grass, and pet hair.
- Let the top side dry.
- Dry the underside.
- Wipe the connector area.
- Fold loosely.
- Store in a dry place.
| After-Play Step | Recommended Action | Time Needed | Main Benefit |
|---|---|---|---|
| Turn off water | Shut faucet before moving pad | 10 seconds | Reduces water pressure |
| Disconnect hose | Remove hose gently | 30 seconds | Protects connector |
| Drain | Let water flow out naturally | 2–5 minutes | Makes pad lighter |
| Rinse | Remove dirt, grass, pet hair | 1–2 minutes | Reduces odor |
| Dry | Air dry or towel dry both sides | 20–60 minutes | Helps prevent mold |
| Fold | Fold loosely, protect connector | 1–2 minutes | Reduces crease stress |
| Store | Keep dry and shaded | Ongoing | Protects material |
How to Drain a Splash Pad
Drain a splash pad by turning off the faucet, disconnecting the hose, and letting water leave the outer ring naturally. Lift one side gently if needed, but do not drag the pad while it is filled with water.
The water-filled edge may take a few minutes to empty. Be patient. Pulling or dragging a heavy splash pad can scrape the bottom surface and stress the seams. If the product has a specific drain area or recommended draining method, follow that instruction.
Drain water away from doorways, patios, and high-traffic areas. On grass, the water usually soaks into the lawn, but repeated use in the same spot can make the ground muddy. If the lawn becomes soft, rotate the setup location the next time.
After draining, remove grass, dirt, and small debris before drying. A clean pad is easier to fold and less likely to develop odor during storage.

Why Dry a Splash Pad First
Drying matters because trapped moisture can cause odor, mildew marks, sticky surfaces, and storage stains. Water can remain around the outer ring, hose connector, folds, and underside even when the top looks mostly dry.
Air drying is the easiest method. Lay the splash pad flat in a clean area until the top is dry. Then flip or lift part of it so the underside can dry too. A soft towel can help around the connector and edge seams.
Do not pack the pad tightly while damp. A sealed storage bag, hot shed, or closed deck box can trap moisture and heat together. That combination is one of the most common causes of musty odor.
For families using the splash pad often, a quick towel wipe after each use can make a big difference. Even if the pad will be used again tomorrow, it should not sit folded while wet overnight.
How to Keep a Splash Pad From Molding
Keep a splash pad from molding by rinsing off dirt, drying both sides completely, and storing it in a cool, dry place with airflow. Mold and mildew are more likely when water, warmth, dirt, and poor ventilation stay together.
Mold prevention matters most after repeated use. A splash pad may look clean after water play, but grass clippings, soil, sunscreen, pet hair, and moisture can stay on the surface. If the pad is folded before drying, those materials stay trapped between layers.
A simple mold-prevention routine works well:
- Drain all water after play.
- Rinse away grass, mud, sunscreen, and pet hair.
- Wipe dirty spots with mild soap and water.
- Dry the top surface.
- Turn or lift the pad to dry the underside.
- Dry the connector area carefully.
- Fold only when the pad feels dry.
- Store away from damp floors and closed wet bins.
Avoid harsh cleaners unless the care label allows them. Strong chemicals may affect printed patterns, surface feel, or PVC flexibility. Mild soap and clean water are enough for normal backyard residue.
If the pad has a slight odor after storage, open it outdoors, rinse it, and let it dry fully before use. If visible mold is present, clean carefully according to the product instructions and inspect the surface before children or pets use it.
How to Fold a Splash Pad
Fold a splash pad loosely after it is dry. Follow natural fold lines instead of forcing sharp creases. Keep the hose connector protected and avoid folding the pad in a way that bends the connector or crushes the outer ring.
The goal is not to make the smallest possible bundle. Very tight folding can create stress points, especially if the PVC is cold or still slightly damp. A looser fold is better for repeated use.
For larger splash pads, fold in wide panels:
- Smooth the pad flat.
- Fold one side toward the center.
- Fold the other side over it.
- Press out remaining air gently.
- Keep the connector on the outside or protected.
- Store without heavy objects on top.
Do not store the folded pad next to sharp garden tools, metal pool accessories, pet crates, or rough surfaces. A clean shelf, storage bin, or dry cabinet is better. Keep it away from direct sunlight when not in use.
Splash Pad Setup Checklist
A good splash pad setup follows the same order every time: prepare the ground, position the pad, connect the hose, start water slowly, adjust spray, supervise play, drain, dry, and store. This routine helps families avoid the problems that usually lead to complaints: leaking, slipping, weak spray, mold, odor, and early material wear.
| Stage | What to Do | Good Target |
|---|---|---|
| Ground prep | Remove stones, sticks, roots, mulch | 2–3 minutes |
| Placement | Spread pad flat with connector facing faucet | 1 minute |
| Hose setup | Hand-tighten hose and keep it straight | 1 minute |
| First water flow | Start low and check connection | 30–60 seconds |
| Spray adjustment | Raise pressure slowly | 30 seconds |
| Play check | Watch kids, pets, hose, and slipping | Full use time |
| Drain | Turn off water and empty outer ring | 2–5 minutes |
| Clean | Rinse off grass, dirt, pet hair | 1–2 minutes |
| Dry | Air dry both sides | 20–60 minutes |
| Storage | Fold loosely and store dry | 1–2 minutes |
The best setup is not complicated. It is consistent. Once families repeat the same routine a few times, the splash pad becomes easier to use, easier to clean, and easier to bring out again through the summer.
For retailers and private-label brands, this checklist can also reduce after-sales pressure. Clear setup guidance on packaging, manuals, product pages, and video content helps customers understand that correct use affects performance. That means fewer preventable complaints about hose leaks, weak spray, slipping, or storage odor.
Why EPN Splash Pads Fit Family and Pet Backyards
EPN splash pads are part of American Epsilon Inc.’s wider PVC and composite outdoor product system. The company develops products for children’s water play, pet cooling, backyard recreation, inflatable pools, water floats, snow tubes, and other seasonal outdoor categories. That experience matters because a splash pad is not just a mat that sprays water. It needs to stay flat, connect securely, spray evenly, handle repeated stepping, and fold away cleanly after use.
American Epsilon Inc. has 27 R&D team members and more than 18 designers supporting product structure, material use, color direction, packaging, graphics, and local-market adaptation. Across product lines, the team completes more than 500 material and product performance tests each year and over 1,500 design projects.
For families, these details appear in practical ways:
- The splash pad should be easy to unfold and connect.
- The outer edge should stay stable under water flow.
- The spray should distribute around the ring instead of concentrating in one spot.
- The material should feel suitable for outdoor summer use.
- The pad should be foldable after drying.
- The setup should work for normal backyards, not only perfect lawns.
- The product should support repeat summer use, not just one-time play.
For pet households, the product also needs to handle different movement patterns. Dogs do not step like children. They may turn quickly, scratch lightly, or hesitate near water. That is why low-pressure introduction, trimmed nails, and grass placement are important.
For business customers, EPN can support branded products and OEM/ODM development. Custom options may include size, shape, print design, PVC thickness, packaging style, labels, manuals, warning information, and market-specific presentation. For Amazon sellers, retailers, distributors, and seasonal product brands, these details can help create splash pad products that are easier to sell and easier for families to understand.

When Should You Replace or Upgrade a Splash Pad?
A splash pad should be replaced or upgraded when it no longer holds water properly, the hose area cannot seal after washer and alignment checks, the spray holes do not work evenly, the surface has heavy wear, seams show visible damage, or the pad develops persistent odor after cleaning and drying.
Some wear is normal after outdoor use. Light fold lines, small surface marks, or minor scuffs do not always affect performance. The warning signs are different. Look for repeated leaking away from the hose, cracking, deep scratches, strong odor, uneven edge filling, or spray that cannot be corrected by adjusting pressure and placement.
Families may also upgrade when their use changes. A small splash pad may be enough for one toddler but feel crowded once two children or a dog join in. A thinner mat may work for occasional play but may not be the best choice for frequent summer use. A family with pets may want a stronger PVC structure, a wider play area, or a more stable edge.
Upgrade timing often depends on use frequency:
| Use Frequency | Care Level Needed | Upgrade Reason |
|---|---|---|
| 1–2 times per month | Basic cleaning and dry storage | Size or feature preference |
| Weekly summer use | Careful drying and surface checks | Better repeat-use value |
| Several times per week | Stronger material and stable setup | Durability and convenience |
| Kids and dogs together | Nail care and closer supervision | Larger, stronger play area |
| Party or group use | Controlled pressure and more space | Wider splash zone |
For brands and sellers, upgrade behavior is important. Customers are not only comparing price. They look for products that feel easier to use, safer for kids, more comfortable for pets, and less likely to fail after a few uses. Clear setup education helps a good splash pad perform better in real homes.
Splash Pad FAQ
Can You Put a Splash Pad on Grass?
Yes. Grass is one of the best surfaces for a splash pad when it is short, clean, and mostly flat. It feels softer under bare feet, gives pets better grip, and helps water drain more naturally. Before setup, remove stones, sticks, roots, mulch, and sharp debris.
Does a Splash Pad Need a Hose?
Yes. Most portable splash pads need a garden hose to create the sprinkler effect. The hose fills the outer ring with water, and pressure pushes water through the small spray holes. Without a hose, the pad may hold some water but will not spray properly.
Why Does a Splash Pad Leak Near the Hose?
A splash pad often leaks near the hose because the washer is missing, the hose is not attached straight, the connector is loose, the hose is pulling sideways, or the water pressure is too high. Turn off the water, check the washer, reconnect the hose straight, and restart with low pressure.
How Much Water Pressure Does a Splash Pad Need?
Most splash pads work best with low to medium water pressure. Start low, let the outer ring fill, then increase the flow slowly. The spray should point inward and feel comfortable for the youngest child or most cautious pet using the splash pad.
Can Dogs Use a Splash Pad?
Yes. Dogs can use a splash pad under supervision, especially during warm weather. Start with low water pressure, place the pad on grass, trim pet nails, and stop chewing or digging quickly. A splash pad can be a fun cooling area, but it is not chew-proof or claw-proof.
How Do You Stop a Splash Pad From Slipping?
Use the splash pad on flat grass when possible, keep water pressure moderate, avoid smooth slick surfaces, and stop rough running or sliding. Keep the hose out of the play path and check the surrounding area as it gets wet.
How Do You Keep a Splash Pad From Molding?
Drain the water fully, rinse off dirt and grass, dry both sides, and store the splash pad in a cool, dry place. Mold is more likely when moisture, warmth, dirt, and poor airflow stay trapped between folded layers.
Should You Dry a Splash Pad Before Storing It?
Yes. A splash pad should be dry before storage. Even small amounts of trapped moisture can cause odor, mildew marks, sticky surfaces, or storage stains. Air dry both sides and wipe the hose connector area before folding.
How Long Does It Take to Set Up a Splash Pad?
Most splash pads take about 5–10 minutes to set up when the ground is already clean and the hose is nearby. Extra time may be needed to clear debris, check the surface, adjust pressure, or prepare the area for children and pets.
Build a Better Backyard Water Play Routine
A splash pad works best when setup feels simple, repeatable, and easy to manage. The goal is not to create the highest spray or the biggest splash. The goal is a comfortable backyard water play space that children enjoy, pets can approach safely, and adults can set up without frustration.
The most reliable routine starts before the water turns on. Choose flat, clean ground. Keep the hose straight. Start with low pressure. Watch the spray pattern. Keep play supervised. After use, drain the water, rinse away dirt, dry both sides, and store the splash pad loosely in a dry place. These small steps help solve the problems families care about most: hose leaks, uneven spray, slipping, mold, odor, and early wear.
For families, that means faster setup, easier cleanup, and more relaxed summer afternoons. For pet owners, it creates a gentle cooling space that dogs can enjoy without being overwhelmed by strong spray. For retailers, Amazon sellers, distributors, and private-label brands, clear setup guidance makes the product easier to explain, easier to support, and more likely to deliver a positive repeat-use experience.
EPN, under American Epsilon Inc., supports both ready-to-sell splash pad products and customized PVC outdoor water play projects. With experience in R&D, design, testing, manufacturing, packaging, and multi-market delivery, EPN can help customers develop splash pads for family use, pet cooling, backyard play, Amazon listings, retail channels, and seasonal promotional programs.
For EPN branded splash pad products or custom splash pad development, contact Epsilon to request product specifications, packaging options, sample timelines, MOQ details, and quotation support.
Get A Fast quote
Here, bringing your inflatable concepts to life is no longer a challenge—it’s a collaborative journey where American Epsilon helps families, outdoor enthusiasts, and global brands transform creative ideas into safe, certified, and market-ready inflatable solutions.


Partner With Epsilon
Whether you are a family looking for safe backyard fun or a brand seeking large-scale OEM/ODM solutions, American Epsilon Inc. guarantees every inflatable is built with safety, durability, and excitement in mind. With flexible low MOQs, strategically placed warehouses in the U.S., Canada, U.K., and Germany, plus 24/7 professional support, we ensure smooth delivery and reliable service worldwide.
Ready to bring your inflatable ideas to life? Request free samples, fast prototypes, and customized designs today—your trusted inflatable journey starts here.