Skip to content
Inflating an inflatable toy sounds like one of the simplest tasks imaginable—until it isn’t.
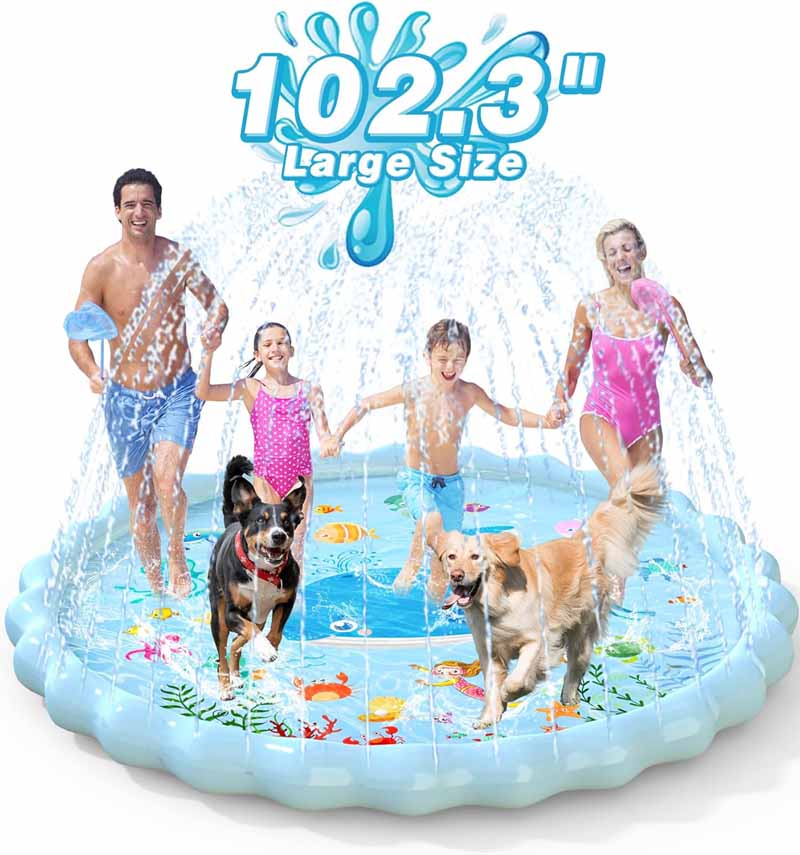
A splash pad that suddenly warps under the sun. A pool float that bursts at the seam. A pet pool that slowly leaks air after just one afternoon. In most cases, these problems don’t come from poor-quality products. They come from improper inflation.
Modern inflatable toys—especially those made from PVC and composite materials—are engineered products. They rely on carefully balanced air pressure, material flexibility, valve design, and seam strength. Yet many users still treat inflation as a race: faster, harder, fuller. That mindset is exactly what shortens product lifespan, compromises safety, and leads to unnecessary replacements.
Here’s the reality: “Fully inflated” is not the same as “properly inflated.”
Air expands. Materials react to temperature. PVC behaves differently under pressure than fabric-wrapped composites. Even the surface you inflate on matters more than most people realize.
To inflate inflatable toys safely and correctly, add air gradually until the surface feels firm but still flexible. Avoid overinflation, especially in warm weather, and use a low-pressure manual or electric pump whenever possible. Proper inflation protects seams, valves, and PVC materials, ensuring better durability, safety, and long-term performance.
And here’s the part many guides skip: inflation is not just a user step—it’s a design conversation between you and the product.
Once you understand what the inflatable is telling you during inflation, you stop guessing—and start using it the way engineers intended. Let’s break it down.
What Does “Inflating an Inflatable Toy” Really Mean?
Inflating an inflatable toy means introducing air into sealed chambers until the internal pressure balances with the material’s elastic resistance. Proper inflation allows the inflatable to hold its intended shape while remaining flexible, accommodating movement, temperature changes, and weight. It is not about maximizing air volume, but about achieving stable structural equilibrium without overstressing seams, valves, or PVC materials.
What “Inflation” Actually Involves
At a technical level, inflating an inflatable toy is a controlled material expansion process, not a simple act of filling space with air.
Inflatable toys made from PVC or composite materials rely on sealed air chambers formed by heat welding or high-frequency welding. When air is introduced, pressure builds evenly inside these chambers, pushing outward against the material. Inflation is complete not when the toy becomes hard, but when internal air pressure and material elasticity reach balance.
This balance is critical. Too little air and the structure collapses under use. Too much air and stress concentrates at seams, corners, and valve junctions—areas most likely to fail over time.
Why “Fully Inflated” Is a Misleading Concept
One of the biggest misconceptions users have is equating “fully inflated” with “properly inflated.”
In reality:
- Fully inflated often means the material has reached its stretch limit
- Properly inflated means the material still has room to flex
Inflatable toys are designed to absorb movement—kids running, pets shifting weight, water motion in pools or splash pads. That shock absorption comes from controlled flexibility. When an inflatable is overinflated, flexibility disappears, and every movement transfers stress directly to seams and welds.
This is why inflatables that feel “extra firm” often fail sooner, even if they look fine initially.
What Happens Inside the Inflatable During Inflation?
As air enters an inflatable toy, several things happen simultaneously:
- Air pressure increases inside sealed chambers
- PVC or composite material stretches microscopically
- Seams begin to carry load, distributing pressure across weld lines
- Valves transition from open-flow to sealed-pressure states
This process is gradual and nonlinear. Early air adds shape quickly. Later air adds pressure much faster. That’s why the last 10–15% of air volume contributes disproportionately to internal stress.
Experienced manufacturers—including American Epsilon Inc.—design inflatables with pressure tolerance margins, but those margins assume correct inflation behavior, not forced overfilling.
How Temperature Changes the Meaning of Inflation
Inflation does not stop once the pump stops.
Air expands when heated. A toy inflated in the morning shade may experience a significant internal pressure increase by midday sun exposure. This is basic gas law behavior, but it’s one of the most common causes of unexpected inflatable damage.
That’s why “proper inflation” always includes:
- Leaving a small pressure buffer
- Avoiding inflation under direct sun
- Rechecking firmness after temperature changes
In this sense, inflation is a dynamic state, not a one-time action.
Why Different Inflatable Shapes Inflate Differently
Flat inflatables (like splash pads or water mats) distribute pressure across large surfaces and are more sensitive to uneven inflation. Round or tubular inflatables (like pool rings or floats) distribute pressure more evenly but can hide overinflation until seams fail.
Reinforced products—such as pet pools, snow sleds, or composite inflatables—may feel softer even when correctly inflated, because reinforcement layers restrict outward stretch. Adding extra air to “compensate” often leads to structural stress instead of improved performance.
Understanding the intended geometry of the inflatable is part of understanding what inflation really means.
The Correct Mental Model: Inflation as Structural Setup
The most accurate way to think about inflating an inflatable toy is this:
You are setting the operating pressure of a flexible structure—not filling a container.
When inflation is approached as setup rather than force, users naturally:
- Inflate more gradually
- Stop earlier
- Observe material feedback
- Extend product lifespan
That mindset shift alone prevents most inflation-related failures.
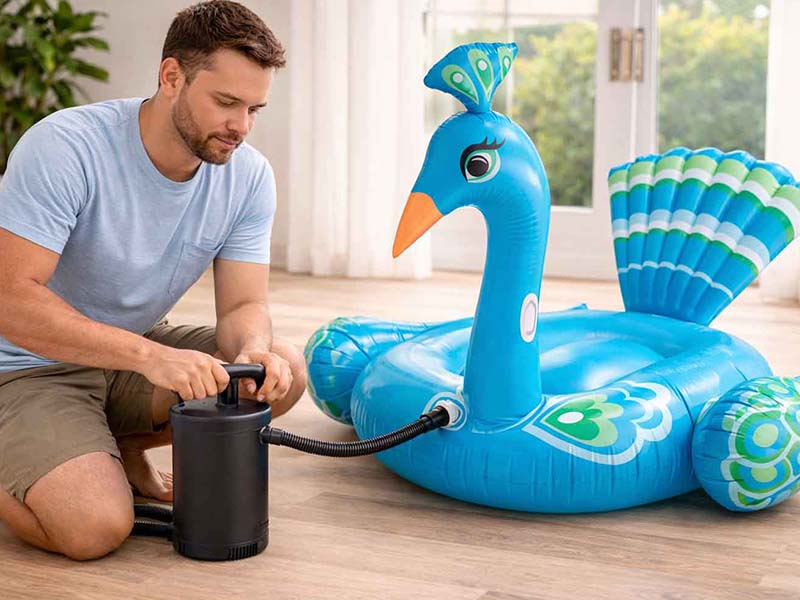
Which Tools Are Best for Inflating Inflatable Toys?
The best tools for inflating inflatable toys are low-pressure inflation devices designed specifically for PVC and composite inflatables. Manual hand or foot pumps provide the highest level of pressure control for small to medium toys, while electric low-pressure, high-volume pumps are ideal for larger inflatables. High-pressure air compressors are generally unsafe without precise regulators, as they can easily exceed material tolerance limits.
Why the Right Inflation Tool Matters More Than Most People Think
Most inflatable damage does not come from sharp objects or rough use—it comes from improper inflation tools.
Inflatable toys are engineered to operate within a narrow internal pressure range. The tool you choose determines:
- How fast air enters the chambers
- How evenly pressure builds
- How much feedback you receive before reaching unsafe limits
A poor tool choice removes that feedback loop. Users compensate by “adding more air,” often overshooting safe pressure before realizing it.
This is why professional manufacturers—including American Epsilon Inc.—design products assuming users will inflate them with low-pressure, consumer-grade pumps, not industrial equipment.
Understanding Airflow vs Pressure
A common mistake is assuming “more powerful” pumps are better. In inflatable design, airflow volume matters more than pressure force.
- Airflow (L/min) determines how quickly the inflatable fills
- Pressure (PSI / bar) determines how much stress the material experiences
Inflatable toys need high airflow at very low pressure.
High-pressure tools deliver air faster than the material can safely stretch, causing:
- Sudden seam loading
- Valve deformation
- Micro-tears in PVC or composite layers
Low-pressure tools allow material expansion to keep pace with air input—this is the core reason they are safer.
Inflation Tools Comparison
| Tool Type | Typical Airflow | Pressure Risk | Recommended Use | Safety Rating |
|---|---|---|---|---|
| Manual Hand Pump | 1–5 L/min | Very Low | Small toys, float rings | ⭐⭐⭐⭐⭐ |
| Manual Foot Pump | 3–8 L/min | Very Low | Medium inflatables | ⭐⭐⭐⭐⭐ |
| Electric Inflatable Pump | 100–200 L/min | Low–Moderate | Pools, splash pads, pet pools | ⭐⭐⭐⭐☆ |
| Battery Inflator | 50–120 L/min | Moderate | Portable outdoor use | ⭐⭐⭐☆☆ |
| Air Compressor | 200+ L/min | Very High | Not recommended | ⭐☆☆☆☆ |
Values represent typical consumer ranges; actual performance varies by model.
Manual Pumps: Why They Are Still the Safest Option
Manual pumps—both hand and foot—remain the gold standard for pressure control.
Key advantages:
- Natural inflation speed limits prevent sudden overpressure
- User can feel resistance increase in real time
- No electrical risk near water or children
Manual pumps are especially recommended for:
- Kids’ inflatable toys
- Small pools and floats
- First-time inflation of new products
From a materials perspective, manual inflation allows PVC to relax and stretch evenly, which significantly reduces early seam fatigue.

Electric Inflatable Pumps: Fast, Efficient, and Safe When Used Correctly
Electric pumps designed for inflatables are the best choice for large-volume products.
They are engineered to:
- Deliver high air volume
- Cap maximum pressure output
- Work with common inflatable valves
Electric Pump Characteristics for Inflatable Toys
| Feature | Why It Matters |
|---|---|
| Low max pressure | Prevents seam overload |
| High airflow | Reduces inflation time |
| Multiple nozzles | Ensures valve compatibility |
| Continuous airflow | Minimizes uneven chamber fill |
However, electric pumps remove tactile feedback. Users must visually and physically monitor firmness and stop early—especially during hot weather.
Why High-Pressure Compressors Are a Poor Choice
Air compressors are designed for rigid systems like tires and tools, not flexible structures.
Problems with compressors include:
- Pressure rises faster than users can react
- No built-in inflatable-safe pressure cap
- Small trigger errors cause large pressure spikes
Even brief overpressurization can permanently weaken seams. Damage may not appear immediately but often shows up days or weeks later as slow leaks or seam failure.
Unless paired with precision regulators (rare in home setups), compressors should be avoided for inflatable toys.
How to Inflate Without a Pump
Inflating without a pump is acceptable only for very small inflatables.
Mouth Inflation
Works for:
- Arm floaties
- Small rings
Limitations:
- Introduces moisture into valves
- Inconsistent pressure
- Unsanitary for shared use

Household Alternatives
Some users try:
- Vacuum exhaust ports
- Hair dryers (cool air only)
These methods lack pressure control and are not recommended for regular use.
For frequent inflation, even a basic manual pump is safer and more cost-effective long term.
Valve Compatibility: The Overlooked Tool Factor
Even the best pump fails if the nozzle doesn’t fit properly.
Poor nozzle fit causes:
- Air leakage during inflation
- User tendency to “pump harder”
- Accidental overinflation
Always choose pumps with:
- Tapered nozzles
- Multiple adapter sizes
- Soft plastic tips to avoid valve damage
Valve-tool compatibility directly affects inflation safety more than pump brand alone.
Key Takeaway for Buyers and Users
The best inflatable pump is not the fastest or strongest—it’s the one that:
- Matches the inflatable’s size
- Respects material limits
- Gives the user control
Using the right tool:
- Extends product lifespan
- Reduces warranty issues
- Improves safety for kids and pets
Inflation tools are not accessories—they are part of the inflatable system.
How Do You Inflate an Inflatable Toy Step by Step?
To inflate an inflatable toy correctly, unfold it fully on a clean, flat surface, check the valve for debris, attach the right nozzle, and add air gradually. Stop when the toy feels firm but still flexible, then seal the valve tightly and let it rest for 10–15 minutes before use. Recheck firmness after resting or temperature changes to avoid overinflation and seam stress.
Why “Step-by-Step” Matters
Most inflatable leaks, warped shapes, and seam blowouts can be traced back to one of three early mistakes:
- inflating on the wrong surface,
- using the wrong nozzle/tool fit, or
- inflating too fast at the final stage.
Inflation is a setup process, not a one-time action. You’re creating stable internal pressure that must survive movement, sun exposure, water weight, and repeated use—especially for PVC and composite inflatables made for kids and pets.
Below is the safest, most repeatable workflow.
Step-by-Step: How to Inflate an Inflatable Toy Correctly
Step 1: Choose the right inflation spot (1 minute)
Pick a surface that is:
- Flat and smooth (grass, deck mat, indoor floor)
- Free from sharp objects (gravel, twigs, pet claws nearby)
- Not in direct sunlight during inflation
Why it matters: Early-stage inflation leaves PVC soft and easy to puncture. Uneven ground also creates uneven chamber pressure, making final firmness hard to judge.
Step 2: Fully unfold and “reset” the material (1–2 minutes)
Unfold the inflatable completely. Smooth out creases and allow it to “relax.”
Pro tip: If the inflatable is cold (garage storage), let it warm slightly to room temperature. Cold PVC is stiffer and can fold stress seams during inflation.
Step 3: Inspect the valve before adding air (30 seconds)
Check the valve opening for:
- sand, dust, hair, grass
- misaligned flaps or twisted caps
- cracks or deformation from previous use
Why it matters: A tiny bit of debris can prevent full sealing, causing a “mystery slow leak” later that users often misdiagnose as material failure.
Step 4: Match the nozzle to the valve (30 seconds)
Pick a nozzle that fits snugly—not forced.
If the nozzle is too small:
- air leaks around the valve
- users tend to inflate longer and overfill
If too large:
- it can damage valve walls
- it may deform sealing surfaces permanently
Step 5: Start inflation slowly and watch the shape form (1–5 minutes)
Begin adding air gradually. Your goal in the first stage is shape, not firmness.
Watch for:
- smooth expansion
- chambers filling evenly
- corners rounding naturally (instead of sharp bulges)
Pause once or twice to smooth and reposition the inflatable so air redistributes.
Step 6: Finish inflation in “short bursts” (critical step)
The last 10–15% is where most overinflation happens.
Use this method:
- inflate 10–20 seconds
- stop and press-check firmness
- repeat until “firm but flexible”
The correct feel: It should resist your palm, but still compress slightly and rebound.
Step 7: Seal the valve correctly (30–60 seconds)
Seal immediately after stopping airflow.
Best practices:
- close inner valve flap (if present)
- twist/lock cap fully (but don’t overtighten)
- wipe the area dry before final closure for water toys
Overtightening can warp valve threads and actually increase leaking risk over time.
Step 8: Let it rest, then recheck (10–15 minutes)
Let the inflatable sit before use.
Why:
- air equalizes across chambers
- PVC relaxes into final shape
- micro-stretch settles
After resting:
- press-check again
- add or release a small amount if needed
Step-by-Step Inflation Checklist
| Step | What to Do | What to Look For | Common Mistake |
|---|---|---|---|
| 1 | Flat, clean surface | no debris, no sharp points | inflating on gravel/concrete |
| 2 | Fully unfold | no tight creases | inflating while folded |
| 3 | Inspect valve | clean seal area | ignoring sand/hair in valve |
| 4 | Match nozzle | snug fit | forcing wrong nozzle |
| 5 | Inflate for shape | even expansion | rushing to full firmness |
| 6 | Finish in bursts | firm but flexible | overinflating final stage |
| 7 | Seal properly | cap aligned & secure | overtightening threads |
| 8 | Rest & recheck | stable firmness | using immediately under sun |
How to Fill Air in an Inflatable Toy Correctly
To make this easy to remember, inflate in three phases:
- Shape Phase: fill until the toy holds form
- Balance Phase: pause, smooth, redistribute air
- Firmness Phase: short bursts to reach correct pressure
This 3-phase approach is the simplest way to avoid the “last-minute overfill” mistake.
How Do You Inflate Inflatables Correctly the First Time?
First inflation is different because new PVC and composite seams may experience slight settling.
Best practice for the first use:
- stop at 90–95% of what feels “full”
- let it rest
- top up lightly after resting
This reduces early seam stress and improves long-term durability.
How Long Should Inflation Take?
Inflation time depends primarily on:
- product volume
- pump airflow
- valve size/nozzle match
Typical Inflation Time Ranges
| Inflatable Type | Manual Pump | Electric Inflatable Pump | Notes |
|---|---|---|---|
| Small pool ring / floaties | 3–8 min | 30–90 sec | mouth inflation possible but not ideal |
| Pool floats / loungers | 8–15 min | 1–3 min | stop early in hot sun |
| Splash pad / water mat | 10–25 min | 2–6 min | avoid uneven ground; smooth folds |
| Inflatable kiddie pool | 15–35 min | 3–10 min | rest & recheck after 10–15 min |
| Reinforced pet pool (inflatable) | 20–40 min | 5–12 min | reinforcement may feel “softer”—don’t overfill |
Ranges are typical for consumer-grade pumps; actual results vary.
How to Quickly Inflate Inflatables
If you want speed, do this instead of overpumping:
- Use a low-pressure, high-volume electric pump
- Use the largest correct nozzle for the valve
- Inflate in shade and avoid hot surfaces
- Stop early, rest, then top up slightly
This method keeps speed high while maintaining safety.
How Much Air Should You Put Into an Inflatable Toy?
You should put enough air into an inflatable toy so it feels firm but still flexible when pressed by hand. The inflatable should hold its shape without becoming rigid or overstretched. Proper air volume allows the material to absorb movement and temperature changes while protecting seams and valves from excessive internal pressure.
Why “More Air” Is Usually the Wrong Answer
One of the most common mistakes users make is assuming that maximum firmness equals maximum performance. In reality, inflatable toys are designed to function within a specific pressure range, not at their maximum possible air capacity.
Inflatables rely on controlled flexibility to:
- absorb impact (kids jumping, pets stepping in)
- redistribute internal pressure evenly
- adapt to temperature changes
When too much air is added, flexibility disappears. At that point, the inflatable stops behaving like a cushion and starts behaving like a stressed container—placing disproportionate load on seams, corners, and valve joints.
The result is often:
- seam splitting
- valve deformation
- slow leaks that appear days later
The Correct Rule: “Firm but Flexible” Explained Clearly
“Firm but flexible” is not a vague phrase—it’s a functional pressure test anyone can perform.
Hand-Press Test
Place your palm flat on the inflatable surface:
- It should resist your hand but compress slightly
- It should rebound immediately when released
- It should NOT feel rock-hard or immovable
If your hand barely dents the surface, internal pressure is already near the material’s stress limit.
Visual Check
Properly inflated inflatables show:
- smooth, rounded surfaces
- relaxed seams (not glossy or stretched thin)
- corners that curve naturally rather than forming sharp angles
Visual strain is often an early warning sign of overinflation—even before failure occurs.
Why the Last 10–15% of Air Is the Most Dangerous
Inflation is nonlinear.
Early air fills empty volume and shapes the inflatable.
Late air dramatically increases internal pressure with very little visible size change.
That final 10–15% of air volume can:
- double seam stress
- increase valve load exponentially
- eliminate the material’s ability to flex
This is why most inflatable failures occur not during inflation, but after—once the toy is exposed to sun, weight, or movement.
How Temperature Changes the “Right Amount” of Air
Air expands when heated. This is one of the most overlooked inflation factors.
An inflatable that feels perfect in cool morning air may become overpressurized under afternoon sun—even if no additional air is added.
That’s why best practice includes:
- inflating in shade whenever possible
- stopping slightly short of maximum firmness
- rechecking firmness after temperature changes
In warm conditions, leaving a small pressure buffer is not optional—it’s essential.
Different Inflatable Types Need Different Air Amounts
Not all inflatables should feel the same when properly inflated.
Flat Inflatables (Splash Pads, Water Mats)
- Should feel supportive but noticeably flexible
- Overinflation increases slipping risk and seam stress
Tubular / Ring Inflatables (Floats, Loungers)
- Should maintain shape under body weight
- Still compress slightly at contact points
Reinforced or Composite Inflatables (Pet Pools, Snow Sleds)
- May feel softer even when correctly inflated
- Reinforcement layers restrict outward stretch
- Adding extra air rarely improves performance and often increases damage risk
Understanding the intended function of the inflatable matters more than chasing firmness.
Common Overinflation Myths
“If it feels soft, it needs more air”
Softness can come from reinforcement layers or design geometry—not underinflation.
“It should feel like a tire”
Tires are rigid systems. Inflatables are flexible structures.
“More air makes it safer”
Excess air reduces shock absorption and increases failure risk.
“If it didn’t pop, it’s fine”
Overinflation damage often appears later as seam fatigue or slow leaks.
Simple Reference Guide: How Much Air Is Enough?
| Check Method | Correct Result | Warning Sign |
|---|---|---|
| Hand press | slight compression + rebound | no movement |
| Visual seams | flat, relaxed | glossy, stretched |
| Corner shape | rounded | sharp or angular |
| Temperature change | remains flexible | becomes rigid |
This checklist is far more reliable than “inflating until it looks full.”
Why Manufacturers Never Recommend “Maximum Inflation”
Professional inflatable manufacturers design products with:
- defined pressure tolerance windows
- seam strength margins
- material elasticity limits
These margins assume users will stop short of maximum capacity.
Inflating to the absolute limit removes the safety buffer that protects against:
- sun exposure
- user weight shifts
- repeated use over time
In other words, proper inflation protects both the user and the product.
The correct amount of air is not the most air the inflatable can hold—it’s the amount that lets the inflatable:
- hold its shape
- flex under movement
- adapt to temperature
- protect seams and valves
If you remember only one rule, remember this:
If an inflatable feels rigid, it already has too much air.
Are There Safety Rules You Must Follow When Inflating?
Yes. When inflating inflatable toys, you must follow key safety rules: inflate on a clean, flat surface, keep children and pets away, avoid direct sunlight and heat, use low-pressure pumps only, and stop inflation before the toy becomes rigid. Proper safety practices prevent overinflation, seam damage, valve failure, and sudden pressure-related accidents.
Why Inflation Is the Highest-Risk Moment
Most users think inflatable safety begins after the toy is fully inflated. In reality, inflation is the most failure-prone phase in an inflatable’s entire lifecycle.
During inflation:
- Materials are at their most flexible and vulnerable
- Seams are transitioning from relaxed to load-bearing
- Valves are open and exposed
- Pressure is rising faster than visual size changes
This is when:
- seam blowouts occur
- valves deform
- material overstretching begins
Following safety rules during inflation is not optional—it directly determines product lifespan and user safety.
Rule 1: Inflate on a Safe, Proper Surface
Always inflate inflatable toys on:
- grass
- foam mats
- smooth decking
- indoor floors
Avoid:
- concrete
- gravel
- asphalt
- pool decks with rough textures
Why this matters:
Partially inflated PVC lies flat and thin. Sharp micro-debris that would not puncture a fully inflated toy can easily damage it during early inflation stages. Uneven surfaces also create unequal internal pressure, increasing seam stress.
Rule 2: Keep Children and Pets Away During Inflation
Inflation is not a play activity.
Children and pets should be kept at a distance until:
- inflation is complete
- valves are sealed
- pressure has stabilized
Key risks include:
- sudden air release startling children
- fingers caught in valve mechanisms
- pet claws puncturing soft PVC
- tripping hazards from hoses and cords
Many safety incidents happen not because inflatables are dangerous, but because inflation is treated casually.
Rule 3: Never Inflate Under Direct Sun or High Heat
Heat dramatically changes internal air pressure.
Inflating under direct sun causes:
- rapid air expansion
- false “underinflated” feel
- dangerous pressure spikes after sealing
Best practice:
- inflate in shade
- inflate during cooler parts of the day
- leave a pressure buffer
This rule is especially important for dark-colored PVC, reinforced pet pools, and thick composite inflatables that retain heat longer.
Rule 4: Use Only Low-Pressure Inflation Tools
Always use:
- manual hand pumps
- manual foot pumps
- electric pumps designed for inflatables
Avoid:
- air compressors
- tire inflators
- industrial blowers
Why:
High-pressure tools can exceed safe limits before you feel resistance. Even brief overpressure can permanently weaken seams, even if no immediate damage is visible.
Professional manufacturers like American Epsilon Inc. design products assuming users will inflate with consumer-grade, low-pressure tools, not industrial equipment.
Rule 5: Inflate Gradually—Never All at Once
Fast inflation removes feedback.
Safe inflation always involves:
- gradual air input
- pauses to check firmness
- smoothing and repositioning
The last 10–15% of air volume is where most overinflation occurs. Short bursts and frequent checks dramatically reduce risk.
If you hear material “creaking” or see seams stretching thin, stop immediately.
Rule 6: Do Not Inflate to Maximum Firmness
Inflatables should never feel rigid.
A properly inflated inflatable:
- holds shape
- compresses slightly under hand pressure
- rebounds quickly
Overinflated inflatables:
- lose shock absorption
- transmit force directly to seams
- fail more easily under movement or heat
Remember: maximum firmness is not a safety goal—it’s a warning sign.
Rule 7: Seal Valves Correctly (But Don’t Overtighten)
After inflation:
- close inner valve flaps fully
- align caps correctly
- tighten firmly but gently
Overtightening:
- warps threads
- damages sealing surfaces
- increases leak risk over time
For water toys, always wipe the valve area dry before final sealing to ensure proper closure.
Rule 8: Let the Inflatable Rest Before Use
Always allow:
- 10–15 minutes of rest after inflation
Why:
- air redistributes across chambers
- material relaxes into final shape
- pressure stabilizes
Skipping this step is one of the most common reasons inflatables feel “fine at first” but fail shortly after use begins.
Rule 9: Recheck Pressure After Temperature or Location Changes
If the inflatable:
- moves from shade to sun
- goes from indoors to outdoors
- sits unused for several hours
You must recheck firmness.
If it feels stiffer than before, release a small amount of air. This single habit prevents a large percentage of heat-related failures.
Common Safety Myths That Cause Problems
“It didn’t pop, so it must be safe.”
Damage often appears later as seam fatigue or slow leaks.
“More air makes it safer for kids.”
Overinflation reduces cushioning and increases injury risk.
“I’ve always inflated it this way.”
Material fatigue accumulates—past success doesn’t guarantee future safety.
Quick Safety Checklist
- Flat, debris-free surface
- Shade or cool conditions
- Low-pressure pump
- Gradual inflation
- Firm but flexible feel
- Correct valve sealing
- Rest and recheck
If you follow these rules, you eliminate most preventable inflatable failures.
Inflatable safety is not just about supervision during play—it starts at inflation.
Following proper inflation safety rules:
- protects children and pets
- extends product lifespan
- prevents sudden failures
- preserves material integrity
Think of inflation as setting the operating limits of a flexible structure. When done correctly, inflatables are among the safest and most enjoyable recreational products available.
Do Different Inflatable Materials Inflate Differently?
Yes. Different inflatable materials inflate differently because they vary in elasticity, thickness, reinforcement, and heat response. Standard PVC inflates smoothly and shows pressure changes clearly, while thicker PVC and composite materials inflate more slowly and feel softer even when properly filled. Understanding material behavior is essential to avoid overinflation, seam stress, and premature failure.
Why Material Type Changes the Inflation Experience
Many users assume inflation is purely about air volume. In reality, inflation is a material–air interaction, and different materials respond to air pressure in very different ways.
Inflatable toys are commonly made from:
- standard PVC
- thickened PVC
- reinforced or composite PVC (PVC + fabric / PP / textile layers)
Each material type has a unique balance of:
- stretchability
- pressure tolerance
- heat response
- visual and tactile feedback during inflation
Failing to account for these differences is one of the main reasons users unintentionally overinflate durable products.
Standard PVC: The Most Forgiving Material to Inflate
Standard PVC is widely used in:
- pool floats
- splash pads
- water mats
- basic kiddie pools
Inflation Characteristics
- Expands visibly and evenly
- Provides clear tactile feedback
- Changes shape noticeably as pressure increases
This makes standard PVC user-friendly, especially for first-time users. When pressure increases, the material stiffens gradually, signaling when to stop.
However, this also means standard PVC is more sensitive to:
- heat expansion
- repeated overinflation cycles
It rewards careful inflation but punishes “always inflate to max” habits.
Thicker PVC: Slower Inflation, Higher Stability
Thicker PVC is often used in:
- pet pools
- large inflatable pools
- heavy-duty outdoor inflatables
Inflation Characteristics
- Requires more air volume to form shape
- Feels softer longer during inflation
- Resists outward stretch more strongly
This often leads users to mistakenly think the inflatable is underfilled. In reality, thickness reduces visible stretch, not internal pressure.
Adding extra air to “make it feel firm” is a common error that places excessive stress on seams without improving performance.
Composite & Reinforced Materials: The Most Misunderstood
Composite inflatables combine PVC with:
- fabric backing
- PP or hard plastic bases
- textile reinforcement layers
These are common in:
- inflatable pet pools
- snow sleds
- reinforced loungers
- large structural inflatables
Inflation Characteristics
- Limited outward stretch
- Minimal visible shape change after initial fill
- Softer surface feel even at correct pressure
Reinforcement layers are designed to limit expansion, not signal underinflation. As a result, these inflatables should never be judged by firmness alone.
Manufacturers such as American Epsilon Inc. design reinforced products with internal pressure limits that are reached before the surface feels “hard.”
Inflation Behavior by Material Type
| Material Type | Stretch Visibility | Inflation Speed | Tactile Feedback | Overinflation Risk |
|---|---|---|---|---|
| Standard PVC | High | Fast | Clear & gradual | Moderate |
| Thick PVC | Medium | Moderate | Delayed | High (user overfills) |
| Composite / Reinforced | Low | Slow | Minimal | Very High (misjudged firmness) |
Overinflation risk reflects common user behavior, not material weakness.
How Material Affects Heat Expansion After Inflation
Heat response varies significantly by material.
- Standard PVC expands quickly with heat
- Thick PVC expands more slowly but retains heat longer
- Composite inflatables trap heat internally due to layered construction
This means reinforced products are more likely to experience hidden pressure buildup after inflation—even if they felt soft initially.
Best practice across all materials:
- inflate in shade
- leave a pressure buffer
- recheck firmness after sun exposure
Why Visual Cues Are Less Reliable Than Touch
Material reinforcement often masks visual cues.
For example:
- seams may look relaxed even at high pressure
- surfaces may not appear glossy until failure is near
This is why hand-press testing (firm but flexible) is more reliable than appearance alone—especially for thick and composite inflatables.
Table 2: Recommended Inflation Approach by Material
| Material Type | Inflation Strategy | Key Mistake to Avoid |
|---|---|---|
| Standard PVC | Inflate gradually, stop early | Inflating under sun |
| Thick PVC | Stop when shape is stable | Chasing surface hardness |
| Composite / Reinforced | Inflate to shape only | Adding air to “feel firm” |
Common User Errors Caused by Material Misunderstanding
“It still feels soft, so I’ll add more air.”
→ Often leads to seam stress in thick/composite inflatables.
“This one can take more air—it’s reinforced.”
→ Reinforcement limits stretch, not pressure buildup.
“It looks fine, so pressure must be safe.”
→ Visual cues lag behind internal stress in layered materials.
Yes—different inflatable materials absolutely inflate differently.
The correct inflation approach depends on:
- material thickness
- reinforcement structure
- intended product function
Understanding material behavior helps users:
- stop inflating at the right moment
- avoid hidden overpressure
- extend product lifespan
- maintain safety for kids and pets
If there’s one universal rule, it’s this:
Judge inflation by flexibility and function—not by firmness alone.
How Can You Inflate Inflatables Quickly Without Causing Damage?
To inflate inflatables quickly without causing damage, use a low-pressure, high-volume electric pump, match the correct nozzle to the valve, inflate in stages, and stop before the surface becomes rigid. Always inflate in shade, allow short pauses for air redistribution, and leave a pressure buffer to account for heat expansion. Speed should come from airflow efficiency, not higher pressure.
Why “Fast Inflation” Usually Leads to Damage
Most inflatable damage blamed on “weak seams” or “poor quality” is actually caused by speed-driven overinflation.
When users try to inflate too fast, they typically:
- choose overly powerful tools
- skip intermediate checks
- inflate straight to maximum firmness
This removes the feedback window where material stretch, seam load, and air distribution can be assessed. The result is invisible overstress that often appears later as:
- seam fatigue
- valve leaks
- permanent material deformation
The goal is not to slow down—but to separate airflow speed from pressure force.
The Core Principle: High Airflow, Low Pressure
Quick inflation is safest when achieved through volume, not force.
- High airflow (L/min) fills chambers quickly
- Low pressure (PSI) allows material to stretch evenly
Electric pumps designed for inflatables follow this principle. Industrial compressors do not.
Think of inflation as filling a balloon with a fan, not a pressure tank.
Step-by-Step: The Fast & Safe Inflation Method
Step 1: Choose the Right Pump
Use:
- low-pressure electric inflatable pump
- multiple nozzle options
- continuous airflow design
Avoid:
- air compressors
- tire inflators
- shop vacs without airflow control
Correct tool choice alone eliminates most damage risk—even at high speed.
Step 2: Maximize Nozzle Efficiency
Speed is often limited by air leakage, not pump power.
To maximize efficiency:
- use the largest nozzle that fits snugly
- avoid loose or angled connections
- keep the valve fully open during airflow
A well-matched nozzle can cut inflation time by 30–40% without increasing pressure.
Step 3: Inflate in Two Phases
Phase 1 – Shape Fill (Fast):
- inflate continuously until the inflatable holds full shape
- ignore firmness at this stage
Phase 2 – Pressure Finish (Slow):
- switch to short bursts
- pause every 10–20 seconds
- check flexibility with hand press
Most overinflation happens when users skip this two-phase approach.
Step 4: Inflate in Shade and Cool Conditions
Inflating in heat gives false feedback.
Hot air expands faster, making the inflatable:
- feel softer during inflation
- become overpressurized after sealing
Inflating in shade allows you to:
- stop earlier
- rely on accurate tactile feedback
- reduce post-inflation pressure spikes
This single habit dramatically reduces damage risk while saving time later.
How Much Faster Can You Inflate Safely?
Safe speed depends on tool choice and technique, not just product size.
| Method | Typical Time (Large Inflatable) | Damage Risk |
|---|---|---|
| Manual pump only | 20–40 min | Very low |
| Electric pump + staged finish | 3–8 min | Low |
| Electric pump, no pauses | 2–5 min | Moderate |
| Air compressor | <2 min | Very high |
Fast does not have to mean reckless—method matters more than minutes.
Why Pausing Actually Saves Time Overall
Skipping pauses may save seconds during inflation—but costs hours later.
Without pauses:
- air distributes unevenly
- folds trap pressure
- users overinflate trying to “fix” shape
Pausing allows:
- air to equalize
- shape to settle
- pressure to stabilize
In practice, staged inflation often results in less rework, fewer leaks, and longer usable life—making it the fastest approach over time.
Common “Fast Inflation” Mistakes to Avoid
“I’ll just inflate until it’s hard—faster that way”
→ leads to overpressure and seam damage.
“This pump is stronger, so it’s better”
→ pressure spikes faster than material response.
“It feels soft, so I’ll add more air quickly”
→ often misjudging reinforced or thick PVC inflatables.
“I don’t need to recheck—it looks fine”
→ damage often appears later, not immediately.
Quick Checklist: Fast but Safe Inflation
- Low-pressure electric pump
- Correct nozzle fit
- Shade or cool environment
- Two-phase inflation (shape → pressure)
- Short pauses and hand checks
- Stop before rigidity
If all six boxes are checked, you’re inflating as fast as safely possible.
Why Manufacturers Emphasize Controlled Speed
Professional inflatable manufacturers design products with expected inflation behavior in mind.
They assume:
- gradual pressure buildup
- user monitoring
- pressure buffer for heat expansion
Inflating faster than those assumptions removes the safety margin built into seam strength and material elasticity.
Speed is acceptable—loss of control is not.
How Can You Tell If an Inflatable Is Properly Inflated?
An inflatable is properly inflated when it holds its intended shape, feels firm but still flexible when pressed by hand, shows no seam strain, and rebounds quickly after pressure is released. It should not feel rigid or overstretched, and its firmness should remain stable after resting or temperature changes. Proper inflation balances shape, flexibility, and pressure stability.
Why “Looks Full” Is Not a Reliable Indicator
Many users rely on appearance alone—“It looks full, so it must be right.”
This is one of the most common causes of hidden overinflation.
Inflatables are flexible structures. As internal pressure increases, visible size changes slow down, while internal stress rises sharply. That means an inflatable can look perfect while already being overpressurized.
Proper inflation must be judged using multiple signals, not just one.
The Most Reliable Test: The Hand-Press Method
The hand-press test is the fastest and most accurate way to assess inflation.
How to Perform It
- Place your palm flat on the main surface
- Press gently but firmly
- Release and observe rebound
Correct Result
- Surface compresses slightly
- Springs back immediately
- Feels supportive, not rigid
Warning Signs
- No compression at all → overinflated
- Deep collapse or slow rebound → underinflated
This test works across PVC, thick PVC, and composite inflatables and is more reliable than visual cues alone.
Visual Indicators: What Seams and Surfaces Reveal
Seams are the first places to show stress.
Signs of Proper Inflation
- Seams lie flat and matte
- No whitening, glossing, or stretching
- Corners appear rounded, not sharp
Signs of Overinflation
- Seams look shiny or thinned
- Stitch or weld lines appear pulled
- Corners form angular shapes
If seams look tense, pressure is already too high—even if the inflatable still feels usable.
Bounce-Back Test: Checking Elastic Recovery
Elastic recovery shows whether the material still has a safety buffer.
How to Check
- Press or sit lightly on the inflatable
- Release pressure
Proper Inflation
- Shape recovers instantly
- No lingering dents or folds
Overinflation
- Minimal movement under load
- Feels “dead” or stiff
- No cushioning effect
Loss of rebound means the inflatable has lost its ability to absorb movement—an early sign of overstress.
Quick Inflation Check Guide
| Test Method | Properly Inflated | Overinflated | Underinflated |
|---|---|---|---|
| Hand press | slight give + rebound | rigid, no give | collapses deeply |
| Seam look | flat, relaxed | glossy, stretched | wrinkled |
| Corner shape | rounded | sharp/angular | sagging |
| Rebound | instant | minimal | slow |
| Feel | supportive | hard | unstable |
Rest-and-Recheck: The Step Most Users Skip
Proper inflation cannot be judged immediately.
After inflation:
- let the inflatable rest for 10–15 minutes
- allow air to redistribute
- allow material to relax
Then repeat the hand-press and visual checks.
If the inflatable becomes noticeably firmer after resting, it was likely inflated too close to its limit. Release a small amount of air.
This step is critical for:
- new products (first inflation)
- large inflatables
- thick or reinforced materials
Temperature Check: How Heat Changes the Verdict
Temperature can turn “properly inflated” into “overinflated” without adding any air.
What to Do
- Recheck firmness after moving from shade to sun
- Recheck after 30–60 minutes outdoors
- Recheck when water warms the surface
If the inflatable feels stiffer than before, release air slightly.
Ignoring heat expansion is one of the leading causes of seam failure.
Material-Specific Clues You Should Know
Different materials feel different even at correct pressure.
Standard PVC
- Clear firmness feedback
- Easier to judge visually and by touch
Thick PVC
- Feels softer longer
- Users often overinflate trying to “firm it up”
Composite / Reinforced Materials
- May never feel “hard”
- Correct inflation is reached by shape stability, not surface stiffness
Judging reinforced inflatables by firmness alone is a common mistake.
Manufacturers like American Epsilon Inc. design reinforced products to operate safely before they feel rigid.
Table 2: Proper Inflation Cues by Material Type
| Material Type | Best Indicator | What to Ignore |
|---|---|---|
| Standard PVC | hand-press + seam look | chasing max firmness |
| Thick PVC | shape stability | surface softness |
| Composite | shape + rebound | lack of hardness |
Common Myths That Lead to Misjudgment
“It should feel like a tire.”
→ Tires are rigid; inflatables are not.
“If it doesn’t pop, it’s fine.”
→ Damage often appears later as slow leaks.
“More air makes it safer.”
→ Overinflation reduces shock absorption.
The 5-Point Final Check
An inflatable is properly inflated if it:
- Holds its intended shape
- Compresses slightly under hand pressure
- Rebounds immediately
- Shows relaxed seams
- Remains flexible after resting
If all five are true, inflation is correct.
What Should You Do After Inflating an Inflatable Toy?
After inflating an inflatable toy, you should let it rest for 10–15 minutes, recheck firmness, adjust air if needed, ensure valves are fully sealed, and monitor pressure during temperature changes. Proper post-inflation steps allow air to redistribute, materials to relax, and pressure to stabilize, reducing the risk of overinflation, seam stress, and early damage.
Why Post-Inflation Care Is Just as Important as Inflation Itself
Most users assume the process ends when the pump stops.
In reality, inflation is only half complete at that point.
After inflation:
- air continues to move between chambers
- PVC or composite materials relax and settle
- internal pressure stabilizes over time
- temperature begins to influence air expansion
Skipping post-inflation steps is one of the most common reasons inflatables fail shortly after first use, even when inflation initially seemed correct.
Think of post-inflation as the stabilization phase—it’s where safety margins are either preserved or lost.
Step 1: Let the Inflatable Rest and Settle
Always allow the inflatable to rest for 10–15 minutes before use.
During this resting period:
- trapped air redistributes evenly
- minor folds relax
- seams transition from active stretch to stable load-bearing
This is especially important for:
- new inflatables (first-time use)
- large-volume products (pools, splash pads)
- thick or reinforced materials
Using an inflatable immediately after inflation often leads to pressure misjudgment, because the material has not yet reached its natural equilibrium.
Step 2: Recheck Firmness and Flexibility
After resting, reassess inflation using:
- hand-press test (firm but flexible)
- visual seam inspection
- rebound response
If the inflatable feels firmer than before, release a small amount of air.
If it feels noticeably softer, add air in short bursts only.
This small adjustment step dramatically reduces:
- overinflation risk
- heat-related pressure spikes
- seam fatigue during early use
Experienced users treat this recheck as non-negotiable.
Step 3: Confirm Valve Seals Are Fully Secure
Valves are under continuous pressure after inflation.
After resting:
- recheck valve caps
- ensure inner flaps are seated properly
- confirm threads or plugs are aligned
For water inflatables:
- wipe the valve area dry before final sealing
- ensure no water is trapped near the seal
Do not overtighten. Excessive force can warp valve threads and actually increase leak risk over time.
A properly sealed valve should feel secure—not strained.
Step 4: Observe the Inflatable During Initial Use
The first 10–30 minutes of use are a diagnostic window.
Watch for:
- unexpected bulging
- seam whitening or glossing
- rapid firmness increase in sun
- unusual air sounds near valves
If any of these appear:
- stop use immediately
- release a small amount of air
- reposition or move the inflatable to shade
Early intervention prevents minor pressure issues from turning into permanent damage.
Step 5: Monitor Temperature and Environmental Changes
Temperature is the silent variable most users ignore.
After inflation, pressure can increase if:
- the inflatable moves from shade to sun
- ambient temperature rises
- water inside warms up
Best practice:
- recheck firmness after temperature changes
- release air proactively if stiffness increases
This is especially critical for dark-colored PVC, reinforced products, and inflatables used outdoors for extended periods.
Remember: air expansion does not require additional pumping to cause overpressure.
Step 6: Make Small Adjustments—Never Large Ones
If adjustment is needed:
- add or release air in very small amounts
- recheck after each adjustment
- avoid “correcting” by large air changes
Inflatable pressure changes quickly at higher fill levels. Small actions have big effects.
Large adjustments often overshoot the safe zone in the opposite direction.
Step 7: Establish a Habit of Periodic Checks
For inflatables used over hours or days:
- check firmness every few hours
- check again before each new use session
This habit:
- extends product lifespan
- improves safety for kids and pets
- prevents slow, cumulative overpressure
Well-maintained inflatables rarely fail suddenly—they show warning signs first.
What NOT to Do After Inflating
Avoid these common mistakes:
- Using immediately without resting
- Leaving inflatables fully inflated under direct sun
- Ignoring gradual stiffness increase
- Overtightening valves
- Assuming “it was fine yesterday” means it’s fine today
Each of these shortcuts removes the safety buffer built into inflatable design.
Why Manufacturers Emphasize Post-Inflation Behavior
Professional inflatable manufacturers—such as American Epsilon Inc.—design products assuming users will:
- allow settling time
- recheck pressure
- manage heat exposure
When those assumptions are ignored, products are forced to operate at the edge of their tolerance window, reducing durability and safety.
Post-inflation care is not extra—it’s part of correct use.
Why Manufacturer Expertise Matters When Inflating Inflatables
Manufacturer expertise matters because inflatables are engineered systems with defined pressure limits, material behaviors, valve designs, and seam tolerances. Experienced manufacturers design inflatables to inflate predictably, distribute air evenly, and tolerate real-world user behavior. Without professional engineering, even correct inflation techniques may fail to prevent leaks, seam stress, or premature damage.
Inflation Is Not a User Skill Alone—It’s a Design Outcome
Most people think inflatable performance depends almost entirely on how the user inflates it.
In reality, inflation success is largely determined before the product ever reaches the customer.
Every inflatable toy reflects hundreds of upstream decisions:
- material formulation
- wall thickness
- seam geometry
- valve structure
- internal chamber layout
These decisions define how forgiving—or unforgiving—the inflatable will be during inflation.
A well-designed inflatable:
- inflates smoothly
- gives clear tactile feedback
- tolerates small user errors
A poorly designed one may fail even when users follow instructions carefully.
Pressure Tolerance Is Engineered, Not Accidental
Inflatables are not empty bags of air. They are pressure-bearing flexible structures.
Experienced manufacturers design products with:
- defined operating pressure ranges
- safety margins above normal use
- controlled material stretch behavior
This allows inflatables to survive:
- minor overinflation
- temperature swings
- uneven user weight
Without this engineering margin, inflatables operate at the edge of failure from the moment inflation begins.
Professional manufacturers test these limits in controlled environments—something low-end suppliers rarely do.
Valve Design Determines Inflation Safety More Than Most Users Realize
Valves are the most complex components in an inflatable.
They must:
- allow fast airflow during inflation
- seal completely under pressure
- resist deformation over repeated cycles
- tolerate moisture, sand, and temperature changes
Expert manufacturers invest heavily in valve engineering:
- multi-layer sealing flaps
- reinforced valve bases
- materials matched to PVC elasticity
When valve design is poor, users experience:
- difficulty inflating
- slow leaks mistaken for material defects
- sudden air loss during use
Good valve design makes correct inflation intuitive. Bad valve design makes users fight the product.
Seam Engineering Controls How Inflation Stress Is Distributed
Seams are where inflatables fail first—but not because seams are weak.
They fail when:
- stress concentrates unevenly
- welding depth is inconsistent
- seam geometry forces sharp pressure angles
Expert manufacturers use:
- high-frequency welding
- controlled seam overlap
- rounded corner transitions
This allows pressure to spread across a wider area during inflation instead of focusing on a single failure point.
From the user’s perspective, this shows up as:
- smoother inflation
- fewer bulges
- longer-lasting shape retention
Seam quality is invisible—but inflation behavior reveals it immediately.
Material Formulation Shapes Inflation Feedback
Not all PVC is the same.
Material expertise determines:
- how quickly PVC stretches during inflation
- how it rebounds under pressure
- how it reacts to heat
Experienced manufacturers formulate PVC and composite materials to:
- stretch predictably
- resist sudden deformation
- maintain flexibility over time
This is why professionally engineered inflatables:
- feel “right” earlier during inflation
- don’t require guessing
- rarely need to be inflated to extremes
Material science turns inflation from a risk into a controlled process.
Why Cheap Inflatables Fail Even With “Correct” Inflation
Many users report: “I followed the instructions, but it still leaked or burst.”
In many cases, the issue is not user error—it’s design tolerance.
Low-expertise manufacturers often:
- use thinner, inconsistent materials
- rely on minimal seam overlap
- skip pressure-cycle testing
This leaves no margin for:
- hot weather
- uneven surfaces
- real-world use patterns
As a result, even small deviations during inflation cause damage.
Expertise is what allows inflatables to survive normal human behavior.
Testing Is the Invisible Difference That Users Feel
Professional manufacturers conduct:
- pressure-hold testing
- repeated inflation–deflation cycles
- heat exposure simulations
- load and impact testing
These tests ensure inflatables behave consistently during inflation—not just when new, but after repeated use.
When testing is absent, inflation becomes unpredictable:
- one unit inflates fine
- another fails under the same conditions
Consistency is not luck. It’s engineering.
Why Experienced Manufacturers Write Better Inflation Instructions
Clear inflation instructions don’t come from marketing—they come from engineering insight.
Manufacturers with real expertise:
- understand where users make mistakes
- know which steps matter most
- emphasize pressure feel over “fullness”
This is why professional brands focus on:
- “firm but flexible” guidance
- rest-and-recheck steps
- heat and pressure warnings
Good instructions reflect deep understanding of material behavior—not just compliance requirements.
How Manufacturer Expertise Protects Both Users and Products
When manufacturer expertise is present:
- users inflate more confidently
- products last longer
- safety incidents decrease
- warranty issues drop
This creates a positive cycle:
- fewer failures
- higher trust
- better user experience
Companies like American Epsilon Inc. invest in material science, structural engineering, and real-world testing so inflation works as expected, not just on paper.
Key Takeaway
Inflating an inflatable is not just a user task—it’s the final step of a long engineering process.
Manufacturer expertise determines:
- how easy inflation feels
- how much margin for error exists
- how well the inflatable handles heat, pressure, and use
When expertise is present, correct inflation is intuitive.
When it’s missing, no technique can fully compensate.
If an inflatable inflates smoothly, feels predictable, and holds up over time—that’s not luck.
That’s engineering.
Conclusion
Proper inflation protects your inflatable—but quality design makes correct inflation easier in the first place.
If you’re a consumer looking for reliable, in-stock inflatable toys, explore Epsilon’s available products on Amazon across the US, Canada, and Europe—engineered for safety, durability, and real-world use.
If you’re a brand owner, retailer, or distributor, Epsilon offers professional OEM/ODM customization, including:
- Material thickness optimization
- Valve and seam engineering
- Custom sizes, colors, and packaging
- Compliance with US & EU safety standards
Contact Epsilon today to request samples, pricing, or custom development—and turn inflation from a risk point into a strength.