Skip to content
A splash pad is one of those “why didn’t we do this sooner?” summer products—until it becomes the thing you avoid pulling out. That usually happens for boring reasons: the spray is uneven, the surface gets slippery, the hose connection drips, or the pad never fully dries and starts to smell. These problems are common, but they’re usually fixable—and most of the time they come from a few setup details that look minor.
Here’s the simple version: a splash pad works best when it’s placed on a flat surface, run at a comfortable water pressure, and allowed to drain and dry properly after use. When you do that, it feels effortless—kids stay engaged longer, pets are less hesitant, and you’re not constantly adjusting things.
To set up a splash pad, choose a flat, stable surface with good drainage, fully unfold the pad, connect it to a standard garden hose, and slowly increase water flow until the spray is comfortable and even. Keep pressure moderate, prevent pooling by leveling the pad, and always drain and dry it after use to avoid odor and early material wear.
If you’ve ever watched kids lose interest because the spray “isn’t fun,” or seen a dog step off because it feels unstable, you already know the truth: the small setup steps are what make the whole thing feel worth it. Let’s make yours the version that actually gets used.
What Is a Splash Pad?
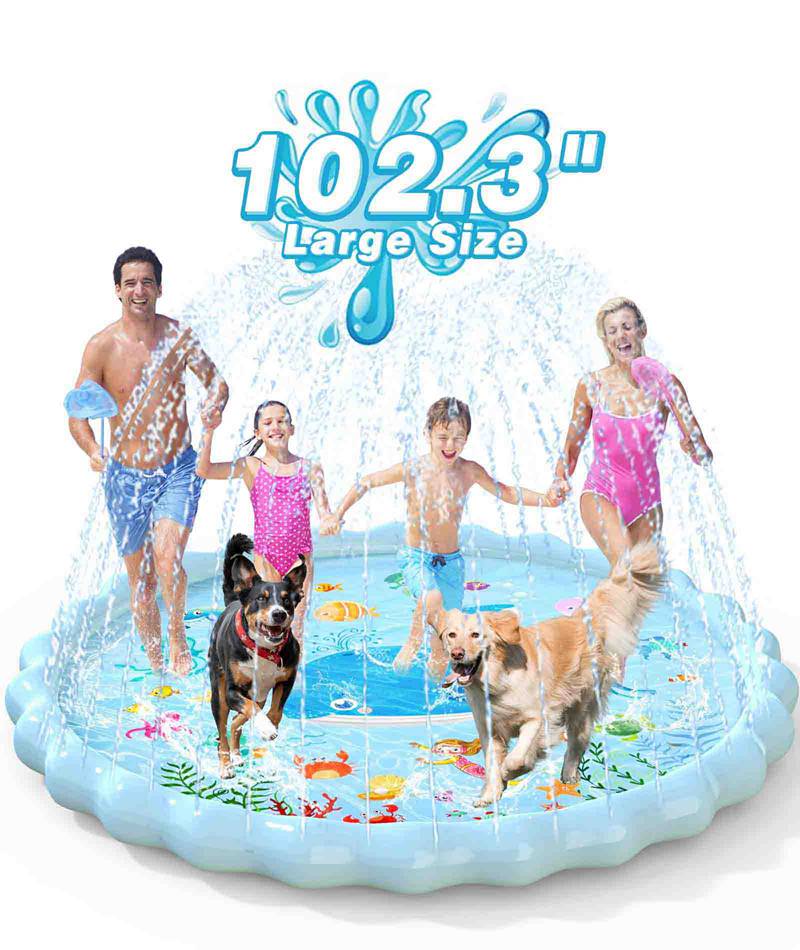
A splash pad is a flat, water-activated play surface designed to spray water upward when connected to a standard garden hose. Unlike pools, it doesn’t rely on deep or standing water. Water flows in and out continuously, which makes splash pads easier to manage, quicker to use, and more suitable for short, everyday play sessions—especially for families with young children or pets.
In practical terms, a splash pad sits between a lawn sprinkler and a shallow pool. It offers more interaction than a sprinkler, without the setup time and standing-water concerns that come with pools.
What do people actually use a splash pad for?
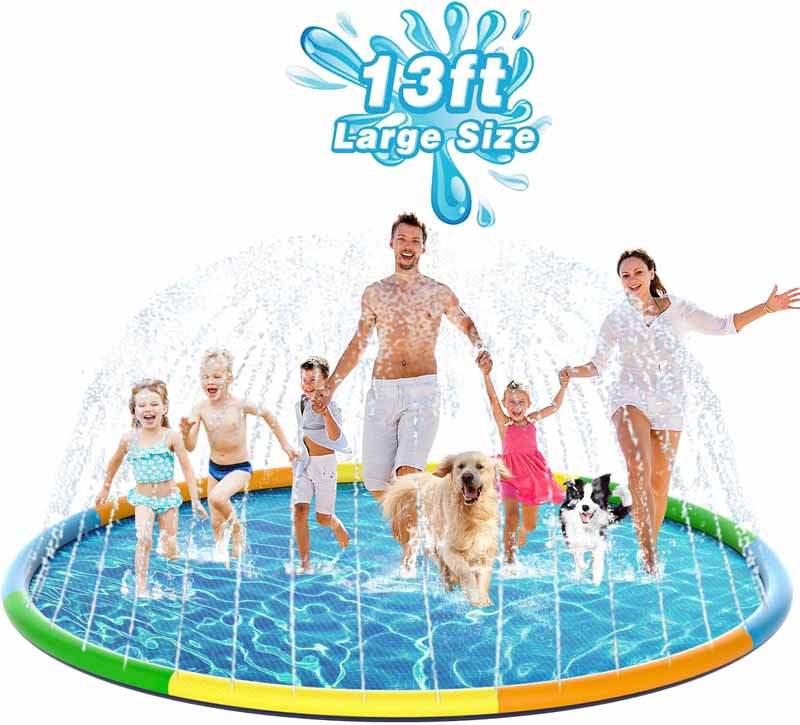
Most families don’t use splash pads the way product photos suggest. In real backyards, splash pads are rarely about long, planned play sessions. They’re used for short, repeatable moments—often 20 to 40 minutes at a time—several times a week.
Common real-world uses include:
- Letting kids cool down after outdoor play without changing into swimwear
- Giving dogs a safe way to cool off on hot days
- Keeping children occupied while parents cook, garden, or supervise nearby
- Providing water play in homes where pools aren’t practical
Splash pads tend to get used most in households where:
- Setup takes under 10 minutes
- Cleanup doesn’t involve draining large volumes of water
- Storage is straightforward and doesn’t require inflating/deflating structures
That’s why splash pads often get pulled out more frequently than inflatable pools, even if pools look more exciting at first glance.
How does a splash pad actually work?
A splash pad redirects water pressure through internal channels built into the pad. Water enters through the hose connector, spreads through these channels, and exits through spray holes distributed across the surface or around the perimeter.
A few points that matter in everyday use:
- Spray height is controlled by faucet pressure (not motors or pumps)

- In most yards, you’ll get a good spray long before the faucet is fully open—start low and increase slowly until it feels comfortable
- Higher pressure doesn’t always improve play and often increases slipping
- Even spray depends on internal channel design and how flat the pad sits
If spray looks uneven, the cause is usually one of these:
- The pad isn’t fully flat
- Water pressure is too high or too low
- The hose is bent or restricting flow
Understanding that saves a lot of frustration, because many issues that feel like “product problems” are actually small setup issues.

How is a splash pad different from a pool or sprinkler?
The biggest difference is effort versus payoff.
| Feature | Splash Pad | Inflatable Pool | Lawn Sprinkler |
|---|---|---|---|
| Standing water | Minimal | High | None |
| Setup time | 5–10 min | 20–40 min | 1–2 min |
| Storage effort | Low | Medium–High | Very low |
| Child safety | High (shallow) | Moderate | High |
| Pet friendliness | High | Mixed | Low |
| Repeat daily use | High | Medium | Low |
Pools offer immersion but require commitment. Sprinklers are easy but limited in engagement. Splash pads land in the middle—enough interaction to be fun, with low enough effort to be used frequently.
Are splash pads inflatable or non-inflatable, and why does it matter?
Splash pads generally fall into two categories: inflatable-edge designs and flat, non-inflatable designs.
Inflatable-edge splash pads:
- Can feel soft and cushioned
- May collapse or fold when stepped on
- Are more sensitive to air leaks and uneven inflation
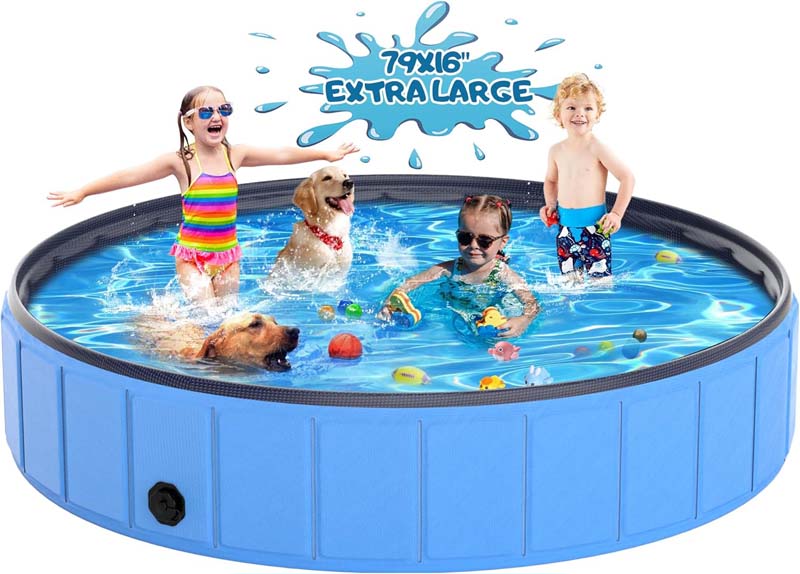
Flat, non-inflatable splash pads:
- Stay stable under body weight and paws
- Don’t require inflation or air checks
- Handle repeated stepping and running better
For households with dogs or multiple children, stability often matters more than softness. When the surface stays predictable underfoot, users feel more confident and play lasts longer.
Who is a splash pad actually best suited for?
Splash pads tend to work best for:
- Families with children under 8
- Households with dogs that dislike deep water
- Homes without space for permanent or large pools
- Users who prefer quick setup and simple storage
They’re less ideal for:
- Older kids looking for swimming or diving
- Households wanting long, unsupervised water play
- Situations where deep water is the main goal
What You Need for a Splash Pad
To set up a splash pad well, you need three things: a flat surface, a standard garden hose, and a drainage plan so water doesn’t pool where people run. You don’t need tools, electricity, or pumps. The extra items depend on your surface and who’s using the pad.
Where should you place a splash pad?
Place your splash pad where it can stay flat and drain easily.
Good locations:
- Level lawn (soft and comfortable, but can get muddy if drainage is poor)
- Concrete patio/driveway (stable, but can be slippery if very smooth)
- Decking (works if it has traction and water-safe finish)
- Rubber play tiles (high traction and great for toddlers)
Avoid:
- Any slope (pooling happens fast)
- Loose gravel/sand (can scratch the bottom and clog holes)
- Near garden beds (runoff can wash soil onto the pad)
- Right against walls/foundations (repeated runoff isn’t ideal)
A quick level check: place a small ball or bottle cap near the center. If it rolls, move the pad.
What should go under a splash pad?
In many cases, nothing—if the surface is safe and not abrasive. Underlay becomes useful when you notice:
- Kids slipping frequently
- Dogs hesitating or stepping off
- Corners curling because the ground is uneven
- Rough concrete that could scuff the bottom
Practical underlay options:
| Underlay | Best for | Helps with | Watch out for |
|---|---|---|---|
| Nothing | Level grass, textured rubber | Simple setup | Mud if lawn drains poorly |
| Thin rubber mat (textured) | Smooth concrete/pavers | Traction + stability | Must allow drainage |
| Interlocking foam tiles (outdoor-grade) | Toddlers on hard surfaces | Cushioning | Can trap water if sealed |
| Outdoor rug (low pile) | Decks/patios | Comfort | Needs drying too |
Avoid thick padding that creates soft spots. Soft spots collect water and increase slipping.
What do you need to set up a splash pad?
Must-have:
- Standard garden hose connection
- A faucet you can adjust gradually
- A flat play area with drainage
Helpful:
- A hose washer (small rubber ring) if your hose tends to drip
- A quick way to remove debris (rinse or soft cloth)
- A place to air-dry the pad (shade + airflow)
Nice to have:
- A short hose extension to avoid sharp bends
- A simple water pressure gauge if your neighborhood pressure runs high
What makes setup feel “easy” is removing friction points: no kinks, no uneven surface, and no surprise pooling.
What changes the experience the most?
| Setup factor | What you’ll notice if it’s wrong | Fix difficulty |
|---|---|---|
| Surface not level | Pooling, slipping, uneven spray | Easy |
| Water pressure too high | Harsh spray, more slipping | Easy |
| Hose kink / bend | Weak spray, inconsistent jets | Easy |
| Poor drainage | Puddles, muddy edges, more slipping | Medium |
| Stored while damp | Odor, stickiness, discoloration | Easy (needs drying time) |
How to Set Up a Splash Pad
Setting up a splash pad correctly is less about “following instructions” and more about avoiding a few small mistakes that ruin the experience. Uneven spray, slippery spots, leaking connectors, and pads that feel unstable usually come from simple setup details.
A good setup should feel simple and predictable. If everything looks dramatic or out of control during setup, something is probably off.
How to lay a splash pad flat (the step most people rush)
The pad needs to be fully flat before you turn on the water. Water pressure won’t fix raised edges or trapped air—it usually makes them worse.
Do this first:
- Smooth outward from the center with your hands or feet
- Spend extra time on edges and corners
- Walk the perimeter once with light pressure
You’re checking for small edge lift, not obvious wrinkles. Even a 1–2 cm lift can change how water fills internal channels.
A simple visual test: crouch down and look across the pad at ground level. If you see shadow lines under the surface, the pad isn’t flat yet.
If this step is skipped, you’ll often see:
- One side spraying higher within the first 30 seconds
- Water pooling along a single edge
- More slipping in one area

How to connect a splash pad to a hose (and avoid pressure loss)
Leaks here are common and usually not the pad’s fault.
Before connecting:
- Confirm a rubber washer is inside the hose connector
- Remove sand or debris from the threads
- Lay the hose so it approaches the pad without sharp bends
Hand-tighten until snug, then stop. Over-tightening can deform plastic threads over time.
Turn the faucet on slightly and watch the connector for 10–15 seconds.
If you see a slow drip, it’s often a worn or missing washer. A new rubber washer usually fixes most slow-drip connections.
How to start a splash pad (pressure control matters more than height)
Turn on the water gradually, not full blast. The pad typically moves through:
- Channel fill (little spray)
- Initial spray (low jets)
- Playable spray (even spray across the surface)
Stop increasing pressure once spray feels comfortable. Most yards get a great spray long before the faucet is fully open—start low, then increase slowly until the spray feels comfortable and even.
A red flag: if spray height looks uneven after 30–60 seconds, turn off the water and reset. Most of the time that means the pad isn’t flat or the hose is restricting flow.
How to check spray quality in the first minute
The first minute tells you almost everything. Stand still and check:
- Are sprays roughly similar in height across the pad?
- Is the spray comfortable rather than aggressive?
- Does the pad feel stable when stepped on?
If you see this, do this:
| What you see | What it means | What to do |
|---|---|---|
| One side sprays higher | Pad not flat | Turn off, re-smooth edges |
| Spray feels harsh | Pressure too high | Lower faucet flow |
| Weak spray everywhere | Hose kink or low pressure | Straighten hose, check tap |
| Pooling water | Surface not level | Reposition pad |
Fixing issues early prevents most common problems later.
How long splash pad setup should take (realistic timing)
| Step | Time |
|---|---|
| Unfolding & smoothing | 2–3 minutes |
| Hose connection | 1 minute |
| Pressure adjustment | 1–2 minutes |
| Final check | 1–2 minutes |
If it regularly takes longer than 10 minutes, it usually means the surface choice isn’t ideal, the hose keeps kinking, or the pad is being rushed instead of smoothed once properly.
When to stop and reset during setup
Stop and reset if:
- Spray becomes chaotic or unpredictable
- Water pools instead of draining outward
- The surface shifts under light steps
Turn off the water, reposition the pad, smooth the edges again, and restart slowly. A reset usually takes under two minutes and prevents slipping, frustration, and early wear.
Why this setup method works long-term
Splash pads tend to wear out faster when:
- Water pressure is always maxed out
- Edges repeatedly lift under flow
- Connectors are stressed by leaks
This setup approach reduces all three.
How to Use a Splash Pad Safely
Splash pads reduce many risks compared to pools, but safe use still depends on reading what’s happening correctly. Most issues come from too much water pressure, uneven surfaces, or repeated slipping—not from splash pads being “unsafe.”
What is normal splash pad behavior (no need to worry)
These are common and usually fine:
- A child slips once and immediately regains balance
- Kids run faster as they get comfortable
- Spray changes slightly when several people step on the pad
- A dog steps back briefly before re-entering
If a slip happens once or twice and doesn’t repeat, it’s often a learning moment, not a setup problem.
When you should adjust the splash pad (but not stop play)
Adjust when you see:
- Repeated slipping in the same area
- Spray height climbing as play continues
- Slow pooling instead of outward drainage
- A dog hesitating in one spot repeatedly
What to do:
- Lower faucet flow slightly
- Press down along any lifted edge
- Reposition the pad a few centimeters if needed
Most adjustments take under 30 seconds.
When to stop splash pad use immediately
Pause play if you notice:
- Slipping happens repeatedly in a short window (more than twice in 5 minutes)
- The pad shifts or folds under light steps
- Water collects in one area instead of draining
- Spray becomes forceful and unpredictable
- A child or pet shows clear fear and refuses to re-enter
These usually point to setup problems. Fix pressure/flatness/placement before restarting.
How water pressure affects safety
Higher pressure increases spray height, but also:
- Reduces traction on smooth surfaces
- Makes edges more active
- Increases surprise spray near faces
Practical guideline:
| User group | Pressure level |
|---|---|
| Toddlers | Low |
| Mixed-age children | Low to medium |
| Older kids | Medium |
| Pets (first-time users) | Low |
| Pets (experienced) | Medium |
If play becomes frantic or messy, pressure is often too high. Lowering it slightly usually helps.
How to supervise without hovering
You don’t need to interrupt every run or splash. Watch patterns:
- Where slips repeat
- Whether spray changes as more users step on
- How pets approach and exit
Intervene when the same issue repeats, not when something happens once.
Pet-specific safety tips
Dogs often:
- Step on edges
- Turn suddenly
- Paw at spray holes
To reduce risk:
- Start with low pressure
- Let the dog approach voluntarily
- Don’t force interaction
- Keep nails trimmed
Backing away once is normal. Avoiding the same spot repeatedly often means the surface feels unstable or the spray is too strong.
When weather and surfaces change the rules
Be more cautious when:
- Ground becomes muddy
- Smooth concrete develops slick residue
- The pad is hot from long sun exposure
In these cases:
- Reduce pressure
- Shorten play sessions
- Rinse and dry more frequently
Common safety misunderstandings
- The pad doesn’t need to be perfectly dry between same-day uses
- A single slip doesn’t automatically mean the pad is unsafe
- Many pets can use splash pads comfortably with low pressure and a stable surface
A good rule of thumb: if a problem repeats, adjust. If it continues after adjustment, stop and reset.
Is a Splash Pad Worth It?
Buying a splash pad is rarely about the sticker price. Most families don’t regret spending money—they regret buying something that ends up unused after a few weeks. “Worth it” comes down to how often it gets used and how little effort it takes to keep using it.
How much does a splash pad cost?
Most splash pads fall around these ranges:
| Product type | Price range you’ll usually see | What that price often reflects |
|---|---|---|
| Entry-level splash pad | $25–$40 | Thinner material, simpler spray layout |
| Mid-range splash pad | $40–$60 | Better thickness, more even spray |
| Heavy-duty splash pad | $60–$80 | Thicker PVC, reinforced edges, more stability |
The difference isn’t just price—it can show up in stability, spray consistency, and how the pad holds up to repeated use and pets.
Cost per use
| Scenario | Price | Uses over summer | Cost per use |
|---|---|---|---|
| Lower-cost pad used rarely | $35 | 8 uses | $4.38 |
| Mid-range pad used often | $55 | 25 uses | $2.20 |
| Higher-end pad used frequently | $75 | 45 uses | $1.67 |
What drives usage frequency:
- Setup time (fast vs annoying)
- Stability (no constant re-adjusting)
- Drying and storage effort
Many households find a more reliable pad gets used far more often because it feels easy.
Splash pad vs inflatable pool vs sprinkler
| Option | Why people buy it | Why they stop using it |
|---|---|---|
| Splash pad | Fast setup, low water, safe | Uneven spray or poor setup |
| Inflatable pool | Immersion, looks fun | Filling, draining, storage hassle |
| Lawn sprinkler | Cheapest | Less engaging, short play |
Splash pads often win on repeatability: if it’s easy on a weekday, it gets used.
When a splash pad is a strong fit
A splash pad tends to be a good choice if:
- You want short, frequent water play
- You don’t want standing water
- Kids or pets overheat easily
- Storage space is limited
- You value simplicity more than deep water play
When it may not be the best choice
It may not fit well if:
- Older kids mainly want swimming
- You expect long unsupervised sessions
- You already have a permanent pool setup
- You dislike any setup at all
The part people don’t calculate: hassle
If a pad slips constantly, needs constant pressure changes, or smells after storage, it stops being fun quickly. That’s why ease and reliability often matter more than saving a small amount upfront.
How Should You Clean and Store a Splash Pad?
Most splash pads don’t wear out from play. They run into problems during storage: odor, tacky feel, stiffness, discoloration, or weakened seams. These usually come from trapped moisture and the way the pad is stored.
Why splash pads run into problems after storage
Common issues include:
- Musty or sour smell
- Sticky or tacky surface feel
- Cloudy appearance or fading
- Stiffness and reduced flexibility
- Seam weakening over time
Moisture tends to hide in:
- Welded seams and edge folds
- Textured anti-slip surfaces
- Layered areas near connectors
How to drain a splash pad properly
- Turn off the faucet and let spraying stop naturally
- Wait 30–60 seconds for channels to empty
- Lift one edge to guide remaining water out
- Walk slowly across the pad to push water outward
Don’t drag a water-filled pad. If it still feels heavy, give it another minute.
How to tell if it’s actually dry
Before folding:
- Seams feel dry and neutral (not cool)
- Paper towel pressed into texture comes away dry
- The pad feels noticeably lighter
- Smell is neutral (no sour odor)
If seams feel cool, moisture is still present.
How long drying usually takes
| Conditions | Drying time |
|---|---|
| Warm day, good airflow | 1–2 hours |
| Shade, mild weather | 2–4 hours |
| High humidity | 4–6 hours |
Best approach: airflow on both sides, shade when possible. Short sun is fine; long direct sun can speed fading.
Why sealed plastic bins often cause odor
Sealed bins can trap moisture and create condensation from temperature changes. Breathable storage is usually safer:
- Fabric storage bags
- Open bins with airflow
- Shelves in dry spaces
If you must use a plastic bin: dry fully, add moisture absorbers, and avoid hot storage areas.
How to fold without damaging seams
- Fold loosely along natural lines
- Avoid sharp creases
- Don’t roll tightly
- Don’t compress under heavy items
Where to store (and where not to)
Good:
- Indoor closets
- Dry basements with airflow
- Climate-controlled garage shelving

Avoid:
- Hot attics
- Damp sheds
- Places with big temperature swings
- Sun-exposed areas year-round
How often to clean during the season
- Rinse after each use
- Wipe visible dirt/grass
- Let dry fully before long storage
- Light soap-and-water clean every few weeks if used often
Mild soap is usually enough. Avoid harsh solvents.
Which Splash Pad Is Right for You? (A 3-Minute Selection Guide)
This is a fast way to pick without overthinking. Start with who uses it, then choose size and structure based on how people actually move.

Step 1: Who will use it most?
Mostly toddlers/young kids (under ~6)
Comfort matters more than spray height. A stable medium-size pad is usually enough.
Kids running together
Space matters. Too small leads to crowding, slipping, and shorter play.
Kids + dogs
Stability matters most. Flat, non-inflatable designs tend to feel more secure under paws.
Mostly pets
Gentle adjustable spray and stable footing matter more than size. Smaller is fine if space is limited.
Step 2: How much space do you really have?
Think about movement, not measurements.
| Typical use | Size direction |
|---|---|
| One child / one pet | Small to medium |
| Two kids | Medium |
| Kids + dog | Medium to large |
| Groups / parties | Large |
If you’re between two sizes, the larger one is usually the better experience.
Step 3: How often will you use it?
Occasional use: basic options can work.
Frequent use: prioritize stability and easy drying/storage.
Step 4: How much effort do you tolerate?
If you don’t want inflation, long draining, or complicated cleanup, choose designs that are flat, stable, and quick to dry.
Step 5: What problems do you want to avoid?
| If you hate… | Prioritize… |
|---|---|
| Slipping | Stable surface + pressure control |
| Leaks | Solid connectors + no air chambers |
| Odor after storage | Easy drying + breathable storage |
| Constant re-adjusting | Flat structure + even spray |
If you only remember one thing:
- Kids will run → go larger
- Pets will step → go flatter and more stable
- Want frequent use → prioritize easy drying and predictable setup
Final Thoughts
A splash pad should make summer simpler. When it’s placed on a flat surface, run at comfortable pressure, and stored fully dry with airflow, it becomes something families keep using all season.
A good splash pad isn’t the one with the longest feature list. It’s the one that still gets used next week.

Ready to Choose the Right Splash Pad?
If you’re looking for a splash pad that is:
- Stable on grass and patios
- Designed for even, all-around spray
- Easy to connect and adjust
- Built for kids, pets, and repeated seasonal use
You can explore our current splash pad collection here:
Splash Pads for Active Play
Pet-Friendly Water Play Add-Ons
For Retailers, Distributors & OEM Buyers
If you’re sourcing splash pads for:
- Private label programs
- Seasonal retail distribution
- Pet product lines
- Backyard recreation collections
We support:
- Custom size & structure development
- Spray layout engineering
- PVC thickness upgrades
- Packaging & branding customization
- Regional compliance support
Request OEM / ODM Information
Whether you’re purchasing for your own backyard or developing products for your market, the right splash pad starts with smart setup — and the right structure behind it.
Explore More Water-Play Categories
If you’re planning a broader seasonal catalog or expanding beyond splash pads, these pages may be useful: