Skip to content
 Best Punching Bag: Which Type & Weight Should You Buy?
# Your Trusted Inflatable Supplier In US
Most people shop for a punching bag like they shop for a blender: pick a popular one, hope it works, and deal with the regrets later. But bags aren’t appliances. A punching bag is feedback. It teaches your hands and hips what “clean contact” feels like, it exposes weak wrists, it punishes sloppy footwork, and it either makes training addictive… or it makes you quit after two sore sessions.
Here’s the uncomfortable truth: there is no single “best punching bag” for everyone. The best bag is the one that matches your goal, your space, your body, and your consistency. A bag that’s “amazing” for a 200-lb power puncher can be frustrating (or unsafe) for a smaller beginner. A freestanding bag that’s perfect for a condo can feel wrong for someone learning real boxing rhythm. And a cheap bag that looks fine on day one can turn into a leaky, lopsided headache by week six.
The best punching bag depends on your training goal. For boxing power and conditioning, choose a hanging heavy bag. For apartments, shared spaces, or easy setup, a freestanding bag with a stable base is more practical. For timing and accuracy, use a double-end or reflex bag. Prioritize stable rebound, safe hand feel, durable seams, and the right weight for your strength.
If you’ve ever watched someone crush the bag at a gym and thought, “I want that,” you already understand the hook: the bag doesn’t just build fitness—it builds confidence. Let’s make sure you buy the kind of confidence that lasts.
What Is the Best Punching Bag for Your Goal?
The best punching bag is the one that matches your main goal and makes training easy to repeat. For power and conditioning, choose a hanging heavy bag. For timing and accuracy, add a double-end or reflex bag. For small spaces or no-install setups, a freestanding bag is more realistic. Pick based on (1) goal, (2) space, (3) safety/hand feel, and (4) stability.
Use this as your weekly baseline when planning bag sessions.
What is the best punching bag for boxing, MMA, or fitness?
If you train boxing, your fastest progress usually comes from a hanging heavy bag because it supports the core skills you repeat most: straight punches, hooks, body shots, distance control, and round-based conditioning. A heavy bag also lets you build volume safely—many home users aim for 6–12 rounds per week (2–3 sessions × 3–4 rounds), and the heavy bag is the easiest tool to scale that workload without overthinking.
For MMA, the “best” bag depends on whether you’ll throw a lot of kicks and knees. If yes, you’ll want either a longer heavy bag (better low-line targets) or a stable freestanding setup if hanging isn’t possible. The key difference: MMA striking often includes more angles, clinch-style knees, and mixed-contact points, so stability and surface durability matter more.
For fitness, most people quit because the setup is annoying or their hands hurt. So the best bag is the one that’s quick to start, not too loud for your space, and has a forgiving but responsive surface. If you’re doing short workouts (10–20 minutes), a freestanding bag can win simply because it’s “always ready.”
Our kids products are designed for supervised, non-contact home fitness play — not head impacts or sparring.
Which goal matters most: power, speed, or cardio?
A useful way to choose is to ask what your training should feel like at minute 12, not minute 1.
- Power goal: You want the bag to feel solid and not fly away. Too-light bags swing hard, forcing you to chase and breaking your stance. Heavier bags (or stable bases) keep the target where you expect it, which makes your power work cleaner and safer.
- Speed goal: You want quick return and repeatable rhythm. That’s where double-end and reflex bags shine. They punish lazy hands and help you build fast retraction and guard recovery.
- Cardio goal: You want long, repeatable rounds without your wrists becoming the limiting factor. That usually means a bag with predictable movement, a surface that doesn’t feel like a brick, and enough stability that you don’t waste energy resetting it.
Here’s a practical cheat sheet that matches what most home users actually do:
| Main Goal | Best Primary Bag | Best Add-On | Why It Works |
|---|---|---|---|
| Power + hard combos | Hanging heavy bag | None (start here) | Stable target, strong feedback, easy to scale rounds |
| Timing + accuracy | Double-end bag | Reflex bag | Fast return, forces straight punches and clean guard |
| Cardio + fat loss | Heavy bag or freestanding | Timer + simple combo plan | Keeps sessions repeatable and easy to progress |
| Mixed striking (MMA-style) | Longer heavy bag or stable freestanding | Pads/target drills | Better kick/knee targets, less awkward repositioning |
What should beginners prioritize first: stability, feedback, or safety?
Beginners often buy “the toughest bag” and then stop training because their knuckles and wrists hate them. The smarter order is:
- Safety (hand feel + wrist alignment): Early on, you’re still learning to land on the first two knuckles with a straight wrist. A bag that’s overly hard can turn small form errors into pain fast. If you want to train 3–5 days per week, your hands must survive it. Wraps and gloves help, but the bag surface still matters.
- Stability (predictable movement): Wild swing or a freestanding base that “walks” will pull you out of stance, especially during hooks. That teaches bad habits (reaching, leaning, over-rotating).
- Feedback (clear response): You do want feedback—just not punishment. The best beginner bag gives a clean “thud,” not a sharp slap or a dead mush.
A common beginner-friendly training volume is 30–60 total minutes of bag work per week (example: three 10–20 minute sessions). Your bag choice should support that without pain or constant resets.
How do you match your goal to the right “feel” and training plan?
Think of bag “feel” as a training partner style:
- Soft-to-medium feel: better for beginners, longer cardio sessions, and households where multiple people train. It reduces impact shock and makes it easier to keep sessions consistent.
- Medium-to-firm feel: better for experienced punchers who want honest feedback and strong resistance on power shots.
A simple progression that works well at home (and keeps your goal aligned with your bag) looks like this:
| Goal | Session Structure | Best Bag Behavior |
|---|---|---|
| Beginner technique | 6–10 rounds × 1 minute (easy pace) | Predictable movement, forgiving surface |
| Cardio | 6–10 rounds × 2 minutes (steady pace) | Doesn’t force constant resets |
| Power | 6–8 rounds × 2–3 minutes (hard efforts) | Stable target, reduced swing |
| Timing | 8–12 rounds × 1–2 minutes (light/fast) | Fast rebound, punishes slow hands |
Which Punching Bag Type Should You Choose?
Choose your punching bag type based on what you can train consistently at home. A hanging heavy bag is best for boxing power, conditioning, and full combos. A freestanding bag is best when you can’t mount hardware or need a controlled footprint. A double-end bag is best for timing and accuracy. A reflex bag is best for speed and reaction. For kids or low-impact training, choose soft-impact or inflatable styles.
Download the Buyer Checklist (PDF)
Which type of punching bag is best?
“Best” depends on the skill you’re trying to build fastest. Most people buy the wrong type because they shop by popularity instead of training outcome.
A simple way to decide is to rank your needs from 1 to 3:
- Skill outcome: power, technique, timing, speed, mixed striking
- Space reality: mounting allowed or not, ceiling height, clearance, noise
- User profile: beginner vs experienced, adults vs kids, single user vs family
If you want one bag that covers the widest range of home training, the heavy bag (hanging) usually wins because it supports longer rounds, full combinations, and measurable conditioning progress. But “usually” isn’t “always”—apartment restrictions and setup friction often make a freestanding bag the better real-world choice.
Which is better: heavy bag, reflex bag, or double-end bag?
These three bags train different “systems,” so comparing them is like comparing a treadmill to dumbbells—each is good at its job.
- Heavy bag: best for power + endurance + combo practice. If you’re aiming for 15–30 minute sessions with structured rounds (for example, 6–10 rounds × 2–3 minutes), the heavy bag fits that routine naturally.
- Double-end bag: best for accuracy + timing + straight punches. It forces you to punch clean and return to guard. It also rewards footwork and head movement because the bag’s rebound is quick and unforgiving.
- Reflex bag: best for speed + coordination + reaction. It’s great for short sessions (5–15 minutes) and quick skill maintenance when you don’t have time for full rounds.
If you’re building a home setup from zero, many people get the best results by starting with one heavy bag, then adding a double-end later for timing.
USA Boxing Training Manual (PDF)
Which is better: hanging bag or freestanding bag?
This decision is less about “performance” and more about your home environment.
- Choose a hanging bag if you can mount safely and you want the most authentic boxing feel. Hanging bags absorb power well and let you work long combinations without the base shifting.
- Choose a freestanding bag if you need fast setup, no drilling, and a predictable footprint. This is common for apartments, rentals, shared garages, or multi-purpose rooms.
A useful “buyer honesty test”: If the bag requires a complicated install and you know you’ll delay it, pick freestanding. The best bag is the one that’s ready when motivation shows up.
Which is best for small spaces and apartments?
In tight spaces, clearance becomes the hidden cost. Hanging bags swing and can demand more room than people expect. Freestanding bags keep the action centered, which helps avoid collisions with walls and furniture.
For most small-space home users, a freestanding bag tends to be the easiest win—especially if you pair it with a floor mat to reduce vibration and noise. If you go hanging in a small space, consider a slightly shorter bag and train with controlled swing so you’re not constantly chasing the target.
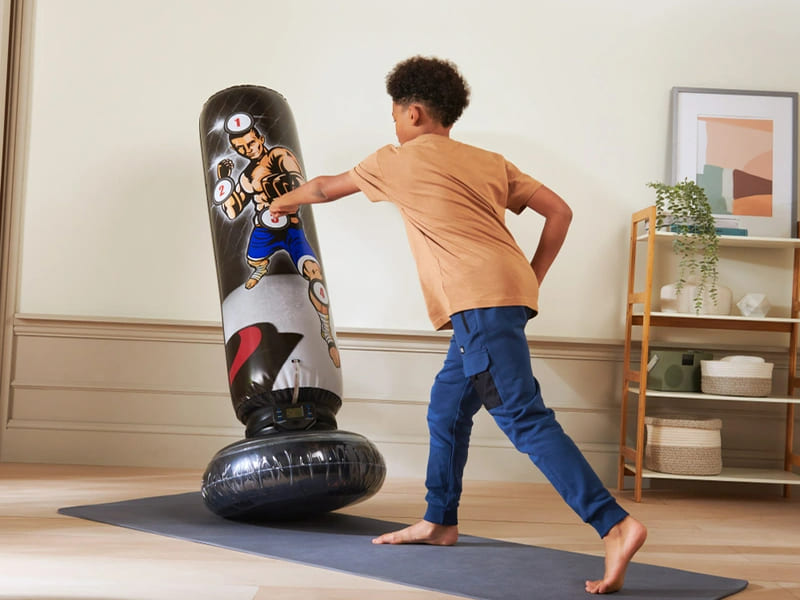
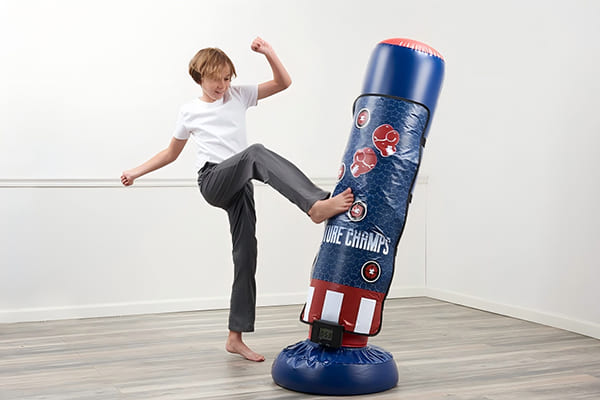
Which is best for kids: inflatable or soft-impact bags?
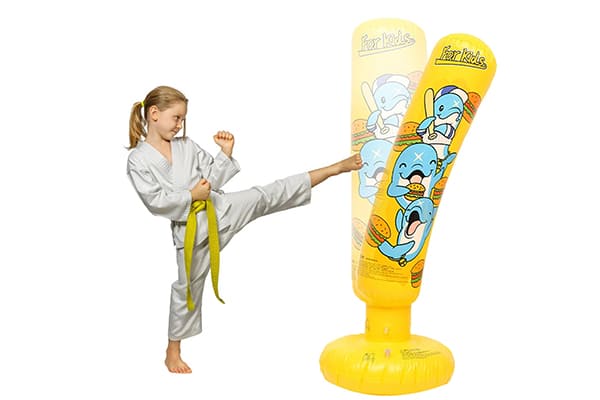
For kids, the priority is safe contact + fun repetition. A softer surface reduces knuckle and wrist issues, and it helps kids stay confident. Inflatable and soft-impact designs also make sense if you need to store the product easily or move it often.
A good kids’ setup is one where:
- the bag doesn’t tip easily
- the surface doesn’t feel “hard plastic”
- the height matches their natural punch line
- sessions stay short and playful (5–10 minutes at a time)
Quick Comparison Table
| Bag Type | Best For | Setup Complexity | Space Needs | Typical Session Style |
|---|---|---|---|---|
| Hanging heavy bag | power, conditioning, combos | medium–high | medium–high | 6–10 rounds × 2–3 min |
| Freestanding bag | convenience, rentals, shared spaces | low | low–medium | 10–20 min quick rounds |
| Double-end bag | timing, accuracy, defense rhythm | medium | low | 8–12 rounds × 1–2 min |
| Reflex bag | speed, coordination, reaction | low | very low | 5–15 min bursts |
| Soft-impact / inflatable | kids, beginners, low-impact | low | low | short skill + play sessions |
How Heavy Should a Punching Bag Be?
A good punching bag weight depends on your body size, strength, and training style. A practical range for many adults is 70–100 lb for general boxing at home, with lighter bags swinging more (good for movement and speed) and heavier bags swinging less (better for power rounds). A simple rule many coaches use is choosing a bag around 40–60% of your body weight, then adjusting based on whether the bag feels too “wild” or too “dead.”
How do you choose bag weight by body weight and skill level?
Bag weight should help you keep form late in the round—that’s where technique usually falls apart. The most useful weight is the one that stays predictable when you’re tired.
A common starting point is the 40–60% body-weight rule:
- If you weigh 140 lb, a bag around 60–85 lb is often workable.
- If you weigh 170 lb, a bag around 70–100 lb tends to feel right.
- If you weigh 200 lb, a bag around 80–120 lb often makes sense.
But skill level matters. Beginners often do better at the lower end of the range because they need to learn clean contact without overloading wrists. Experienced punchers typically prefer heavier because they can control power and alignment and they want less swing.
Is a 70lb punching bag good?
Yes—70 lb is one of the safest “default” weights for home training because it balances feedback, movement, and manageability. It’s heavy enough that you can throw combinations without the bag behaving like a pendulum every time you land a hook, but it still swings enough to teach distance and footwork.
70 lb tends to work especially well if:
- you’re a beginner to intermediate boxer
- you want a bag that supports both technique and conditioning
- your space is limited and you don’t want extreme swing
Where it can feel wrong: if you throw a lot of hard kicks or you’re a heavier athlete hitting with full power, it may swing too much unless your mount is very solid and your technique is controlled.
Is an 80lb punching bag good?
Yes—80 lb is a common “sweet spot” because it begins to feel stable for power work while still being practical to install and live with at home. Compared with a 60–70 lb bag, an 80 lb bag usually:
- swings less during hooks and body shots
- feels more solid for combinations
- requires less “chasing the bag” footwork (which is good when you’re learning)
For many adults doing boxing-focused training (mostly punches), 80 lb supports the classic home routine: 6–10 rounds per session, 2–4 sessions per week, without excessive bag movement disrupting form.
How does bag length change boxing vs kick training?
Weight is only half the story; length controls target zones. If you only box, a standard heavy bag length works because your targets are head and body height. If you kick, you need consistent low targets or you’ll start changing stance and distance in awkward ways.
A simple match:
- Boxing-only: prioritize weight + feel.
- Boxing + kicks: prioritize length + stability (often heavier or better anchored).
- Knees and clinch-style work: longer bags can be more natural.
Many “wrong purchases” happen when someone buys a standard bag for MMA-style training and then realizes there’s nowhere comfortable to practice low kicks.
How do heavier bags change swing, rebound, and control?
Think of weight as controlling how the bag behaves after contact:
- Lighter bags (40–70 lb): more swing, faster movement, more demand on footwork and range control. Good for speed and movement—but can frustrate beginners who feel like the target never stays still.
- Mid-weight bags (70–100 lb): balanced behavior. Enough stability for combos, enough movement to teach range. This is why this range is popular for home users.
- Heavy bags (100–150 lb+): minimal swing, very stable target. Better for power and endurance. But they can feel “dead” for smaller athletes, and they increase installation demands.
A good sign you need heavier: the bag swings so much that your punches start missing and you’re constantly resetting stance. A good sign you need lighter (or softer feel): your hands and wrists feel beat up and you stop training.
How heavy was Bruce Lee’s punching bag?
People ask this because they want a simple answer, but the more useful takeaway is how he trained: high repetition, precision, and intent, often mixing tools. Public claims about exact bag weights vary and aren’t always consistent across sources or phases of training, so treat any single number as trivia, not a buying rule.
If you want to follow the practical lesson, match the bag to the session:
- lighter / faster rebound for speed and timing days
- heavier / steadier target for power and conditioning days
That approach improves skill faster than copying a number.
Quick Decision Table (Pick the weight faster)
| Buyer Profile | Typical Good Range | Why |
|---|---|---|
| Beginner adult (boxing) | 60–90 lb | safer learning curve, manageable swing |
| Average adult home user | 70–100 lb | balanced stability + movement |
| Bigger/stronger hitter | 100–150 lb | less swing, supports power rounds |
| Family/kids shared use | softer feel or lighter | reduces hand injury risk, more fun |
If you share your height/weight, training style (boxing vs MMA vs fitness), and whether you’ll mount or go freestanding, I can narrow this to a tight weight range that’s realistic for your space and your goals.
Is a Water-Filled Base Better Than Sand?
A water-filled base is better if you want fast setup, easy draining, and easier moving when empty, while a sand-filled base is better if you want maximum stability and less wobble during hard combinations. Water can shift and “slosh,” slightly changing rebound feel, and it requires solid leak prevention. Sand is heavier and steadier but messy to fill and hard to relocate once loaded. For most home users, water wins on convenience; sand wins on stability.
What changes in training feel when the base is water vs sand?
Most buyers think base fill is only about “weight,” but it also changes how the bag behaves after impact.
- Water-filled base: the base can absorb movement through internal shifting. That can create a mild wobble during heavy hooks or repeated kicks. The upside is it often feels less harsh on floors and is easier to adjust (you can partially drain if you overshoot weight).
- Sand-filled base: the base acts more like a fixed anchor. When you hit, the energy stays in the bag instead of moving the base. That usually feels more “planted,” which helps with clean combinations and consistent distance.
In practice: if you’re mostly doing boxing combinations, either can work. If you’re throwing lots of hard kicks or you’re a heavier hitter, sand tends to feel more stable.
Is sand better for stability and “dead” resistance?
Yes—sand is usually the most stable option because it’s dense and doesn’t move internally. That matters if you want the bag to stay put during:
- heavy hooks and body shots
- repeated low kicks
- high-volume rounds where your stance gets tired
A useful way to think about it: sand is better at preventing the bag from “walking” across the room. The downside is lifestyle friction. Sand is:
- harder to pour in (often requires funneling and patience)
- messy if spilled
- heavy to reposition (once filled, most people never move it)
If your training spot is permanent (garage, basement, dedicated corner), sand is usually worth it.
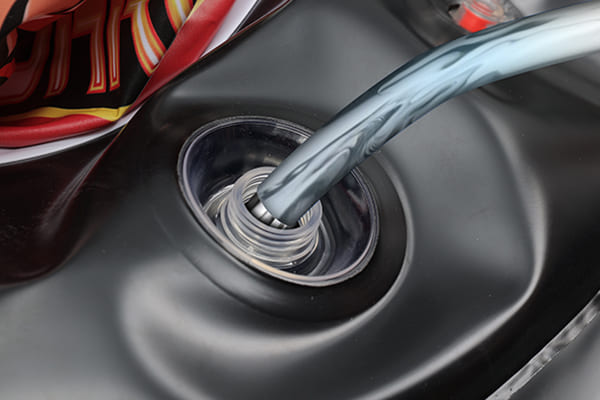
Is water better for rebound and easier setup?
Water wins on convenience, and convenience is a real training advantage. Many home users train more simply because water is easy:
- fill with a hose
- drain quickly
- move the base when empty
This matters if you need to reclaim space after training (living room, patio, shared garage). Water can also be friendlier for renters who don’t want heavy sand sitting on one spot long-term.
Rebound-wise, water can feel a little “livelier” in some freestanding designs, but the tradeoff is the slight wobble or rotation you may notice during high-power sessions.
Do water-filled bases require more leak prevention and maintenance?
Yes. Any water-filled product needs strong sealing and reliable materials. If a base leaks slowly, it’s not just annoying—it reduces stability over time, and the bag starts to feel worse week by week.
Look for these practical signals:
- Thicker PVC/composite material around the base
- Clean, consistent welded seams (seams are where most failures start)
- A valve design that’s protected from direct impact and abrasion
- A base shape that doesn’t crease sharply when moved (sharp folds can stress material)
This is where a PVC and composite specialist like Epsilon has an advantage: our manufacturing is built around controlling weld consistency, material thickness, and leak resistance across batches, because we produce inflatable and water-filled products at scale and test for long-term performance.
Which fill/base is safer for floors: water, sand, or hybrid?
Floor safety depends on two things: total load and how that load is distributed.
- Sand creates a heavy, concentrated load. It’s stable, but on softer floors it can leave marks if you don’t use a mat.
- Water can be heavy too, but it’s easier to drain and reposition, which reduces long-term floor stress.
- Hybrid (if allowed by the product design) can balance stability and adjustability, but you must follow manufacturer guidance—some bases aren’t built for mixed fill.
A simple rule that prevents most “floor regrets”: always place a freestanding bag on a thick rubber mat or shock-absorbing pad. It reduces vibration, protects floors, and helps stop the base from sliding.
Quick Practical Comparison
| Base Fill | Stability | Convenience | Mess Risk | Moving After Fill | Best For |
|---|---|---|---|---|---|
| Water | medium | high | low | easy (drain first) | apartments, shared spaces, flexible setups |
| Sand | high | low | medium | hard | hard hitters, dedicated training corners |
| Hybrid* | medium–high | medium | medium | medium | balance seekers (only if permitted) |
How Do You Judge Durability and “Feel”?
Judge a punching bag by whether it stays consistent after weeks of real use: it should keep its shape, rebound predictably, and avoid seam or surface failures. The most reliable durability signals are material thickness, seam construction (reinforced stitching or welded joints), abrasion resistance, and hardware quality. “Feel” matters just as much: a good bag absorbs impact without feeling rock-hard, doesn’t create sharp hotspots on knuckles, and gives repeatable feedback so your technique improves instead of your wrists getting injured.
What outer material lasts longer: leather, PU, or PVC composites?

Most buyers compare materials like they compare phone cases—by brand and price. In real training, durability is about how the surface handles abrasion + repeated shock.
- Leather (quality hides) can last years with care and gives a classic feel, but it’s costly and can dry or crack if neglected.
- PU varies the most. Good PU can last well; cheap PU often peels or splits at stress points after heavy use.
- PVC composites can be extremely durable when engineered well—especially for products that must hold air or water and survive outdoor wear. The key is not “PVC vs leather,” but PVC formula + thickness control + seam execution.
Epsilon is built around PVC and composite manufacturing, so the focus isn’t just appearance. It’s repeatable material consistency across batches, which is exactly what long-term home users care about: the bag feels the same on week 8 as it did on day 1.
How do seams fail: stitching vs welded construction?
Seams are where most bags lose their “best bag” status.
- Stitched seams can be strong, especially when reinforced (multiple rows, heavy thread, stress tape). But every stitch is a tiny puncture point, and repeated impact can slowly widen weak areas—especially if the bag is overfilled or the shell is thin.
- Welded seams (common in inflatable and water-based products) avoid needle holes and can create a continuous bonded joint when done correctly. The catch is quality control: bad welding is worse than good stitching.
A practical buyer checklist for seam confidence:
- Are high-stress zones reinforced (top hang points, base joints, corners)?
- Is the seam wide and even (not narrow or wavy)?
- Does the design avoid sharp creases where stress concentrates?
Epsilon’s production model emphasizes seam reliability because we run high-frequency welding and pressure/leak testing as standard practice for inflatable/water products.
What does “feedback” mean, and which bags feel better to hit?
“Feel” is the combination of surface compliance + fill density + rebound behavior. It directly affects whether you train consistently.
A bag can fail on feel in two opposite ways:
- Too hard: punches feel sharp on knuckles; wrists get sore; you start pulling punches.
- Too soft/mushy: your hands sink in; rebound is inconsistent; it hides mistakes and can encourage sloppy alignment.
A good “feedback” bag:
- gives a clean, predictable rebound
- lets you feel when you landed on the first two knuckles
- doesn’t punish you for small beginner errors
This is why many serious home users prefer a medium feel and then adjust gloves/wraps rather than buying the hardest bag possible.
Are inflatable or air-filled bags good for conditioning and beginners?
They can be a great option if you care about accessibility, storage, and hand comfort—especially for families or multi-user homes.
The success or failure of inflatable/air-filled designs comes down to engineering details:
- valve integrity (no slow leaks)
- weld consistency (no seam creeping)
- abrasion resistance (base and contact zones)
- stable geometry (does it stay upright and balanced?)
A well-built inflatable or water-filled bag can make it easier to train more often, because it’s less intimidating and less punishing. For beginners, that’s a major advantage: the best bag is the one you can hit 4 times a week without your hands getting wrecked.
What punching bag did Mike Tyson use, and what’s the real lesson?
People ask this because they want a shortcut: “Use what Tyson used.” The real lesson from elite training isn’t one specific bag—it’s tool rotation.
Top fighters typically use:
- heavy bag rounds for power and conditioning
- double-end bag for timing and accuracy
- defense drills (slip line, head movement) to stay balanced under fatigue
So instead of chasing a single “Tyson bag,” build a setup that matches your routine. If you only buy one piece, most people get the most progress from a heavy bag first. Then, if your goal is to look and move like a real boxer (not just get tired), add a double-end bag later.
A practical “Durability Scorecard” you can use before buying
Below is a simple way to judge whether a bag is likely to hold up beyond the honeymoon period:
| What to Check | Why It Matters | What “Good” Looks Like |
|---|---|---|
| Material thickness & consistency | prevents splits and deformation | even surface, no thin patches |
| Seam design | seams are the #1 failure point | reinforced seams or clean welds |
| Hardware quality | failure here can be dangerous | rated straps/chains, solid mounts |
| Base durability (freestanding) | base takes constant stress | abrasion-resistant base + stable shape |
| Feel over time | consistency drives training | rebound doesn’t turn mushy or harsh |
How Do You Set Up a Punching Bag at Home Safely?
A safe home punching bag setup comes down to three things: secure mounting (or stable base), enough clearance for movement, and hand protection. For hanging bags, anchor into a structural beam or use a rated stand—never drywall. For freestanding bags, use the right fill (sand for max stability, water for convenience) plus a non-slip mat to stop walking. Leave enough space for footwork, and use wraps + gloves to reduce wrist and knuckle injuries.
Download the 30-Day Training Plan
How do you hang a heavy bag without damaging ceilings?
The biggest home mistake is treating a heavy bag like a ceiling lamp. A punching bag creates dynamic load—the forces are higher than the bag’s listed weight because your strikes create swing and shock.
Practical rules that keep homes intact:
- Mount to structure, not surface. You need a joist/beam or a properly rated stand. Drywall anchors are not for this.
- Over-rate your hardware. If you’re using an 80 lb bag, choose mounting hardware rated well above that because impact and swing increase load.
- Use a swivel. It reduces chain twist and decreases stress on the mount during combinations.
- Check fasteners regularly. A quick monthly check prevents “mystery wobble” that turns into damage.
If you’re renting or you’re unsure about ceiling structure, a freestanding bag can be the safer and simpler path.
How do you stop a freestanding bag from walking or tipping?
Freestanding bags usually “walk” for three reasons: the base is too light, the floor is too slippery, or your strikes push the bag sideways (hooks and kicks do this more than straight punches).
Fixes that work in real rooms:
- Choose the right fill: sand = highest stability; water = easier setup and moving.
- Use a thick rubber mat: reduces sliding, vibration, and noise.
- Place on one consistent surface: avoid half carpet / half tile placements—uneven friction makes wobble worse.
- Adjust distance: standing too close makes you shove the bag; a proper range makes your punches land cleaner and reduces tipping.
If your training includes lots of kicks, stability matters more—consider sand fill (or a heavier base design) and a mat.
Do you need wraps and gloves for wrist safety?
If you want to train consistently, wraps and gloves are not optional for most people. Wrist pain is one of the fastest ways home training dies out.
Why they matter:
- Wraps stabilize your wrist and spread impact across knuckles.
- Gloves add padding, reduce skin damage, and protect joints over hundreds of strikes.
A realistic home training volume can easily reach 1,000–3,000 punches per week (for example, 3 sessions × 6–10 rounds × light-to-moderate combinations). Even if you’re not hitting hard, that repetition adds up. Wraps and gloves help you keep training without accumulating small injuries.
If you’re buying a bag for a family, this becomes even more important because kids and beginners tend to land with less consistent alignment.
How do you place a bag for footwork, clearance, and noise control?
Placement is a safety feature. The bag should support movement, not trap you.
A simple home layout checklist:
- Clearance: leave room to step around the bag and pivot without hitting furniture or walls. Most people underestimate how much space hooks and angles require.
- Swing zone (hanging bags): account for the bag’s arc. If the bag can swing into a wall, you’ll either damage the wall or change your technique to avoid it.
- Floor protection: use a mat to reduce vibration transfer (especially in apartments).
- Noise strategy: softer contact surfaces and mats reduce sharp impact noise. Training earlier hours and using controlled power rounds also helps.
If you’re in an apartment, a freestanding bag on a mat is often the most neighbor-friendly setup.
What is the safest beginner setup for small spaces?
If you’re new and space is limited, safety and consistency matter more than “gym authenticity.”
A beginner-friendly setup usually looks like:
- freestanding bag (no drilling, controlled footprint)
- water base (easy fill/drain) or sand if you need extra stability
- non-slip mat
- basic wraps + 12–16 oz gloves for comfort during longer rounds
The goal is to create a setup that’s “ready in 30 seconds,” because that’s how you win the habit battle.
Quick Home Safety Checklist (save this before you buy)
| Setup Item | Why It Matters | Minimum Standard |
|---|---|---|
| Mount / stand rating | prevents failures and damage | rated above bag + dynamic load |
| Base fill + mat | stability + floor protection | stable base + non-slip mat |
| Clearance | prevents collisions and bad form | room to pivot + swing zone |
| Hand protection | prevents training-ending pain | wraps + gloves for most users |
| Regular checks | catches problems early | monthly bolt/valve inspection |
Buy In-Stock on Amazon or Get a Custom Quote from Epsilon
If you’re ready to stop guessing and start training, Epsilon makes it easy to take the next step. Whether you want something delivered fast, built to your spec, or tested before you scale, we can support you with a clear path forward.
Most shoppers choose an in-stock option so they can start training right away. Brands, gyms, and retail programs typically choose OEM/ODM to build a product that matches their audience—structure, stability target, PVC or composite build, surface feel, graphics, packaging, and compliance-ready documentation. If you prefer to validate performance first, we can also provide samples so you can test stability, rebound feel, footprint, and noise level in real sessions.
To recommend the right direction quickly, tell us your scenario in one message: training style (boxing/MMA/fitness), adult vs kids, apartment vs garage, hanging vs freestanding, and whether you prefer easier moving or maximum stability for the base. We’ll point you to the best-fit in-stock option—or quote a custom build that performs consistently at scale.
- Shop In-Stock Punching Bags
- Request a Custom Quote (OEM/ODM)
- Request a Sample
Explore more EPN outdoor favorites:
Get A Fast quote
Here, bringing your inflatable concepts to life is no longer a challenge—it’s a collaborative journey where American Epsilon helps families, outdoor enthusiasts, and global brands transform creative ideas into safe, certified, and market-ready inflatable solutions.


Partner With Epsilon
Whether you are a family looking for safe backyard fun or a brand seeking large-scale OEM/ODM solutions, American Epsilon Inc. guarantees every inflatable is built with safety, durability, and excitement in mind. With flexible low MOQs, strategically placed warehouses in the U.S., Canada, U.K., and Germany, plus 24/7 professional support, we ensure smooth delivery and reliable service worldwide.
Ready to bring your inflatable ideas to life? Request free samples, fast prototypes, and customized designs today—your trusted inflatable journey starts here.