Skip to content
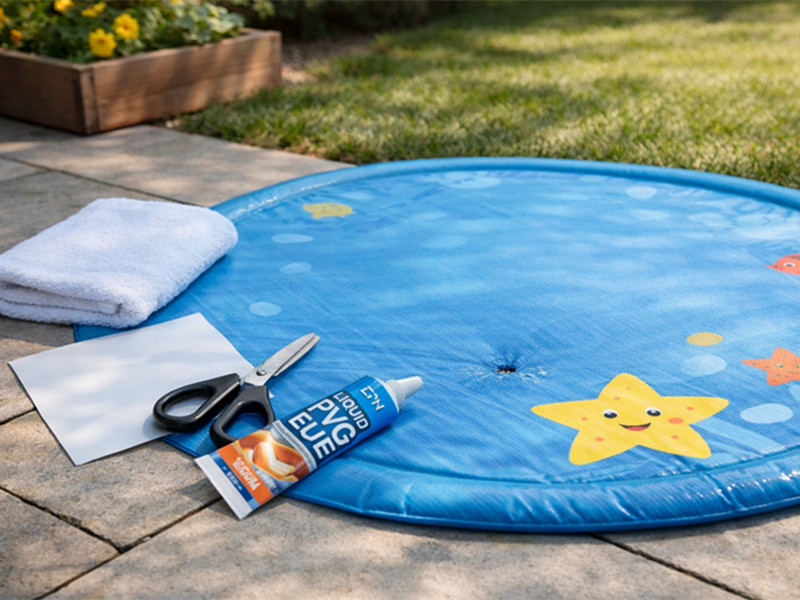
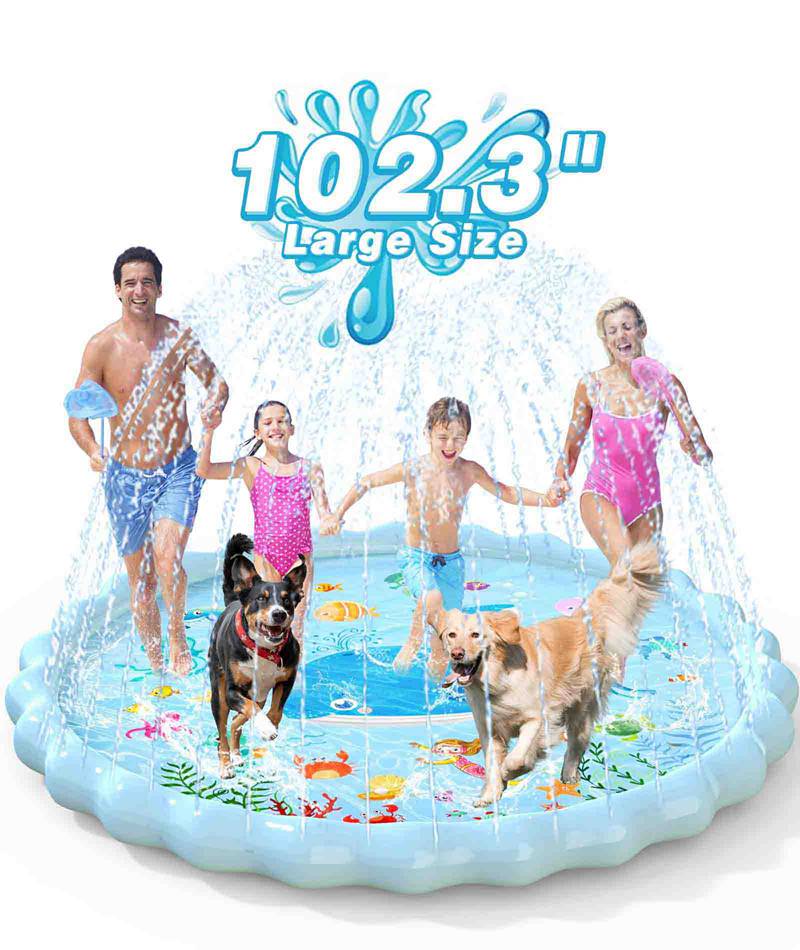
A splash pad usually does not fail all at once. In most cases, the first sign is small enough to ignore. One section sprays lower than the rest. The outer ring feels softer on one side. A damp patch shows up underneath after playtime, but the splash pad still works well enough, so the repair gets pushed to another day. That is often how a tiny puncture turns into a larger tear, a weakened seam, or a product people replace earlier than expected.
The good news is that many splash pad leaks can be fixed at home. For most PVC splash pads, the repair itself is not complicated: find the leak, clean and dry the area, apply a properly sized patch with the right adhesive, and let it cure fully before using the splash pad again. What makes the real difference is not complexity. It is whether the small details are handled well.
That matters for more than convenience. For families, a solid repair means more playtime, less waste, and fewer repeat leaks. For retailers and brands, it says something important about long-term product value. A splash pad that can be repaired cleanly and kept in service longer feels more dependable than one that only performs well at first.
If you are dealing with a small hole, a weak edge, or a seam leak, this guide will walk you through the full process in a practical way. It covers what causes splash pads to leak, what materials work best, how to patch them properly, how to handle different types of damage, and how to help the product last longer after the repair.
.jpg)
Why Does a Splash Pad Leak?
A splash pad usually leaks because the material has been punctured, worn thin, stressed repeatedly in the same area, or weakened over time by water pressure, sunlight, and outdoor use. The most common problem areas are the bottom panel, the outer ring, the seam lines, and the hose connection zone. Even small damage matters because water pressure keeps working against it every time the splash pad is used.
A lot of people assume leaks happen because the splash pad is simply too thin. Sometimes that is part of the issue, but everyday wear is usually more specific than that. A decent PVC splash pad can still wear out early if it is used on rough ground, exposed to higher pressure than necessary, folded sharply while damp, or left in heat for long periods. Splash pads rarely fail because of one dramatic event. More often, they wear down through repeated strain.
Another reason leaks are so common is that splash pads are doing more work than they appear to. They are not just lying flat in the yard. They are handling water flow, foot traffic, bending, pressure shifts, storage creases, and changing temperatures. Once you understand where that stress builds up, repairs become easier and prevention becomes much more realistic.

Where Does a Splash Pad Leak Most?
Most leaks show up in the same few places.
The first is the bottom panel. This is the part that stays in direct contact with the ground, so it takes the most friction. A lawn may look soft and harmless, but short grass can hide small stones, dry twigs, thorn pieces, sprinkler edges, or hard soil patches. On patios, the problem changes. The surface may be cleaner, but rough texture can still wear down PVC gradually through repeated use.
The second common area is the outer ring. This section works hard. It carries water around the perimeter, supports the spray layout, and gets stepped on over and over. That makes it one of the most stressed parts of the splash pad. Over time, pressure, compression, and constant movement can make the ring more vulnerable than the center surface.
The third major weak point is the seam line. Seams connect separate material sections, so they naturally carry more structural stress. If a splash pad is folded too sharply, over-pressurized, stored damp, or made with weaker seam bonding, wear often starts here.
The hose inlet is another area worth checking. It is easy to overlook, but the hose itself can add strain. A heavy hose pulling sideways, a sharp bend at the connector, or sudden full water pressure can all stress the inlet zone.
| Leak Area | Why It Happens | What Users Usually Notice First |
|---|---|---|
| Bottom panel | Ground friction, hidden debris, dragging | Water under the pad |
| Outer ring | Foot traffic, pressure stress, flexing | Uneven spray or weak edge |
| Seam line | Repeated folding, tension, bond fatigue | Slow leak along edge or join |
| Hose connection | Pulling force, twisting, pressure surge | Drip near inlet or unstable spray |
The useful takeaway is simple: splash pad leaks are usually predictable. Once you know where stress and wear collect, you know where to inspect first.
Do Small Splash Pad Holes Matter?
Yes, and usually more than people expect.
A tiny hole may not stop the splash pad from working right away, but it often starts affecting performance before anyone notices the actual leak. Water begins escaping from the damaged spot, which lowers pressure where the pad should be holding it. That can reduce spray height, weaken ring stability, and increase strain on the surrounding material.
That is why a small hole is rarely just cosmetic. It is often the beginning of a larger problem.
Small holes matter for three practical reasons:
- They reduce spray consistency.
- They tend to grow under pressure and foot traffic.
- They make later repair harder if ignored too long.
A fresh puncture on clean material is often one of the easiest repairs to make. The same puncture, after several more uses, may already have dirt buildup, softened edges, or stress spreading around it. That is often when people decide the patch “didn’t work,” even though the real issue is that the repair came too late.
| Damage Size | What It Usually Means | Best Response |
|---|---|---|
| Tiny pinhole | Early-stage leak | Patch early |
| Small visible hole | Active pressure loss | Repair immediately |
| Short slit or tear | Damage spreading | Use wider patch |
| Repeated leak in same area | Material may be weakened | Repair and reassess long-term use |
A lot of users ask whether they can keep using the splash pad for a while before fixing a small hole. Technically, sometimes yes. In practice, that often turns an easy repair into a larger, less reliable one.
How Long Does a Splash Pad Last?
Most splash pads last about 1 to 3 seasons in normal family use, but actual lifespan depends on several factors working together. Material quality, setup surface, water pressure, UV exposure, storage habits, and early repair all matter. A better-made PVC splash pad used on a smooth surface and stored properly can last much longer than a lower-grade one used hard and put away wet.
That is why two splash pads that look similar online can perform very differently over time.
The biggest factors are usually these:
- Material quality: better PVC stays flexible longer and patches more reliably.
- Surface condition: smoother ground reduces puncture risk.
- Water pressure: moderate pressure causes less structural stress.
- Sun exposure: long UV exposure speeds up aging.
- Storage habits: damp storage and repeated hard folds shorten lifespan.
- Early maintenance: small repairs often prevent larger failures.
| Use Pattern | Estimated Lifespan |
|---|---|
| Rough ground + high pressure + poor storage | Less than 1 season to 1 season |
| Average family use + mixed care habits | 1 to 2 seasons |
| Smooth setup + moderate pressure + better storage | 2 to 3 seasons |
| Better material + careful use + early repair | 3 seasons or longer in many cases |
In other words, value is not only about purchase price. A splash pad that lasts longer, repairs better, and keeps working through repeated use is often the better buy.
What Do You Need to Patch a Splash Pad?
To patch a splash pad properly, you need four things working together: the right patch material, the right adhesive, a clean and dry surface, and enough cure time. Most failed repairs happen because one of those four is missing, rushed, or mismatched.
A lot of people think repair is mostly about glue. In reality, patching is a full process. Even a good adhesive will struggle if the surface is damp, dusty, oily, or under tension. On the other hand, a simple PVC repair patch can hold very well when the area is prepared correctly and the patch is sized for the way that section actually moves.
That is especially important with splash pads because they are not static products. They get wet, flex, hold pressure, get stepped on, and then get folded into storage. The repair has to behave like part of the product, not just like something attached to the surface.

What Is the Best Splash Pad Patch Kit?
The best splash pad patch kit is one designed for flexible PVC or similar water-use materials, not for rigid plastic, fabric, or short-term tape repairs. The patch material should move with the splash pad, and the adhesive should stay bonded after moisture, heat, and repeated bending.
A useful patch kit usually includes:
- PVC patch sheet or matching repair material
- waterproof flexible adhesive
- enough patch area to cut custom shapes
- basic instructions for surface prep and cure time
Pre-cut patches can be convenient, but custom-cut patches are usually more effective because damage is rarely perfectly shaped. Rounded patches generally perform better than square ones because sharp corners are more likely to lift first.
| Repair Method | Short-Term Hold | Long-Term Hold | Best Use |
|---|---|---|---|
| PVC patch + PVC adhesive | Strong | Strong | Best overall repair |
| Self-adhesive patch | Fair | Fair to moderate | Minor quick fix |
| Waterproof repair tape | Fair | Weak | Temporary emergency use |
| Fabric patch | Weak | Weak | Not recommended |
| Glue only | Weak | Weak | Not recommended |
The biggest mistake is choosing speed over compatibility. A repair tape may look convenient, but splash pads deal with moisture, sunlight, flexing, pressure, and repeated use. That is why something that “sticks fast” does not always “hold well.”
Which Glue Works for a Splash Pad?
The best glue for a splash pad is a PVC-compatible adhesive made for flexible waterproof repair. What matters is not only how strong it feels after drying, but whether it stays bonded while the splash pad bends, gets wet again, and handles pressure.
This is one of the most common repair mistakes. A glue may feel hard and solid once dry, but that hardness can become the problem. Splash pads need flexibility. If the adhesive cures too rigidly, the repaired area may crack or lift once the material bends again.
A suitable adhesive should:
- bond well to flexible PVC
- resist water after curing
- stay stable in warm outdoor conditions
- remain flexible rather than brittle
| Glue Type | Suitable for Splash Pads? | Main Issue |
|---|---|---|
| PVC repair adhesive | Yes | Best option when used correctly |
| Vinyl repair adhesive | Often yes | Check compatibility first |
| Super glue | No | Too brittle |
| Hot glue | No | Poor water performance |
| General household glue | Usually no | Weak or unreliable bond |
Using too much glue is also a common mistake. More adhesive does not automatically create a stronger repair. Too much can create ridges, trap air, slow curing, and weaken the edge bond. In most cases, a thin, even layer works better than a thick one.
Can You Patch a Splash Pad Without Sewing?
Yes, and in most cases that is the better choice.
Splash pads are sealed water products, not fabric goods. Sewing adds needle holes, interrupts the waterproof surface, and often creates new weak points around the original damage. Even if sewing looks secure at first, it usually does not restore the kind of flexible seal a splash pad needs.
A no-sew patch is usually better because it:
- avoids creating extra holes
- spreads stress more evenly
- stays flatter underfoot
- preserves waterproof integrity more effectively
| Repair Method | Waterproof | Flexible | Suitable for Splash Pads |
|---|---|---|---|
| PVC patch + adhesive | Yes | Yes | Yes |
| Sewing only | No | Limited | No |
| Sewing + patch overlay | Sometimes | Moderate | Only in special cases |
| Tape only | Limited | Limited | Temporary only |
The important point is not whether sewing is skipped. It is whether the bonded patch is done properly. A no-sew repair can hold very well when the surface is clean, the patch is sized correctly, and the cure time is respected.
How to Patch a Splash Pad Step by Step?
Patching a splash pad is not difficult, but it does reward patience. Most failed repairs happen for simple reasons: the wrong spot was patched, the area was not fully dry, the patch was too small, the glue was not suitable, or the splash pad was used again too soon.
In practical terms, the repair comes down to five steps:
- find the exact leak
- clean and dry the area fully
- cut the right patch shape and size
- apply adhesive evenly and press firmly
- allow enough curing time before reuse

How Do You Find a Splash Pad Leak?
Finding the exact leak is the first real job. Many users notice the symptom before they find the source. One side sprays lower, one part of the ring feels softer, or water keeps appearing underneath. The mistake is patching the first suspicious-looking spot without confirming where pressure is actually escaping.
Start by running the splash pad at low to moderate water flow. Avoid turning it on fully right away. A gentler setup makes it easier to see how the splash pad behaves. Look for:
- weaker spray in one section
- water collecting under one area
- visible beads of water on the surface
- a dark damp patch that returns after wiping
- drips near the seam or inlet
If the leak is not obvious, work in sections. Mentally divide the splash pad into smaller zones and inspect one at a time. For very small leaks, mark the area with a washable marker or removable sticker so you do not lose the exact spot after cleaning and repositioning the pad.
| What You Notice | What It Often Means | Where to Check First |
|---|---|---|
| One side sprays lower | Pressure loss in that section | Outer ring nearby |
| Water under the pad | Bottom puncture or edge leak | Bottom panel and perimeter |
| Spray is inconsistent overall | Pressure issue or multiple weak points | Inlet, ring, seams |
| One area feels softer | Leak hidden in that zone | Ring curve or underside |
| Drip near hose connection | Inlet strain or fitting issue | Hose connection area |
A careful ten-minute inspection here often saves a second repair later.
How Do You Clean a Splash Pad First?
A patch only bonds as well as the surface allows. On a splash pad, the area may look clean while still holding sunscreen residue, hose-water minerals, body oil, grass dust, soil particles, or hidden moisture. All of that weakens adhesion.
Start by draining the splash pad fully and drying the repair zone with a soft cloth. Then clean the area with mild soap and water or another PVC-safe cleaner that does not leave a slick residue. After cleaning, wipe the area again and allow it to air-dry completely.
The two most common mistakes are rushing and over-cleaning. A surface may look dry while still holding moisture around the texture or seam line. On the other hand, harsh solvents can damage the finish or affect flexibility.
A reliable prep routine looks like this:
- drain the splash pad fully
- remove visible dirt and debris
- clean with mild PVC-safe cleaner
- wipe dry with a soft cloth
- allow full air-drying
- keep the area clean while waiting
| Surface Condition | Likely Repair Result |
|---|---|
| Clean and fully dry | Stronger, flatter bond |
| Slightly damp | Adhesive may weaken |
| Oily or dusty | Patch edges may lift |
| Cleaner left residue | Uneven bond |
| Surface disturbed before cure | Repair may shift or peel |
This is one of the biggest reasons good patch material sometimes gets blamed unfairly. The patch often fails because the prep failed first.
How Do You Patch a Splash Pad Properly?
Once the area is clean and dry, the next step is building a patch that supports the whole damaged zone, not just the visible opening. The patch should be larger than the hole or tear on every side. For small punctures, extending the patch roughly 1 inch beyond the damage in all directions is usually a good baseline. For tears, edge damage, or near-seam repairs, a wider margin is usually safer.
Rounded patches perform better than square ones because corners are more likely to lift. A round, oval, or rounded rectangle is often the better choice.
Before applying adhesive, dry-fit the patch once to confirm the size and alignment. Then apply adhesive in a thin, even layer. Too much glue can create ridges, slow curing, and weaken the edge bond. Once the patch is placed, press from the center outward to remove trapped air and improve contact.
A dependable patching routine usually looks like this:
- cut a rounded patch
- make sure it covers the damage and surrounding stress zone
- dry-fit the patch
- apply adhesive evenly
- place the patch carefully
- press from center to edges
- leave the area flat while curing
| Damage Type | Patch Goal | Best Patch Approach |
|---|---|---|
| Tiny puncture | Seal pressure loss | Standard rounded patch |
| Small tear | Stop damage from spreading | Wider patch beyond both ends |
| Edge leak | Support curved stress area | Broad rounded reinforcement |
| Near seam | Stabilize moving area | Larger patch with extra margin |
A good patch usually looks simple and flat. That is often a sign it was done right.
How Long Should a Splash Pad Patch Dry?
Dry time is where many otherwise good repairs fail. A patch may feel dry on the surface long before it is ready for pressure, bending, and foot traffic. That difference matters a lot.
The safest approach is to follow the adhesive instructions and then allow extra time whenever possible, especially in cool or humid conditions. Warm, dry air generally helps. Humidity slows curing. Thick glue application also increases drying time.
People often confuse three different stages:
- surface dry
- stable enough to stay in place
- fully cured for real use
For a splash pad, only the last stage matters.
| Condition | What It Usually Means |
|---|---|
| Warm, dry environment | Faster, more stable curing |
| Cool weather | Slower cure, wait longer |
| High humidity | Bond may need extra time |
| Thick adhesive layer | Drying may be delayed |
| Larger patch area | Longer cure is safer |
A practical rule is to do the repair at the end of the day and leave the splash pad untouched overnight or longer. Extra cure time costs nothing and often prevents a second repair attempt.
How Do You Fix Different Splash Pad Damage?
Not all splash pad damage behaves the same way. A small hole is usually the easiest repair because the damage is contained. A tear is more serious because it has direction and can continue spreading. Edge leaks are harder because the perimeter flexes more and holds more pressure. Seam damage requires the most caution because seams are structural join points rather than simple flat surfaces.

How Do You Fix a Hole in a Splash Pad?
A hole is the most common type of splash pad damage and usually the easiest to repair. In many cases, the surrounding material is still stable, which gives the patch a reliable base.
After locating the hole, clean and dry the area completely, then place a rounded PVC patch with enough margin around the damage. Keep the patch centered, press it flat, and allow full cure time before reusing the splash pad.
| Hole Location | Repair Difficulty | What to Focus On |
|---|---|---|
| Center panel | Easy | Clean seal and standard patch size |
| Bottom near edge | Easy to Moderate | Slightly wider patch margin |
| Outer ring | Moderate | Support both hole and stress zone |
| Near inlet | Moderate to Hard | Check for connection stress too |
A small hole repaired early often gives the best return for the least effort.
How Do You Patch a Small Splash Pad Tear?
A tear needs more care than a hole because it can keep spreading, especially from the ends. The goal is not just to close the opening, but to stop the split from traveling farther.
Let the torn section rest in its natural shape. Do not pull it tightly to make it look neat. Artificial tension often causes the repair to fail once the splash pad flexes again. The patch should cover the full tear and extend beyond both ends.
| Tear Condition | Best Repair Approach | Main Risk |
|---|---|---|
| Short clean tear on flat area | Wider rounded patch | Tear spreads if patch is too small |
| Tear near edge | Larger reinforcement patch | Edge movement stresses bond |
| Tear along fold line | Patch plus extra cure time | Material may already be fatigued |
| Tear in weakened area | Repair cautiously | Surrounding PVC may continue failing |
In many cases, the best repair is the one that spreads force gently and stays flat during use.
How Do You Fix a Splash Pad Edge Leak?
Edge leaks are common because the perimeter carries water, supports spray, gets stepped on constantly, and usually takes the most folding stress in storage. That makes the edge one of the hardest-working parts of the splash pad.
To repair an edge leak properly, release all pressure from that section and let it lie as flat as possible. Clean the area carefully, because edges often collect residue that weakens adhesion. Then use a patch large enough to support the whole stressed area, not just the visible opening.
A better edge repair often includes:
- a wider patch shape
- careful cleaning of the curved area
- gradual pressure testing after cure
- close monitoring during the next few uses
| Edge Repair Factor | Why It Matters |
|---|---|
| Curved surface | Makes flat bonding harder |
| Foot traffic | Adds repeated compression |
| Water flow | Concentrates pressure |
| Dirt buildup | Weakens edge adhesion |
| Folding strain | Reopens weak repair zones |
A narrow patch may cover the leak, but it often does not reduce the stress around it. That is why edge repairs need a little more patch area and a little more patience.
How Do You Repair a Splash Pad Seam?
Seam repair requires the most judgment because a seam is not just a surface. It is a structural join between material sections. If a seam starts separating, the issue may involve both the visible leak and the stress that caused the bond to weaken.
A small isolated seam leak can sometimes be reinforced with a broad patch if the surrounding material is still stable and flexible. But if the seam is separating across a longer distance, or if the nearby material already feels unstable, repair becomes less predictable.
| Seam Condition | Repair Outlook | Practical Next Step |
|---|---|---|
| Tiny isolated seam leak | Fair to Good | Careful reinforcement patch |
| Short seam lift | Moderate | Repair and monitor closely |
| Longer separation | Limited | Temporary repair only in many cases |
| Repeated seam failure | Poor | Replacement may be smarter |
| Seam leak near inlet | Poor to Limited | Advanced repair or replacement |
Not every seam problem should be treated like a simple hole. Some are repairable. Others are signs the product has reached the limit of practical repair.

How Can You Protect a Splash Pad Longer?
A splash pad usually lasts longer because of everyday habits, not because of one dramatic fix. Most early damage begins quietly: rough ground under the base, water pressure set too high, residue left on the surface after use, or the same tight fold repeated in storage. By the time a leak becomes visible, the wear has often been building for weeks.
The biggest gains in lifespan usually come from a few simple habits:
- choose a cleaner, lower-wear setup surface
- keep water pressure moderate and stable
- rinse off dirt and residue after use
- dry the splash pad fully before storage
- avoid repeated stress on the same folds and edges
Which Surface Is Best for a Splash Pad?
The best surface for a splash pad is flat, clean, and low-abrasion. In everyday use, that usually means a checked lawn, a smooth patio, or another stable outdoor area without sharp debris, rough texture, or strong heat buildup.
Grass is often the first choice because it feels softer and cooler, but it still needs inspection. Patios can be convenient, but some are rougher than they look. The real question is not whether the surface looks tidy. It is whether it reduces puncture risk and unnecessary wear.
| Surface Type | Comfort | Puncture Risk | Wear Risk | Overall Suitability |
|---|---|---|---|---|
| Checked lawn | High | Low to Moderate | Low | Very Good |
| Smooth sealed patio | Moderate | Low | Moderate | Good |
| Textured concrete | Moderate | Moderate | High | Fair |
| Uneven pavers | Low | Moderate to High | High | Poor |
| Gravel-adjacent area | Low | High | High | Poor |
A quick ground check before setup can prevent a surprising number of repairs later.

Can Water Pressure Damage a Splash Pad?
Yes, and it is one of the most overlooked causes of early wear.
Many users assume stronger water pressure automatically means better fun. In reality, too much pressure often creates more strain than benefit. When water is pushed in too aggressively, the outer ring, spray-hole area, seams, and inlet all take on extra stress.
A safer habit is simple:
- turn on the water gradually
- watch how the ring fills
- adjust only as much as needed for stable spray
- avoid sudden jumps to full pressure
| Water Use Habit | Effect on Play | Effect on Product Life |
|---|---|---|
| Gradual pressure increase | Stable spray pattern | Better long-term durability |
| Moderate steady pressure | Comfortable, balanced use | Lower stress on seams and ring |
| Sudden full pressure | More dramatic spray at first | Higher strain risk |
| Constant maximum pressure | Inconsistent in some cases | Faster wear over time |
A moderate, stable spray pattern is usually better for both fun and product life than maximum pressure.
How Should You Store a Splash Pad?
A splash pad should be stored clean, fully dry, and folded in a way that does not keep stressing the same exact points. Good storage helps prevent odor, sticking, crease fatigue, edge warping, and hidden wear that only becomes obvious the next time the splash pad is used.
After use, it helps to:
- rinse away dirt and residue
- dry the splash pad fully
- fold gently rather than tightly
- vary fold lines sometimes
- store it in a cool, dry place
- keep it away from sharp objects and heavy weight
| After-Use Step | Why It Helps |
|---|---|
| Rinse away dirt and residue | Reduces buildup and surface wear |
| Dry fully before folding | Helps prevent odor and hidden moisture stress |
| Fold gently | Lowers crease fatigue |
| Change fold pattern sometimes | Reduces repeated line stress |
| Store in a cool, dry place | Protects PVC from heat and humidity |
| Keep away from sharp objects | Prevents storage damage |
In many homes, the splash pad spends more total time in storage than in active play. That means storage quality affects lifespan almost as much as use conditions do.

FAQ
Can I patch a splash pad the same day I find the leak?
Yes, but only if the surface can be cleaned and dried fully and the patch is given enough cure time. In most cases, same-day repair is possible, but same-hour reuse is where problems usually start.
Can I use tape instead of a real patch kit?
Tape can work as a short-term emergency fix, but it is usually not the best long-term solution for splash pads. Moisture, pressure, heat, and repeated flexing often cause tape repairs to fail earlier than bonded PVC patches.
Is a seam leak worth repairing?
Sometimes. A very small isolated seam leak can often be reinforced successfully. A longer seam separation or repeated seam failure usually needs more caution and may not be worth repeated repair attempts.
Can I patch a splash pad without sewing?
Yes. In most cases, a no-sew PVC patch is the better method because it preserves waterproof integrity and avoids creating new needle holes.
How do I know when it is better to replace the splash pad?
If the same area keeps failing, the seam is separating across a longer section, or the surrounding material already feels weak, stiff, or unstable, replacement may be the more practical choice.
Final Thoughts
Patching a splash pad is usually very possible, but a lasting repair depends on doing the small things well. Finding the exact leak, cleaning the area properly, choosing a patch that fits the material and the damage, allowing real cure time, and adjusting everyday use habits all make a clear difference. In many cases, a simple early repair can save a splash pad from turning into a much larger problem later.
That matters for families who want a backyard product that keeps working through the season, and it matters just as much for retailers, distributors, and growing brands that care about durability in real use rather than just appearance on day one. A splash pad that holds up better, patches more cleanly, and performs more consistently creates better long-term value.
At EPN, we focus on PVC and composite products designed for real family, pet, and outdoor use. That includes splash pads, pet splash pads, inflatable pools, dog pools, water-play products, floating items, snow tubes, and more. The goal is not simply to offer products that look good in listing images, but to build products that feel dependable in actual use, with materials, structure, and manufacturing choices that support longer service life and a better user experience.
If you are sourcing splash pads, comparing suppliers, or planning your own product line, EPN supports both ready-to-sell products and custom OEM/ODM development, including custom sizing, graphics, packaging, logo printing, and broader PVC product-line support.
If you also need a reliable adhesive for PVC splash pad repairs, a dedicated PVC repair glue is one of the simplest ways to make small repairs more durable and more consistent.