Skip to content
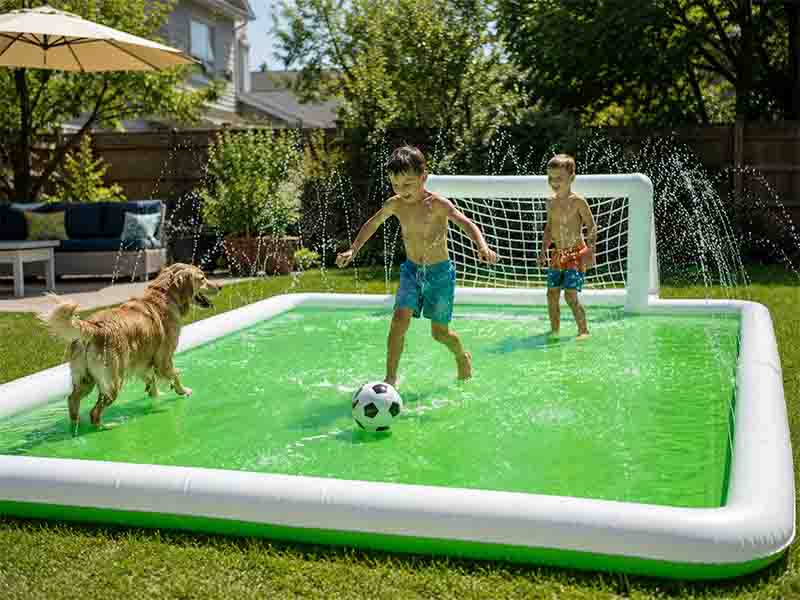
A splash pad can make a hot backyard feel like the easiest summer upgrade. Connect the hose, let the outer ring fill, and children or dogs can start running through the spray within minutes. The part many families notice later is cleanup. After one afternoon outside, the surface can collect grass clippings, sunscreen film, muddy paw prints, pet hair, leaves, and water trapped near the edge. If the pad is folded too soon, that small amount of moisture can turn into odor before the next setup.
To clean a splash pad after backyard use, drain it fully, rinse the surface with fresh water, wipe dirty areas with mild soap, clear grass and sand from the spray holes, dry both sides, and store it only after the seams and hose connector are dry. A 5–10 minute rinse after each use can help reduce odor, mildew risk, clogged spray holes, and early PVC wear.
Good splash pad care is not complicated. It is about handling dirt while it is still fresh, drying the PVC before folding, and checking the small spots that are easy to miss. The families who get better summer use from a splash pad are usually not doing heavy cleaning every day. They simply build a short routine after play, so the next setup starts clean, fresh, and ready for water.
Why Splash Pad Cleaning Matters
Splash pad cleaning matters because backyard use leaves more than visible dirt behind. Grass, soil, sunscreen, pet hair, body oils, and standing water can stay on the PVC surface after play. Cleaning the pad soon after use keeps the surface fresher, helps the spray holes work evenly, reduces odor, and protects seam edges before storage.
Splash Pad Dirt Buildup
A splash pad sits directly on the ground, so dirt starts building up before the water even turns on. A clean lawn can still leave grass clippings, pollen, fine soil, small stones, and plant residue on the underside. Once the surface gets wet, those particles stick more easily to the PVC. Children running across the center can spread the dirt, while dogs can press it into the textured surface with wet paws.
The problem is not only visual. Dirt can hold moisture against the material, especially around the outer ring, seam edges, and fold lines. Fine sand or grit can also rub against printed areas when the pad is folded and stored. Over a full summer, repeated folding with grit inside can make the surface look older faster.
Fresh dirt is much easier to remove than dried dirt. A quick rinse right after backyard use usually takes about 5–10 minutes and can remove most grass, soil, and loose debris. Waiting until the next day often means the mud has dried, sunscreen has settled, and small particles have stuck to the surface.
| Dirt Source | Common Area | What It May Cause | Best Cleaning Move |
|---|---|---|---|
| Grass clippings | Underside, outer ring | Odor, wet residue | Rinse and flip dry |
| Fine soil | Center surface | Muddy marks | Rinse from center outward |
| Sand or grit | Spray holes, seams | Uneven spray, surface wear | Wipe gently after rinsing |
| Sunscreen | Main play area | Slick film | Mild soap and full rinse |
| Pet hair | Edge, connector, folds | Smell, visible mess | Remove before drying |
| Leaves | Drain path, edge | Staining, blocked flow | Clear before storage |
For families using the splash pad several times a week, cleaning after each play session is easier than doing one heavy wash later. The goal is not to scrub the pad every day. The goal is to remove fresh outdoor mess before it becomes harder to clean. If the surface still feels slick after draining, if grass is stuck under the outer ring, if pet hair gathers near the connector, or if the spray looks uneven at the next setup, the pad needs more than a quick rinse.
For more ground setup details, the guide Can You Use a Splash Pad on Grass is useful because grass condition, slope, stones, and moisture all affect how dirty the underside becomes after play.
Splash Pad Odor Risk
Splash pad odor usually starts when moisture is trapped inside folds. The pad may look empty after draining, but water can stay along the outer spray ring, seam path, hose connector, underside, and small low spots. If the pad is folded too soon, that moisture gets pressed between PVC layers with grass, sunscreen, soil, or pet residue.
Warm weather makes the odor problem appear faster. After a hot afternoon, the splash pad and the ground beneath it can stay warm for a while. When a damp pad is placed inside a storage bin, garage corner, or outdoor toy box, airflow becomes limited. A light musty smell can appear before the next setup.
Drying matters as much as washing. The center of the pad may feel dry after 20–30 minutes, but the outer ring and underside often need longer. Many backyard splash pads need around 30–60 minutes of open-air drying, depending on shade, humidity, wind, and ground moisture. Thick edges and connector areas may need extra towel wiping.
The safest habit is to drain the splash pad fully after play, rinse away grass and sunscreen residue, wipe the outer ring and connector, then flip the pad once so the underside can dry. The pad should only be folded when both sides feel dry. If it is stored on a damp garage floor or sealed inside a wet storage bag, odor is much more likely to appear.
Odor does not always mean the splash pad material is poor. In many cases, the cause is trapped water and backyard residue. Good cleaning and drying habits can prevent most smell problems before they start.
Splash Pad Pet Mess
Pet use makes splash pad cleaning more important because dogs bring a different kind of mess. A child may step onto the pad from a towel or patio, but a dog often runs through grass, soil, mulch, mud, and dusty paths before reaching the water. Once paws are wet, dirt spreads quickly across the surface.
Dog hair is another issue. Wet hair can collect around the outer ring, hose connector, spray holes, and fold lines. If it dries onto the PVC, it becomes harder to rinse away later. Pet saliva and muddy paw marks can also leave a light film, especially after longer play sessions.
A dog splash pad should be rinsed after every pet use, even if it still looks fairly clean. For large dogs or multiple dogs, pay more attention to the entry area and the outer ring. These spots usually carry the most paw traffic. If the pad is used by both children and pets, cleaning after dog play helps keep the next session more comfortable for the whole family.
Pet splash pad care should focus on paw dirt, pet hair, spray holes, and the underside. Long nails can also increase surface wear during fast turns, so basic paw care matters when dogs use the pad often. EPN splash pads are developed for real backyard use, including family play and pet cooling scenes. Durable PVC, stable seams, balanced spray holes, and practical hose connection all matter. Still, even a stronger splash pad lasts better when mud, pet hair, and moisture are not left on the surface after every use.
How to Clean a Splash Pad
To clean a splash pad properly, start by turning off the hose and draining the water before moving it. Rinse the surface from the center toward the edge, then wipe dirty areas with mild soap and a soft cloth. Most normal backyard cleaning takes about 10–20 minutes, depending on mud, sunscreen, pets, and grass.

A splash pad should be drained before any real cleaning begins. Turn off the hose first, then wait for the outer spray ring to lose pressure. Once the spray stops, lift one side of the pad slowly and guide the water toward grass, a patio drain, or another safe drainage area. Avoid pulling or dragging the pad while it is still full of water.
Water weight can put extra stress on the seams, especially around the outer ring and hose connector. A dry splash pad is easy to move, but a wet one can be much heavier than it looks. If water stays inside the ring or low spots, moving it too quickly may stretch the material or twist the connector area.
Draining also helps you see where the real mess is. Grass clippings often collect under the edge. Mud may stay near low spots. Sunscreen and body oils may remain on the center surface. Pet hair may gather near the water inlet. If cleaning starts before draining, dirt spreads around instead of washing away.
| Step | What to Do | Time Needed | Why It Helps |
|---|---|---|---|
| 1 | Turn off the hose | 30 seconds | Stops water pressure |
| 2 | Wait for spray to drop | 30–60 seconds | Relieves the outer ring |
| 3 | Lift one side gently | 1–2 minutes | Guides water out safely |
| 4 | Check low spots | 1 minute | Finds trapped water |
| 5 | Look under the edge | 1–2 minutes | Catches grass, mud, and grit |
If the splash pad was used on grass, do not skip the underside check. The bottom may look less important because children or pets do not play on it directly, but it often holds the most dirt. Wet grass, soil, and small stones can stay underneath and get folded into the pad if not removed.
Splash Pad Quick Rinse
After draining, rinse the splash pad with clean hose water. Start from the center and move outward toward the edge. This direction pushes dirt away from the play area instead of spreading it back across the surface. Use low to medium water pressure. High pressure is rarely needed for daily cleaning and may push fine sand toward the spray holes.
The center area usually holds footprints, sunscreen residue, and light dirt. The outer ring usually collects grass, leaves, and muddy water. The hose connector can hold grit. The underside can hold soil and moisture from the lawn. A careful rinse should cover all of these areas, not just the top surface.
For light backyard use, a 5–10 minute rinse is usually enough. For muddy yards, dog use, food spills, or longer summer play sessions, expect closer to 15–20 minutes. The faster you rinse after play, the easier the cleaning will be. Fresh mud rinses away quickly. Dried mud usually needs wiping.
| Splash Pad Area | Cleaning Focus | Suggested Time |
|---|---|---|
| Center surface | Footprints, sunscreen, light dirt | 1–2 minutes |
| Outer spray ring | Grass, leaves, spray-hole line | 2–3 minutes |
| Hose connector | Sand, thread area, inlet residue | 30–60 seconds |
| Seam edges | Dirt lines, trapped moisture | 1–2 minutes |
| Underside | Mud, grass, soil marks | 2–4 minutes |
Do not forget the spray-hole line while rinsing. If small grass pieces or sand sit around the holes, the spray may look uneven next time. Uneven spray does not always mean the splash pad has a defect. In many cases, the holes simply need to be rinsed clean.
Splash Pad Mild Soap
Mild soap is useful when water alone does not remove dirt, sunscreen, pet residue, or sticky marks. Mix a small amount of mild dish soap with clean water, then wipe the dirty area with a soft cloth or sponge. A light soap mix is usually enough. The goal is to lift residue without leaving the surface slippery.
Use soap on areas that feel slick, cloudy, muddy, or sticky after rinsing. Sunscreen often leaves a thin film in the center play area. Dogs may leave paw marks, hair, and saliva near the edge. Mud can dry along seams and fold lines. These spots should be wiped gently before the pad is rinsed again.
Avoid stiff brushes, abrasive pads, harsh solvents, strong degreasers, and unknown outdoor cleaners. These can damage printed graphics, weaken surface texture, or affect PVC flexibility over time. Strong chemical cleaning should not be part of normal splash pad care unless the product care label clearly allows it and the pad is rinsed completely afterward.
| Cleaning Situation | Best Method | Avoid |
|---|---|---|
| Sunscreen film | Mild soap and soft cloth | Strong degreaser |
| Muddy paw marks | Rinse, wipe, rinse again | Hard scrubbing brush |
| Sticky surface | Light soap mix | Too much soap |
| Pet hair | Remove by hand, then rinse | Folding it in |
| Seam dirt | Soft cloth along seam | Sharp scraping tools |
| Connector grit | Wipe thread area gently | Forcing the hose on |
After using soap, rinse the splash pad until the surface feels clean and no longer slippery. This step matters because leftover soap can make the wet surface uncomfortable for children and pets. It can also attract more dirt during the next play session.
For regular family use, mild soap may only be needed every few sessions. For dog use, muddy lawns, or shared child-and-pet play, a light soap wipe after each heavy session is more practical. EPN splash pads are designed for repeated backyard use, but proper cleaning keeps the PVC surface, seam edges, spray holes, and hose connector in better condition through the summer.
Which Splash Pad Spots Need Care
The splash pad spots that need the most care are the spray holes, hose connector, seam edges, fold lines, and underside. These areas collect dirt faster than the open center surface. They also affect how the splash pad sprays, drains, dries, connects to the hose, and stores after use. A pad can look clean in the middle but still hold grass, sand, pet hair, and moisture around the edges.
Splash Pad Spray Holes
Splash pad spray holes need regular checking because they control the water pattern. When the holes are clean, water sprays more evenly toward the center. When grass, sand, mud, or small leaves collect around the holes, one side may spray lower, spray outward, or stop spraying in a few places.
Many families notice uneven spray and think the splash pad has a pressure issue. Sometimes that is true, especially if the garden hose has weak flow. But very often, the problem starts with small debris around the spray-hole line. A few pieces of grass or sand can affect several holes, especially after the pad is used on a lawn.
After each backyard use, rinse slowly around the outer ring. Use a soft cloth to wipe the spray-hole line if dirt is visible. Do not push metal pins, knives, toothpicks, or sharp tools into the holes. Sharp tools can stretch the openings or change the spray direction. If a hole looks blocked, rinse it from the outside and gently wipe around it instead.
| Spray Problem | Likely Cause | What to Check | Best Fix |
|---|---|---|---|
| One side sprays lower | Grass or sand near holes | Outer ring spray line | Rinse and wipe gently |
| Spray points outward | Pad not lying flat | Ground slope and ring shape | Move to flatter ground |
| Some holes do not spray | Small debris blockage | Individual spray holes | Rinse without sharp tools |
| Spray is weak overall | Low hose pressure | Hose flow and connector | Start low, adjust pressure |
| Spray changes during play | Pad shifted on grass | Underside and edge | Reposition and clear ground |
For families using the splash pad several times a week, spray holes should be checked after every use. For pet splash pads, the check is even more important because dogs can kick grass and mud toward the outer ring while playing.
If uneven spray happens together with dripping near the inlet, the guide Why Some Splash Pads Leak Easily can help users separate cleaning problems from setup problems, pressure problems, and connector problems.
Splash Pad Hose Connector
The hose connector needs care because it is the main water entry point. A clean connector helps water flow smoothly into the outer ring. A dirty connector can lead to dripping, side spray, poor sealing, or uneven water pressure. Sometimes what looks like a product leak is actually dirt, grit, or poor hose alignment around the connector.
After play, disconnect the hose and wipe the connector area before the pad dries. Look for sand, grass, soil, small stones, and pet hair around the thread and inlet. If water remains inside the connector area, hold that part downward for a few seconds and let it drain. Then wipe it dry with a towel.
The connector should not be twisted or bent during cleaning and storage. When the pad is folded, avoid placing the connector inside a tight crease. Repeated pressure on this area can make the next setup less smooth. If the connector is crushed under heavy storage items, it may not sit as naturally when attached to the hose.
Before the next setup, make sure the hose is attached straight, the thread area is clean, and the washer sits flat if the connector uses one. Start with low water pressure and increase it only after the outer ring begins filling evenly. If water sprays from the connection point, stop and adjust the hose before play starts.
A small connector check usually takes less than one minute, but it can prevent several common problems. For EPN splash pads, connector reliability is part of the product design focus, but daily handling still matters. Clean connection, gentle tightening, and careful folding help the pad perform better across repeated summer use.

Seam edges are one of the easiest areas to miss during cleaning. The center of the splash pad may look fresh after rinsing, but the seam path can still hold grass clippings, mud lines, sunscreen residue, pet hair, and water beads. On a round splash pad, the outer seam also sits close to the spray ring, so it often collects both dirt and moisture.
Seam care matters because seams are part of the structure that helps the splash pad hold water and keep its shape. Dirt left along the seams can dry into thin lines. When the pad is folded, those dry particles can rub against the PVC surface. Over time, repeated folding with grit inside may make the surface look worn faster.
After rinsing the center, use a soft cloth to follow the seam path. Wipe the top seam, outside edge, and underside seam. If the splash pad was used on grass, check the bottom edge carefully. Wet grass often sticks under the seam, especially when the pad has shifted during play.
| Seam Area | Common Issue | Cleaning Tip |
|---|---|---|
| Top seam | Dirt line after draining | Wipe with soft cloth |
| Outer edge | Grass and leaves | Rinse outward |
| Bottom seam | Wet soil and clippings | Flip and inspect |
| Fold lines | Hidden moisture | Dry before folding |
| Connector seam | Water pressure residue | Wipe and towel dry |
EPN splash pads are developed with attention to PVC material, welded edges, water distribution, and repeated outdoor use. Seam care supports that structure. Even a stronger seam lasts better when dirt, moisture, and grit are not left sitting along the edge after every play session.
Splash Pad Fold Lines
Splash pad fold lines need care because hidden dirt and moisture often stay there after cleaning. When a splash pad is opened on grass, the fold lines may sit slightly raised or slightly lower than the center. During play, water, sunscreen, grass, and fine soil can settle into these lines.
Fold lines also matter during storage. If the splash pad is folded along the same damp or dirty line each time, residue can stay trapped inside. This is one reason a pad may smell clean on the day it is washed but smell musty after being stored for several days.
Before folding, run your hand across the main fold areas. If the line feels gritty, rinse it again. If it feels slick, wipe it with mild soap and rinse fully. If it feels cool and damp, leave the pad open longer or towel-dry the area. The surface should feel dry and clean before storage.
Avoid forcing sharp creases through the same spot every time. Loose folding is better for regular summer use. If the pad came with a natural fold pattern, follow it gently, but do not press the folds flat with body weight or heavy storage items.
Splash Pad Underside
The underside of a splash pad often gets dirtier than the top, especially when used on grass. The bottom touches soil, lawn moisture, small stones, patio dust, and outdoor debris for the entire play session. Because families do not see it while children or pets are playing, it is easy to forget during cleanup.
After the top is rinsed, flip the splash pad and check the bottom. Look for mud patches, grass clippings, wet soil, small stones, and rough debris. These should be removed before drying and storage. If they are folded inside, they can create odor, leave marks, or rub against the PVC surface.
For pet use, the underside needs even more attention. Dogs can push or rotate the pad while entering and exiting. This movement can pull extra grass and mud under the edge. A quick underside rinse helps prevent dirty water from spreading back onto the clean top surface during folding.
The underside does not need heavy scrubbing every time. It needs a careful rinse, a quick wipe when needed, and enough drying time. For families using a splash pad on grass several times a week, this small habit can make the pad feel cleaner and last better through the season.
How Splash Pad Drying Helps
Splash pad drying helps prevent odor, mildew marks, sticky residue, water stains, and storage damage. After cleaning, the top surface, underside, seam edges, spray ring, hose connector, and fold lines should all dry before storage. Most splash pads need about 30–60 minutes of open-air drying, but thick edges, shaded lawns, and humid weather may need longer.
Splash Pad Top Drying
The top surface is the easiest part to see, so many families assume the splash pad is ready to fold once the center looks dry. That can be misleading. The middle play area usually dries first because it is flat and exposed to air. The outer spray ring, hose connector, seam edges, and textured areas often hold water longer.
After rinsing, spread the splash pad flat on a clean surface. Let water run off naturally, then wipe visible droplets with a towel. Pay special attention to the raised outer ring and any low spots in the center. If the pad was used with sunscreen, pet play, or muddy feet, towel wiping also helps remove the light film that water alone may not fully remove.
Drying time depends on weather and ground conditions. A splash pad placed on a clean patio with light sun may dry in about 30 minutes. A splash pad left on damp grass or in shade may need 60–90 minutes. Wind often helps more than strong sun because airflow reaches the surface more evenly.
| Drying Condition | Estimated Drying Time | What to Check |
|---|---|---|
| Sunny patio | 30–45 minutes | Outer ring and connector |
| Partial shade | 45–60 minutes | Seam edges and fold lines |
| Damp grass | 60–90 minutes | Underside and bottom seam |
| Humid weather | 60–120 minutes | Spray-hole line and low spots |
| After pet use | 60–90 minutes | Hair, paw marks, underside |
Do not leave the splash pad under harsh direct sun for unnecessary hours after it is already dry. PVC products are made for outdoor water play, but long heat exposure during storage preparation is not needed. Once the surface is dry, move it to shade or begin checking the underside.
For users comparing different materials and surface finishes, What Material Is Best for a Splash Pad explains why PVC thickness, flexibility, seam quality, and outdoor handling all affect cleaning and drying.

The underside of a splash pad often needs more drying time than the top. It sits directly on grass, soil, patio dust, or an outdoor mat during play. Even when the top surface feels dry, the bottom may still hold moisture from the lawn or small puddles trapped under the edge.
After the top surface is mostly dry, flip the splash pad carefully. A large splash pad is easier to flip with two people because water may still remain in the outer ring or seam areas. Once flipped, check for wet grass, mud marks, small stones, and soil. Rinse or wipe these areas before letting the underside dry.
Bottom drying is especially important when the splash pad is used on grass. Lawns hold moisture, and the bottom of the pad can stay damp even on a sunny day. If the underside is folded while wet, that moisture becomes trapped between PVC layers. This is one of the most common reasons a splash pad smells musty after storage.
For pet use, underside drying matters even more. Dogs may shift the pad while entering, turning, or chasing the spray. This movement can pull mud, grass, and paw debris under the edge. If that mess dries halfway and then gets folded inside, the next setup may start with odor or dirty streaks.
If the ground is still wet, move the splash pad to a clean patio, deck, driveway, or dry outdoor mat for the final drying stage. A dry surface under the pad makes a big difference.
Splash Pad Edge Drying
The outer edge is one of the slowest areas to dry because it is thicker, curved, and close to the spray holes. Water can sit along the raised ring even after the middle of the splash pad feels ready. If this area is folded too soon, trapped moisture can lead to odor, water marks, and a sticky feel around the edge.
After rinsing, run a towel around the outer ring. Follow the full circle instead of wiping only the visible wet spots. The spray-hole line, seam edge, and underside of the ring should all be checked. If water still beads around the spray holes, the pad needs more drying time.
This step also helps with spray performance. Grass, sand, or pet hair can stay near the holes after rinsing. Wiping the edge while drying lets families catch small debris before it hardens or gets folded into the pad.
| Edge Area | Common Issue | Drying Action |
|---|---|---|
| Spray-hole line | Water beads, sand, grass | Towel wipe and air-dry |
| Outer seam | Hidden moisture | Follow seam with cloth |
| Bottom edge | Wet soil, clippings | Flip and rinse if needed |
| Connector side | Drips, trapped water | Hold downward, then wipe |
| Folded edge | Damp crease | Leave open longer |
EPN splash pads are developed with attention to water distribution, PVC structure, and seam stability. Edge drying supports those design details. A cleaner, drier outer ring helps the pad fold better, store better, and spray more evenly during the next setup.
Splash Pad Damp Folding
Damp folding is one of the biggest causes of splash pad odor. A pad can look clean, but still hold moisture around the seam path, underside, connector, or spray ring. Once folded, those wet areas press together with limited airflow. If grass, sunscreen, pet hair, or mud is also inside the fold, the smell becomes stronger.
The safest rule is simple: fold only when both sides feel dry. Touch the surface with your hand instead of judging by appearance. If the pad feels cool, sticky, or damp in any area, leave it open longer. If storage cannot wait, towel-dry the wet spots first, fold the pad loosely, and open it again later to finish drying.
Avoid pressing the folded splash pad flat with your feet or placing heavy items on top right away. Pressure can trap moisture deeper in the fold and may stress the spray ring or hose connector. Loose folding is better for regular summer use.
A dry fold makes the next setup easier. The splash pad opens cleaner, smells fresher, and does not need extra washing before play can begin.
Splash Pad Drying Mistakes
Many splash pad drying problems come from small habits that seem harmless. Folding the pad because the center looks dry is one of them. Storing it in a closed bin right after rinsing is another. Leaving grass stuck to the underside can also create odor even if the top surface looks spotless.
Another common mistake is drying only in one position. If the pad stays flat on grass the entire time, the underside may never dry well. If it is placed over a fence or chair with sharp edges, the material may bend or stretch in one place. A clean flat area, followed by a careful flip, is usually safer.
Families should also avoid using high heat to speed up drying. Hair dryers, heaters, and very hot surfaces are not good drying tools for PVC splash pads. Natural airflow, towel wiping, and enough open time are better choices.
For families using a splash pad several times a week, drying is not an extra step. It is part of the cleaning routine. A well-dried splash pad needs less re-cleaning, creates fewer odor problems, and feels better for children and pets at the next backyard setup.
What Splash Pad Storage Needs
Splash pad storage needs four things: a fully dry surface, gentle folding, a clean storage space, and protection from heat, sharp objects, and heavy pressure. A splash pad may be made for outdoor water play, but it should not stay wet, dirty, compressed, or exposed after use. Good storage helps protect the PVC surface, seam edges, spray holes, hose connector, and printed design through repeated summer use.

A splash pad should be folded only after it is fully drained, cleaned, and dry on both sides. Folding is not just a space-saving step. It affects how the pad opens next time, how the spray ring sits, and whether moisture or dirt gets trapped inside.
Start by laying the splash pad flat after drying. Check the center, underside, outer ring, hose connector, seam edges, and fold lines with your hand. If any area feels cool, damp, gritty, or sticky, it is not ready for storage. Wipe the area again or leave the pad open for another 15–30 minutes.
Fold the splash pad loosely along natural lines. Avoid forcing sharp creases through the outer spray ring or across the hose connector. The connector area should sit naturally without being bent, twisted, or pressed under a tight fold. If the splash pad came folded in a certain direction from the package, use that as a guide, but do not press it flat with body weight.
| Folding Step | What to Do | What to Avoid |
|---|---|---|
| Before folding | Check both sides for moisture | Folding by appearance only |
| First fold | Follow natural fold lines | Sharp creases through the ring |
| Connector area | Keep it relaxed and protected | Bending it inside a tight fold |
| Outer ring | Fold loosely with space | Stepping on it to flatten |
| Final pack | Place in a dry bag or box | Packing with grass or sand inside |
If water comes out while folding, stop and reopen the pad. That means water is still trapped in the ring, seam, or low spots. Storing it in that condition can lead to odor, mildew marks, and a sticky surface next time.
Splash Pad Storage Place
The best place to store a splash pad is cool, dry, clean, and away from sharp objects. A garage shelf, closet, utility room, storage cabinet, or dry outdoor toy box can work well if the area stays protected. The main goal is to keep the pad away from moisture, heat, pressure, and puncture risks.
A splash pad should not be left outside for days after play. Even if it looks dry, outdoor storage exposes it to morning dew, rain, insects, dirt, direct sun, and temperature swings. A pad left on grass can also collect moisture from the ground again, even after it was dried.
Sharp objects are a common storage problem. Garden tools, pool poles, bike pedals, metal shelves, pruning shears, and rough plastic bins can leave pressure marks or small cuts if the folded pad is pushed against them. Heavy boxes can also press hard creases into the PVC, especially around the spray ring and connector.
| Storage Location | Good Choice? | Reason |
|---|---|---|
| Indoor closet | Yes | Dry, stable temperature, low puncture risk |
| Garage shelf | Yes, if dry | Convenient and protected from ground moisture |
| Outdoor toy box | Only if dry | Works for short-term storage when ventilated |
| Damp shed floor | No | Moisture can cause odor and mildew marks |
| Lawn or patio | No | Collects dirt, dew, insects, and sun exposure |
| Car trunk in summer | No | Heat can stress folded PVC |
| Under heavy tools | No | May crush connector or crease the spray ring |
For weekly summer use, a simple storage bin near the outdoor play area can be practical. For longer breaks, the pad should be cleaned more carefully, dried longer, folded loosely, and placed in a protected indoor or garage space.
For more long-term care planning, How to Choose a Splash Pad That Lasts More Than One Summer gives useful context on PVC durability, seam handling, storage habits, and repeated seasonal use.
Splash Pad Storage Bag
A storage bag can help keep a splash pad cleaner, but only if the pad is completely dry before packing. A bag should not be used to hide moisture. If the splash pad is even slightly damp, a closed bag can trap the smell faster than open storage.
Before placing the pad in a bag, shake off loose grass and wipe the fold lines. Put the hose connector in a position where it will not be crushed. If the bag has enough room, avoid forcing the pad into an overly tight shape. A tight bag may look tidy, but it can press the same creases into the PVC every time.
For short-term storage between weekend uses, a breathable bag, loose box, or open-top bin can be useful. For off-season storage, a clean dry box with enough space is better than a thin bag placed under heavy items.
If the pad was used by dogs, do not pack it with pet hair still attached. Wet hair inside a closed bag can create odor quickly. Remove hair while the surface is still slightly damp, then let the pad finish drying before storage.
Splash Pad Off-Season Care
Off-season storage needs more care than overnight storage. A splash pad used all summer may have small amounts of sunscreen residue, soil, pet hair, or grass stuck along the seams. Before storing it for several weeks or months, give it a more complete cleaning.
Start with a full rinse. Use mild soap on the center surface, outer ring, hose connector, seam edges, and underside. Rinse again until the surface no longer feels slick. Then dry the pad longer than usual. For off-season packing, 60–120 minutes of drying time may be needed, especially after cleaning with soap or drying in shaded weather.
Once the pad is dry, inspect it before folding. Look for clogged spray holes, dirt along the seams, damage near the connector, or rough marks on the underside. These small issues are easier to handle before storage than after several months in a box.
| Off-Season Step | Recommended Action | Why It Matters |
|---|---|---|
| Deep rinse | Clean both top and underside | Removes summer buildup |
| Mild soap wipe | Use on sticky or dirty areas | Reduces sunscreen and pet residue |
| Full drying | Allow 60–120 minutes if needed | Prevents trapped moisture |
| Spray-hole check | Clear grass and sand gently | Helps next season’s water flow |
| Connector check | Wipe and dry inlet area | Reduces setup problems |
| Loose fold | Avoid hard creases | Protects PVC and ring shape |
| Protected storage | Use dry indoor or garage space | Avoids heat, pests, and punctures |
Do not store the splash pad in a place where rodents, insects, or sharp tools may reach it. If storing in a garage, place it on a shelf or in a closed clean bin rather than directly on the floor.

Good storage makes the next setup easier, but the splash pad should still be checked before water play starts. A clean stored pad can collect dust, small lint, or storage marks. Before connecting the hose, unfold the pad and inspect the surface.
Start with the ground. Remove sticks, stones, thorns, garden clips, toys, hose nozzles, and rough debris from the setup area. A well-stored splash pad can still be damaged if placed over a sharp object. Grass should be flat and free from hidden stones. Patio use should avoid rough edges and hot surfaces.
Next, check the pad itself. Look at the spray holes, outer ring, connector, seam edges, and underside. If the pad has been stored for more than a few weeks, give it a quick rinse before children or pets use it. This makes the surface feel fresh and removes any storage dust.
Connect the hose carefully and start with low water pressure. Let the outer ring fill gradually. Once the spray begins, increase the pressure only until the spray height feels comfortable. Very high pressure is not always better. It may push water outside the play area, make the connector work harder, or create uneven spray if the ground is not flat.
Splash Pad Storage Mistakes
Many splash pad problems come from small storage mistakes. The most common one is folding the pad while it is almost dry, but not fully dry. The center may feel ready, while the underside and outer ring are still damp. Once folded, that moisture has nowhere to go.
Another mistake is storing the splash pad with outdoor debris inside. Grass clippings, sand, soil, and pet hair may look harmless, but they can create odor, leave marks, or rub against the PVC surface during storage.
Heavy pressure is also a problem. A folded splash pad should not sit under boxes, sports gear, garden tools, pool equipment, or sharp objects. Pressure may create hard creases, especially around the outer ring and hose connector.
| Storage Mistake | What Can Happen | Better Habit |
|---|---|---|
| Folding while damp | Odor, mildew marks, sticky feel | Dry both sides first |
| Leaving grass inside | Musty smell, dirty fold lines | Shake, rinse, and wipe |
| Crushing connector | Poor hose fit next time | Place connector away from pressure |
| Storing under heavy items | Sharp creases, ring stress | Use a shelf or roomy bin |
| Leaving outside | Sun, dew, insects, dirt | Store indoors or in a dry box |
| Packing after pet use without cleaning | Hair, odor, residue | Rinse and remove pet hair first |
EPN splash pads are developed for repeated backyard use, with attention to PVC material, seam structure, hose connection, and practical family handling. Proper storage supports those product details. A clean, dry, loosely folded splash pad is easier to reopen, easier to connect, and more pleasant for children and pets at the next setup.
Keep Your Splash Pad Ready for Summer Play
A splash pad does not need a complicated care routine. The best routine is simple enough to do after every play session: drain it after play, rinse fresh dirt away, wipe high-contact areas, dry the top and bottom, fold it gently, and store it in a dry place. These small habits help the pad smell cleaner, spray more evenly, and stay easier to use through the season.
For families, better cleaning means less frustration. Children step onto a cleaner play surface. Dogs cool down without bringing old mud and hair into the next session. Parents do not have to open a folded pad and deal with a musty smell before play can even start.
When choosing a splash pad, families should also think about daily cleanup. A good splash pad should not only look fun in photos. It should be easy to rinse, easy to drain, simple to fold, and strong enough for repeated outdoor use. Details such as PVC thickness, seam design, hose connector quality, spray-hole balance, and surface texture all affect daily care.
EPN splash pads are developed by American Epsilon Inc., a U.S.-registered company focused on PVC and composite outdoor recreation products. EPN works across kids’ splash pads, pet splash pads, inflatable pools, water toys, snow tubes, pool pillows, and other seasonal outdoor products, so the brand understands how PVC products are used, cleaned, folded, and stored in real homes.
EPN designs splash pads for outdoor durability, easy setup, simple storage, stable water connection, and regular family use. From material selection to seam structure, from spray-hole layout to packaging instructions, each detail can affect how the pad performs through repeated summer play.
Epsilon supports EPN branded product orders and custom splash pad development for different sizes, colors, patterns, packaging styles, retail channels, and seasonal programs. Custom options can include PVC thickness selection, product structure adjustment, spray-hole layout, print design, packaging localization, label content, and order planning.
For ready-to-sell EPN splash pad products or custom splash pad projects, contact Epsilon to request product specifications, available order options, packaging details, sample support, and a project quote.