Skip to content
 How to Fix a Hole in an Inflatable Without a Kit: DIY Guide
# Your Trusted Inflatable Supplier In US
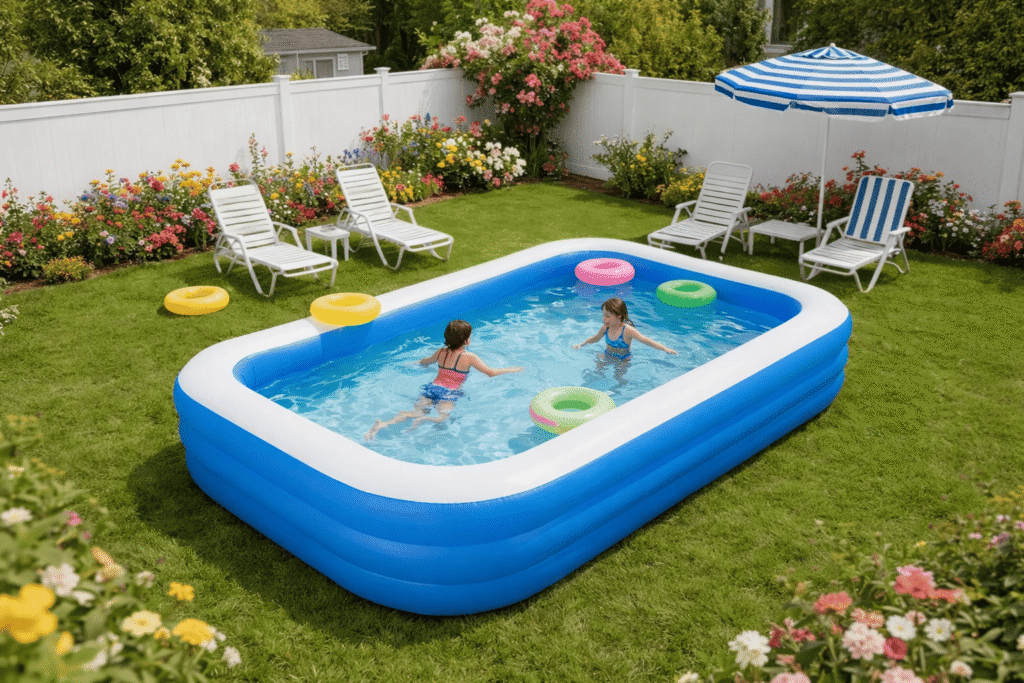
In the world of inflatable products, from air mattresses to pool toys, punctures and leaks are an inevitable part of life. Whether it’s your inflatable mattress losing air overnight, or your child’s favorite pool float leaking mid-summer, a hole in an inflatable can quickly turn a fun experience into a frustrating one. But what if you don’t have a repair kit on hand? Is it still possible to fix the hole without professional help? The good news is yes! In this guide, we’ll explore practical and effective ways to repair an inflatable without a kit, using common household items.
Fixing a hole in an inflatable without a kit is possible using everyday household items like duct tape, super glue, or plastic bags. This DIY approach can provide a temporary but effective solution to avoid costly repairs or replacements.
But how do you find the leak? What’s the best material to patch it with? And how do you ensure the repair holds up? Let’s dive into these questions and help you get your inflatable back in action in no time.
Identifying the Source of the Leak
Locating the exact source of a leak is the first and most crucial step in repairing any inflatable. Whether it’s an air mattress losing air overnight, a pool float slowly deflating, or a kiddie pool with a mysterious leak, knowing where the damage is will make your repair process much smoother and more effective.
Identifying the source of a leak involves inspecting the inflatable carefully. You can use methods like visual inspection, water testing, or applying a soapy water solution to pinpoint the hole. A precise location of the leak ensures that the repair is focused on the right area, improving the durability of your fix.
Before rushing into fixing the hole, you need to first find its exact location. Even the most minor puncture can cause an inflatable to lose air, so finding the leak is crucial to ensure a successful and durable repair.
1. Visual Inspection
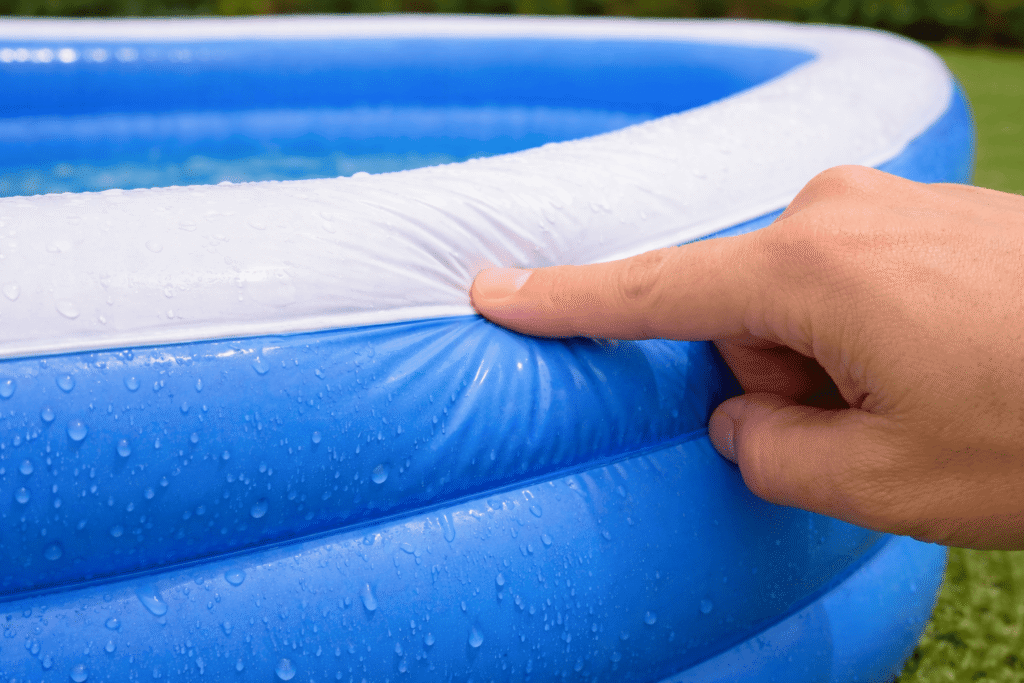
A thorough visual inspection is the first step. Carefully examine the inflatable, paying special attention to the seams, valves, and areas of high stress. Look for obvious signs of damage, such as small punctures or large tears.
Seams and Corners
Seams are often the weakest points in inflatables. Look for any areas where the fabric may have separated or worn out over time. These areas are particularly vulnerable to leaks. Additionally, corners or areas where the inflatable is regularly bent or creased can show signs of stress and damage.
Inflation Valve
Often overlooked, the inflation valve can be another common source of leaks. Ensure the valve is securely sealed and that no air is escaping from there.
2. Water Testing
For larger inflatables like pool floats or air mattresses, the water testing method can help you identify the exact location of the leak. This method is simple and effective, especially for pinpointing small holes that are hard to see with the naked eye.
How to Conduct Water Testing:
Fill a bathtub or a large container with water. Slowly submerge the inflatable, ensuring it’s fully submerged, and observe carefully for any air bubbles. Air bubbles will form at the source of the leak, making it easy to identify the problem.
Important Considerations:
- If your inflatable is too large to submerge, use a hose to pour water on various sections and watch for bubbling.
- This method works particularly well for small punctures or holes that may not be visible right away.
3. Soapy Water Method
The soapy water method is a great alternative for locating air leaks, especially for inflatables that are too large to submerge fully. This method is popular because it’s simple and doesn’t require much equipment.
How to Use Soapy Water to Find a Leak:
Mix a small amount of dish soap with water in a spray bottle or container. Apply the soapy water generously over the inflatable surface, focusing on the areas where you suspect the leak might be. Look for bubbles, which will form where air is escaping.
Why This Works:
The soapy water helps create visual signs of the leak—bubbles appear when air escapes through even the smallest holes. This method is especially effective for larger inflatables where water testing may not be practical.
4. Checking for Air Leaks in Seams
Seams are especially prone to leaks, especially in inflatable products that are used frequently or exposed to stress. Carefully inspect the stitching and welded areas where the fabric is joined together. These spots can often show wear and tear over time, leading to leaks.
- Signs of Seam Leaks:
- Loose or frayed stitching.
- Areas where the fabric is separated or seems to have pulled apart.
- Cracks or punctures in the welded areas.
For seams that are leaking, you’ll likely need to apply a strong adhesive or sealant to repair the damage effectively.
5. Pinpointing Smaller Leaks
If the leak is very small and hard to spot with any of the above methods, using a blow dryer or compressed air can help. Apply gentle air pressure while you listen closely for the faint sound of escaping air, or watch for the movement of the material caused by air leakage.
Using a Blow Dryer or Air Compressor:
By gently blowing air into the inflatable and focusing on suspected leak areas, you may be able to hear a faint hiss or notice subtle movement of the material. This method works particularly well for identifying leaks that are too small to see.
6. Marking the Leak for Repair
Once you’ve identified the leak, mark it clearly with a piece of tape, a permanent marker, or a small sticker. This step ensures you don’t lose track of the damage area, especially when performing the repair later.
Tip:
If you’re working on a larger inflatable like a pool float or air mattress, it’s often helpful to mark the leak both on the surface and on the inside. This will allow for better precision when applying the patch.
What Household Items Can Be Used for Inflatable Repairs?
When you don’t have a dedicated inflatable repair kit on hand, the good news is that you can still make temporary fixes using common household items. These everyday materials are surprisingly effective and can help extend the life of your inflatable product until you can get a proper repair kit or professional help. In this section, we’ll explore the most popular and effective household items for repairing inflatables, from duct tape to super glue.
Household items like duct tape, super glue, plastic wrap, and fabric can be used to repair a variety of inflatable products, from air mattresses to pool floats. These materials provide an effective, temporary solution that can prevent further damage and keep your inflatable in use.
In the absence of a professional repair kit, many household materials can be used to patch up small punctures or tears. Below are some of the most common household items you can use to fix your inflatable products.
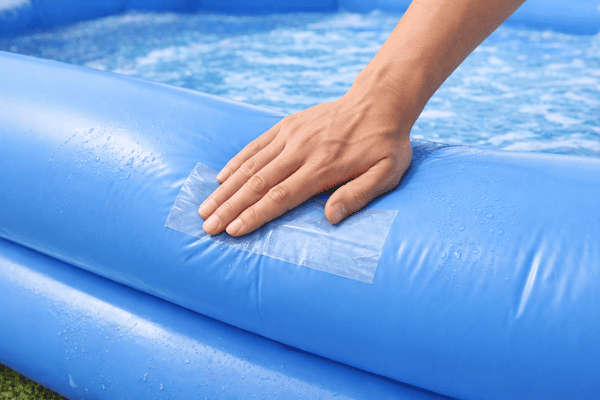
1. Duct Tape: The Ultimate Fix-All
Duct tape is one of the most versatile tools in your home, and it can be incredibly useful for making quick and effective inflatable repairs. Whether you’re dealing with a puncture on an inflatable mattress, a tear on a pool float, or a hole in a pet pool, duct tape can help seal the damage temporarily.
Why Duct Tape Works:
Duct tape has a strong adhesive that bonds well to most materials, including PVC, which is commonly used in inflatables. The durable and waterproof properties of duct tape make it an excellent choice for sealing up leaks, even in wet conditions.
How to Use Duct Tape for Inflatable Repair:
- Clean the area around the hole to ensure good adhesion.
- Cut a piece of duct tape large enough to cover the hole, leaving about a 1-inch margin on all sides.
- Firmly press the tape down on the damaged area, ensuring there are no bubbles or wrinkles.
- For larger tears, apply additional layers of duct tape, making sure to cover the hole completely.
Tip:
Use clear or silver duct tape for a less noticeable patch, especially on visible areas of your inflatable.
2. Super Glue: Perfect for Small Punctures
For tiny punctures or small holes, super glue can be an excellent, quick fix. Super glue is perfect for pinpointing minor leaks that duct tape may not be able to address effectively, especially in tight or hard-to-reach spots.
Why Super Glue Works:
Super glue creates a very strong bond that seals small holes securely. It dries quickly and forms a water-tight seal that is often enough to keep the inflatable in use for a while. This method is especially useful for air mattresses, where precision is needed to patch up tiny punctures.
How to Use Super Glue for Inflatable Repair:
- Clean the damaged area with soap and water and dry it thoroughly.
- Apply a small drop of super glue directly to the hole, ensuring the glue covers the entire punctured area.
- Press the area together and hold for a few seconds to ensure the glue sets.
- Allow the glue to dry completely before reinflating.
Tip:
Be cautious not to over-apply the glue, as it can make the surface of the inflatable stiff and uncomfortable.
3. Plastic Wrap or Bags: A Quick Makeshift Patch
Plastic bags or plastic wrap can be a great temporary solution for larger holes or tears in inflatables, especially when you don’t have access to a more permanent patching material. The flexibility of plastic makes it easy to mold around the damaged area and form a seal.
Why Plastic Works:
Plastic is a cheap and effective way to create a temporary airtight patch. When sealed properly, plastic can stop air from escaping and keep the inflatable functional until you can perform a more durable repair.
How to Use Plastic for Inflatable Repair:
- Cut a piece of plastic bag or plastic wrap that is large enough to cover the hole and extend slightly beyond the edges.
- Place the plastic over the hole and apply duct tape around the edges to hold it in place.
- Press down firmly to ensure the patch is airtight.
Tip:
Plastic patches work best when combined with other materials like duct tape to ensure the edges are sealed tightly.
4. Fabric: Ideal for Larger Tears or Seams
For larger tears, a piece of fabric can work as a durable, temporary patch. Fabric patches can help reinforce the damaged area and are especially useful for inflatables with larger, more critical holes, such as those found in pool toys, lounges, or large air mattresses.
Why Fabric Works:
Fabric is flexible and easy to cut into the required shape. It can cover larger holes more effectively than smaller materials like tape. When used in combination with adhesive glue, fabric can provide a sturdy, long-lasting patch for major damage.
How to Use Fabric for Inflatable Repair:
- Cut a piece of fabric (such as a piece of an old t-shirt or a towel) that is large enough to cover the damaged area.
- Apply a generous amount of adhesive glue or super glue to the fabric.
- Press the fabric over the hole and hold it in place for a few minutes to allow the adhesive to set.
- Once the glue has dried, apply duct tape around the edges to secure the fabric patch.
Tip:
Choose a fabric that is similar in texture to the inflatable material to ensure a better bond and more effective repair.
5. Balloon Patch: A Quick Fix for Air Mattresses
If you’re dealing with a small puncture in an air mattress or a pool float, using an old balloon or flexible material can work as a makeshift patch. Balloons are made from similar materials as inflatables, making them a convenient option for small holes.
Why Balloon Patches Work:
Balloons are stretchable, lightweight, and often made of PVC or rubber, making them a suitable material for temporary patches. The elasticity of the balloon helps the patch mold to the shape of the inflatable, ensuring a snug fit.
How to Use a Balloon for Inflatable Repair:
- Cut the balloon to a size that is slightly larger than the hole.
- Apply super glue or adhesive to both the balloon patch and the surrounding area of the inflatable.
- Place the balloon patch over the hole and hold it in place for a few minutes.
- Allow the glue to set and dry completely before inflating.
Tip:
This method works best for very small punctures and should only be considered a temporary solution.
6. Tape (Other Types): Packing Tape or Clear Tape
While duct tape is the most commonly used for inflatable repairs, other types of strong adhesive tape—such as packing tape, clear tape, or electrical tape—can also be used in a pinch. These tapes can provide a clear, less noticeable fix for inflatables, especially if you’re concerned about aesthetics.
Why Other Tapes Work:
Like duct tape, these tapes have strong adhesive properties that can seal small punctures and provide a quick temporary fix. They’re particularly useful for smaller holes and work best in dry, clean conditions.
How to Use Tape for Inflatable Repair:
- Clean the area thoroughly before applying tape.
- Apply the tape directly over the hole, ensuring there are no air bubbles or gaps around the edges.
- For larger holes, apply multiple layers of tape to ensure a secure, airtight seal.
Tip:
Clear tape can be a good option if you’re looking for a less noticeable repair, particularly for air mattresses or pool floats.
When a hole or tear occurs in your inflatable, having a quick and effective solution is crucial. Fortunately, many common household items can be used to perform a temporary repair, from duct tape and super glue to fabric and plastic bags. These materials offer a fast, practical solution that can keep your inflatable functional until you can secure a professional repair kit or get a replacement.
By using these everyday materials wisely, you can extend the life of your inflatables and save yourself from costly repairs or replacements.
How to Perform a DIY Patch Repair Without a Kit
Repairing an inflatable without a dedicated repair kit can seem challenging, but with the right materials and approach, it’s entirely possible to fix small punctures or tears effectively. Whether you’re dealing with an air mattress, a pool float, or a pet pool, knowing how to perform a DIY patch repair can save you time and money. This guide will provide step-by-step instructions on how to repair your inflatable using common household items.
Performing a DIY inflatable patch repair involves cleaning the damaged area, selecting the right household materials (such as duct tape or super glue), and applying the patch carefully. This quick guide explains how to do it efficiently, providing a reliable temporary solution until you can obtain a proper repair kit.
Performing a DIY patch repair can be a straightforward process if you follow the right steps. Let’s walk through each stage of the repair to ensure a successful fix.
1. Prepare the Inflatable for Repair
Before you start the patching process, it’s important to properly prepare the inflatable. Cleaning and drying the area around the damage is crucial for ensuring a strong bond with the repair material.
Why Preparation Matters:
Properly cleaning the area ensures that there’s no dirt or debris that could interfere with the adhesion of the patch. Any moisture or dirt could cause the patch to peel off, resulting in an unsuccessful repair.
Steps to Prepare the Inflatable:
Step Action Reason Step 1: Locate the Leak Use methods like water testing or visual inspection to find the hole. Identifying the hole ensures you apply the patch in the correct spot. Step 2: Clean the Area Wash the area with mild soap and water, then dry it thoroughly. Cleaning the area removes dirt, dust, and moisture that could weaken the repair. Step 3: Dry Completely Allow the area to air-dry or use a dry towel. Moisture left behind can affect the adhesive properties of the patch material. 2. Choosing the Right Patch Material
Once the area is clean and dry, the next step is to choose the appropriate material for your patch. Depending on the severity of the hole, different materials will work better than others. Below are some common options.
Why Choosing the Right Patch Material Matters:
The material you select will impact the durability and effectiveness of the repair. It’s crucial to choose something that provides a strong bond and is capable of withstanding the pressure or water that the inflatable will encounter.
Patch Material Best For Pros Cons Duct Tape Small punctures, minor seams Strong, waterproof, easy to apply Can leave residue, not ideal for large holes Super Glue Small punctures Quick-drying, strong bond, ideal for small holes Not suitable for large tears or high-pressure areas Plastic Wrap Larger holes, waterproof barriers Flexible, inexpensive, easy to mold Not durable long-term, needs reinforcement Fabric (Old T-shirt) Large tears, seams Durable, flexible, good for reinforcing Needs glue or tape for application Balloon (Old) Tiny punctures or small tears in air mattresses Stretchable, matches material of inflatables Suitable only for small holes 3. Applying the Patch: Step-by-Step Process
Now that you’ve chosen the patch material, it’s time to apply it. Here’s how you can do it effectively.
Step Action Reason Step 1: Prepare the Patch Material Cut your patch material (e.g., duct tape, fabric, plastic) to a size larger than the hole, leaving at least 1 inch of margin around the hole. A larger patch ensures better sealing and strength. Step 2: Apply the Patch Apply the patch material directly over the hole, making sure the edges are firmly sealed. Sealing all edges ensures no air or water can escape. Step 3: Press and Smooth Firmly press the patch down, smoothing out any bubbles or wrinkles. A smooth, airtight seal is essential for long-lasting repairs. Step 4: Reinforce the Patch If needed, apply additional layers of tape, fabric, or plastic wrap, especially for large holes or tears. Extra layers provide more durability, particularly for high-pressure areas. Step 5: Let it Dry If using glue, allow the patch to dry completely before reinflating. Proper drying ensures that the patch stays in place and forms a strong bond. 4. Testing the Repair
Once the patch is applied and dry, it’s time to test the repair to ensure that it holds up under pressure.
Why Testing Matters:
Testing the repair is essential to make sure it’s secure and airtight. If the patch isn’t effective, you may need to reapply it or use a different method to ensure the inflatable holds air.
Steps for Testing:
Step Action Reason Step 1: Inflate the Inflatable Slowly reinflate the inflatable until it reaches the proper pressure or size. Reinflating tests whether the patch can withstand the internal pressure. Step 2: Check for Leaks Listen for hissing sounds or visually inspect the patched area for bubbles. Any signs of air escaping indicate the patch hasn’t sealed properly. Step 3: Apply More Patch If Necessary If you notice any leakage, add another layer of tape or adhesive to reinforce the area. A second layer of patching can ensure the hole is properly sealed. 5. Reinforcing the Repair for Long-Term Durability
While DIY repairs can be effective, they’re often temporary. To ensure that the repair lasts, follow these additional tips:
Why Reinforcing the Repair Matters:
Reinforcement ensures that your inflatable stays intact for a longer period of time, especially if it’s used frequently or exposed to harsh conditions. A well-reinforced patch will be more durable and able to withstand pressure, water, or outdoor elements.
Reinforcement Tip Action Reason Use Multiple Layers For larger holes, apply multiple layers of tape or fabric to ensure a stronger seal. Extra layers distribute the pressure and make the patch more durable. Apply Tape Around the Edges After applying the main patch, reinforce the edges with additional tape to prevent peeling. Reinforcing the edges prevents the patch from lifting over time. Store Properly After Repair Store the repaired inflatable in a cool, dry place to prevent exposure to UV rays or sharp objects. Proper storage helps maintain the integrity of the patch. 6. When to Seek Professional Help
If your inflatable shows signs of repeated leaks, or if the repair process doesn’t seem to hold, it may be time to seek professional help or invest in a more permanent repair kit. Professional repair services can handle more significant damage that a DIY patch cannot effectively address.
Why Professional Help Might Be Needed:
Severe damage to seams or larger punctures may require professional-grade equipment and materials that DIY methods can’t provide. A permanent repair ensures the inflatable stays durable and safe to use over the long term.
Performing a DIY patch repair on an inflatable without a kit is not only possible but can also be a highly effective solution in the short term. By following the proper steps—preparing the surface, choosing the right materials, applying the patch carefully, and reinforcing the repair—you can extend the life of your inflatable products and avoid costly replacements. Keep in mind, though, that DIY repairs are temporary, and you should always consider getting a professional repair kit or service for more significant damage.
Tip:
If you find yourself dealing with frequent inflatable repairs, consider investing in a dedicated repair kit for more efficient, durable solutions.
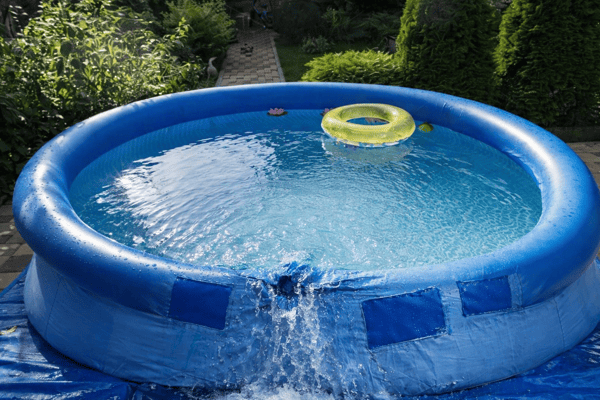
Seams are often the weak point in inflatables. If the seam has come apart or developed a small tear, fixing it without a kit can be tricky but possible.
Fixing Inflatable Seams Without Professional Tools
Inflatable products, such as air mattresses, pool floats, and inflatable kayaks, are vulnerable to seam damage due to wear and tear. When a seam begins to separate, it can lead to air leakage, making the inflatable unusable. While professional repairs may require special tools and equipment, there are DIY solutions that can help you fix these seams effectively at home using common household materials. In this guide, we’ll explore how to repair inflatable seams without professional tools, including step-by-step instructions and tips for ensuring a durable fix.
Fixing inflatable seams without professional tools can be done using household materials like adhesive glue, duct tape, or fabric. Properly applying the right patching technique can restore the integrity of your inflatable and prevent air leakage. Follow this guide to fix seams effectively at home, even without specialized equipment.
Seam damage in inflatables is one of the most common causes of leaks. Fortunately, you can repair it at home with some simple tools and materials. Here’s how to perform a DIY inflatable seam repair step by step.
1. Understand the Type of Seam Damage
Before beginning any repair, it’s important to understand the extent of the damage. Seam damage can range from small separations to large tears that require more extensive patching. Identifying the severity of the issue will help you decide which repair method is best suited.
Why Identifying the Damage Matters:
Different types of seam damage require different methods. Minor separations may only need glue or tape, while larger tears may require fabric patches or additional reinforcement to ensure a lasting repair.
Type of Damage Repair Method Severity Minor Separation Use adhesive glue or strong tape to bond the seam together. Low Large Tear Apply a fabric patch with glue, tape the edges for extra reinforcement. High Worn or Frayed Seams Reinforce with fabric and adhesive, then tape the edges. Medium 2. Prepare the Inflatable for Repair
The first step in any inflatable repair is to prepare the surface. This includes cleaning the area around the seam, ensuring that it is dry and free of debris. The better the surface preparation, the better the patch will adhere.
Why Surface Preparation Matters:
A clean surface ensures that the adhesive or tape adheres properly, which is crucial for a durable repair. Any dirt or moisture can weaken the bond, making the repair less effective.
Steps to Prepare the Inflatable:
Step Action Reason Step 1: Locate the Seam Damage Identify the exact location of the damage along the seam. Knowing where the damage is will allow you to focus the repair. Step 2: Clean the Area Clean the seam and surrounding area using soap and water. Dry thoroughly. Removing dirt and moisture ensures better adhesion. Step 3: Mark the Damage Use tape or a marker to clearly mark the damaged area. Marking the area ensures that you focus on the correct spot during the repair. 3. Choose the Right Materials for Repair
The materials you use for the seam repair depend on the type of damage and the location of the seam. Below are some of the most effective household materials you can use to repair inflatable seams.
Why Choosing the Right Material Matters:
Different materials offer different strengths and are better suited for certain types of damage. For example, fabric is better for large tears, while tape works well for minor seam separations.
Material Best For How to Apply Effectiveness Durability Adhesive Glue Small separations or cracks Apply glue along the seam, press the edges together, and hold until dry. High Medium Duct Tape Minor separations Cut tape to size, apply over the seam, and press down firmly. High Medium Fabric (Old T-shirt) Large tears or frayed seams Cut fabric to size, apply glue to the fabric, and press it over the tear. High High Plastic Patch Larger tears, flexible surface Cut plastic to size, apply adhesive, and press it into the seam. Medium Low 4. Apply the Patch to the Seam
Now that you’ve prepared the area and chosen your materials, it’s time to apply the patch. The process of patching the seam involves ensuring a tight seal between the two sides of the tear or separation.
Why Applying the Patch Correctly Matters:
The effectiveness of the patch depends on how well it’s applied. A poorly applied patch will likely peel off or fail to create a secure seal, leading to further leaks.
Steps to Apply the Patch:
Step Action Reason Step 1: Apply Adhesive Apply a generous layer of adhesive glue along the seam or tear. Ensures a strong bond between the patch material and the inflatable surface. Step 2: Place the Patch Press the patch material (fabric, tape, plastic) over the glued area. Proper placement ensures full coverage of the damaged area. Step 3: Press and Seal Firmly press the patch down, ensuring there are no air bubbles. A smooth, air-tight seal is crucial for durability. Step 4: Reinforce (if necessary) If the damage is severe, apply additional layers of tape or fabric to reinforce the patch. Extra layers offer added durability and prevent further separation. 5. Let the Repair Set and Dry
Once the patch is applied, it’s important to let the adhesive or glue dry thoroughly before reinflating the inflatable. Rushing this step can lead to the patch coming off or not bonding properly.
Why Drying Time Matters:
Allowing the patch to dry fully ensures the adhesive has bonded well to the inflatable material. A hasty repair will be less effective and can result in air leaks.
Steps to Dry the Repair:
Step Action Reason Step 1: Let the Adhesive Dry Allow the adhesive or glue to set for at least 1 hour (or as per manufacturer instructions). Drying ensures a strong bond between the patch and the inflatable. Step 2: Test the Repair Once the adhesive is fully dry, reinflate the inflatable and check for leaks. Testing ensures the patch is holding up under pressure. Step 3: Reinforce (if necessary) If air is still leaking, apply another layer of tape or glue over the patch. Reinforcement may be necessary for larger tears. 6. Test the Repair and Reinforce
Once the patch has dried, it’s essential to test the inflatable to ensure that the repair holds up. This means reinflating the inflatable and checking for any signs of air leakage. If the patch works well, you can continue using the inflatable. If not, you may need to reinforce the patch or consider additional repairs.
Why Testing and Reinforcement Matters:
Testing helps confirm that the repair is airtight. If the patch is ineffective, reinforcement is crucial to ensure the inflatable remains functional.
Steps for Testing and Reinforcement:
Step Action Reason Step 1: Inflate the Item Slowly reinflate the inflatable until it reaches full pressure. Reinflating tests whether the patch can withstand the pressure. Step 2: Check for Leaks Listen for air leaks or visually inspect the repaired seam for bubbles. Checking for leaks ensures the patch has been effective. Step 3: Reinforce if Necessary Apply more adhesive or tape around the edges of the patch for extra strength. Reinforcement ensures the patch stays intact under pressure. Fixing inflatable seams without professional tools is achievable with the right materials and technique. By following the steps outlined in this guide—preparing the area, choosing the right patch materials, and applying the patch correctly—you can restore the integrity of your inflatable. For minor seam separations or small tears, a DIY repair is often sufficient, but for larger or more severe damage, consider seeking professional help or investing in a repair kit for a more permanent solution.
Tip:
Always test the repair before using the inflatable for any significant activities. If you’re unsure about the effectiveness of your DIY repair, professional repair services are available for more extensive seam damage.
Preventing Future Holes in Your Inflatables
Inflatable products such as air mattresses, pool floats, and inflatable toys are popular for their convenience and versatility. However, they are also prone to punctures, leaks, and general wear and tear. Preventing holes from forming in your inflatables is essential to maximizing their lifespan and ensuring they continue to function properly. By following a few simple care and maintenance tips, you can avoid frequent repairs and enjoy your inflatables for much longer.
Preventing holes in your inflatables involves proper handling, storage, and maintenance. Simple practices like controlling air pressure, avoiding sharp objects, and using protective covers can significantly reduce the risk of damage and prolong the life of your inflatables.
Caring for your inflatable products is relatively easy, but it requires some attention to detail. Let’s explore the best ways to prevent holes, punctures, and other damage to your inflatables.
1. Proper Storage: Keep Your Inflatables Safe from Harm
The way you store your inflatables plays a major role in preventing future holes. Exposure to sunlight, extreme temperatures, and rough surfaces can cause the material to weaken, resulting in punctures or material degradation.
Why Storage Matters:
Inflatables are made from materials that can degrade over time, especially when exposed to harsh weather conditions like UV rays or extreme cold. Storing your inflatables properly can keep them in great condition and prevent unnecessary wear and tear.
Storage Tips:
Avoid Sun Exposure:
Prolonged exposure to sunlight can weaken the material, making it more prone to punctures. Always store your inflatable in a cool, dry area out of direct sunlight. UV rays cause the fabric to break down, which can lead to fading, cracks, and brittleness.
Deflate Before Storing:
If possible, deflate your inflatable before storing it. Overinflation can cause stress on the seams and material, leading to splits or tears. Deflating ensures that the inflatable retains its shape and integrity over time.
Store in a Dry, Clean Place:
Moisture can damage inflatables by causing mold and mildew. Store your inflatable in a dry, well-ventilated space to prevent these issues. Avoid keeping it in places where it might come into contact with dirt, debris, or sharp objects that could cause punctures.
2. Handling with Care: Preventing Accidental Damage
How you handle your inflatable when using it can make a big difference in its longevity. Rough handling, such as dragging or placing it on rough surfaces, can lead to tears and punctures.
Why Handling Matters:
Inflatables are sensitive to rough handling, especially when they come into contact with sharp or abrasive surfaces. Gentle handling ensures that your inflatable remains intact and free from unnecessary stress.
Handling Tips:
Avoid Sharp Objects:
Always set up your inflatable on a smooth, soft surface such as grass or sand. Sharp rocks, twigs, or other debris can puncture the material. When using inflatables outdoors, be mindful of the environment and avoid areas where sharp objects could cause damage.
Lift, Don’t Drag:
When moving the inflatable, avoid dragging it across the ground. Dragging can cause friction and result in friction burns or tears. Instead, always lift the inflatable to move it from place to place.
Don’t Overinflate:
Overinflating an inflatable can put too much pressure on the seams and material, increasing the likelihood of tears. Always follow the manufacturer’s instructions for the recommended inflation level. If you don’t have a built-in pressure gauge, use a separate one to ensure you don’t exceed the optimal pressure.
3. Proper Air Pressure: Control the Inflation Level
Maintaining the right air pressure is essential to prolonging the life of your inflatable. Both underinflation and overinflation can lead to damage.
Why Air Pressure Matters:
Inflatable products are designed to hold a certain level of air pressure. If the air pressure is too high, it puts unnecessary strain on the seams and fabric. On the other hand, underinflating may result in poor performance and increased wear in certain areas. Correct inflation ensures that the inflatable remains structurally sound.
Air Pressure Tips:
Use a Pressure Gauge:
For inflatables like air mattresses, it’s essential to use a pressure gauge to avoid overinflation. If your inflatable doesn’t come with a built-in gauge, invest in a pump that has one. Maintaining the right air pressure ensures the seams and fabric aren’t overstressed.
Inflate According to Manufacturer’s Guidelines:
Always follow the manufacturer’s recommended pressure levels. The guidelines are based on the material strength and construction of the inflatable, ensuring it holds up to pressure without causing damage.
Adjust for Temperature Changes:
Air expands and contracts with temperature changes. If you store your inflatable in a cold environment, it may lose air, while in warmer weather, the air inside may expand. If the temperature increases, you may need to release some air to prevent overinflation.
4. Use Protective Covers: Shield Your Inflatable from Elements
Protective covers can significantly reduce the wear and tear caused by UV rays, dirt, and other environmental factors.
Why Protective Covers Matter:
A protective cover shields your inflatable from the sun, which can degrade the material, and from dirt and debris that can cause punctures. Covers also help protect against minor abrasions that might occur when the inflatable is not in use.
Protective Cover Tips:
Use UV-Resistant Covers:
UV rays are one of the main causes of wear and tear on inflatables. Invest in a UV-resistant cover to protect your inflatable from sunlight when not in use. Covers made from UV-protective fabric are designed to block harmful rays, helping to maintain the integrity of your inflatable over time.
Cover When Not in Use:
Always cover your inflatable when it’s not being used, especially if it’s stored outdoors. Even if you’re only taking a break from using the inflatable, a cover can prevent sun exposure and dirt accumulation.
Store Inflatable Indoors:
If possible, store your inflatable indoors during off-seasons to further protect it from the elements. Even if you have a cover, keeping it out of direct sunlight and harsh weather conditions will extend its lifespan.
5. Regular Inspections: Detect and Address Damage Early
Conducting regular inspections can help you catch minor issues before they turn into major problems. Early detection of small punctures, seam separations, or abrasions allows you to repair the inflatable promptly and prevent further damage.
Why Inspections Matter:
By checking your inflatable for damage regularly, you can address small issues before they worsen. Early repairs are often quicker, easier, and less expensive than dealing with large, untreated tears or leaks.
Inspection Tips:
Check After Each Use:
After each use, inspect the inflatable for any signs of wear or small punctures. This ensures you catch any damage early, preventing it from spreading and becoming a bigger issue.
Examine Seams and High-Stress Areas:
Seams are often the most vulnerable part of an inflatable. Pay close attention to seams, especially around corners and edges where stress is concentrated. Look for any fraying or separation of the material.
Use Soapy Water to Detect Small Leaks:
If you suspect a small puncture or leak, apply a mixture of soap and water to the surface. The soap will create bubbles around any leaks, making them easy to find. This method is particularly useful for hard-to-spot leaks.
6. Avoid Use on Rough or Unprotected Surfaces
Using inflatables on rough or abrasive surfaces increases the risk of punctures. It’s essential to set up your inflatable on smooth, soft surfaces to minimize damage.
Why Surface Matters:
Rough surfaces like asphalt, concrete, or rocky terrain can cause abrasions or punctures to your inflatable. Even minor debris or sharp objects can damage the material and lead to holes.
Surface Tips:
Set Up on Soft Ground:
Always place your inflatable on a soft surface like grass, sand, or carpet. Avoid hard, rocky, or gravel surfaces that can puncture or tear the material.
Use a Ground Mat or Blanket:
If you’re using the inflatable outdoors, consider laying down a blanket or tarp to provide extra protection. This acts as a buffer between the inflatable and the ground, preventing punctures from sharp objects.
Preventing future holes in your inflatables is not difficult, but it requires attention to detail and the use of best practices. By following proper storage methods, handling with care, maintaining proper air pressure, using protective covers, and inspecting your inflatable regularly, you can significantly reduce the risk of punctures and tears. These simple precautions will help keep your inflatables in top condition for years to come, saving you money on repairs or replacements.
Tip:
Investing in a high-quality protective cover and performing regular maintenance will go a long way in extending the life of your inflatable products.
When to Consider Professional Repair or Replacement
Inflatable products, such as air mattresses, pool toys, and outdoor floats, are designed for durability but are still vulnerable to damage over time. While DIY repairs can be effective for small tears or punctures, there are situations where professional repairs or even full replacements are necessary. Knowing when to call a professional or replace the item altogether is key to saving money, time, and effort.
If your inflatable has sustained extensive damage, or if previous DIY repairs haven’t worked, it may be time to seek professional help or consider replacing the product. Professional repairs offer long-term durability and may be more cost-effective than continuing to patch the inflatable yourself.
Inflatable products can last for years with proper care, but some situations call for more than just a DIY fix. Let’s look at specific scenarios when you should consider professional repair or replacement and why these options might be the best choice.
1. Extensive Damage to Seams
Seam damage is one of the most common and critical issues with inflatables. While small seam separations can often be fixed with DIY methods, large or extensive seam damage may require professional intervention.
Why Seam Damage is Serious:
Seams are typically the weakest part of an inflatable. When they begin to separate, they can quickly escalate into a larger problem, affecting the overall structure of the product. DIY fixes, like glue or tape, may not hold up for long, especially if the damage is along high-stress areas like corners or the edges of an inflatable.
When to Seek Professional Help:
- Large or Multiple Seam Tears: If your inflatable has multiple tears along the seams or a long, continuous separation, DIY repairs are less likely to be effective. A professional repair service will have specialized tools and materials to properly reseal or re-stitch seams.
- Damage from Pressure or Usage: In cases where the inflatable has been exposed to excessive pressure, wear, or harsh conditions (like sharp objects), the seams may have weakened or become frayed. A professional repair can restore the structural integrity of the inflatable, ensuring it is safe to use again.
Cost Consideration:
Seam repairs performed by professionals may be costly, but they are generally much more durable than a DIY fix. If the inflatable is of high value, such as a large air mattress or expensive pool float, professional repair could be more cost-effective than replacing it.
2. Large Tears or Holes
For smaller holes, a DIY patch can work well, but larger tears or holes often require more advanced materials and techniques that only a professional can provide.
Why Large Tears Need Professional Repair:
Large holes or tears expose more surface area, which can compromise the overall integrity of the inflatable. Depending on the location of the tear, it may need special reinforcement with fabric, a seam weld, or industrial-grade adhesive. DIY methods such as tape or glue may not provide the necessary strength or flexibility for larger areas.
When to Seek Professional Help:
- Tears in High-Stress Areas: If the tear is located near seams, valves, or areas that experience high stress during use, it’s crucial to have it repaired professionally to prevent the damage from worsening.
- Tears Beyond DIY Patching Capacity: Some inflatables have thick, tough materials that require industrial-grade tools to patch. Professional repair services have access to the necessary equipment for these repairs.
Cost Consideration:
Large tears, especially those on premium inflatables, might justify a professional repair, as replacing them entirely could be more expensive. Professional repair can restore the inflatable to a usable condition without compromising safety or functionality.
3. Structural or Frame Damage
Inflatables that rely on a structure (such as inflatable boats, kayaks, or complex floating platforms) may suffer damage to the frame or internal structure that a DIY repair cannot fix.
Why Structural Damage is Serious:
When the frame or internal structure is compromised, the inflatable may lose its stability and safety. Even if the external material is patched, any internal structural damage could result in a dangerous situation, especially for inflatables designed for active use, like inflatable kayaks or boats.
When to Seek Professional Help:
- Damage to Internal Components: If the inflatable has internal air chambers, valves, or structural supports that are damaged, it requires specialized repair. Only professionals have the tools to replace or fix these components safely.
- Structural Integrity Compromise: If the frame or support material is damaged beyond a simple patch or seal, the inflatable may need to be professionally repaired or replaced.
Cost Consideration:
For inflatable boats, kayaks, or other recreational inflatables with structural components, professional repair may be worth the investment. A replacement could be much more expensive, so repairing the internal structure can often be a more cost-effective option.
4. Repeated Leaks After DIY Repairs
If your inflatable continues to lose air after multiple DIY repairs, it may be time to consider a professional repair or replacement. A persistent leak often indicates that the patch has failed or the material has deteriorated to the point where repairs are no longer effective.
Why Repeated Leaks are a Red Flag:
Repeated leaks usually occur when the material has been weakened, the patch hasn’t adhered properly, or the damage is too extensive to repair with basic materials. In these cases, the problem may not just be the hole itself, but the overall integrity of the inflatable.
When to Seek Professional Help:
- Multiple Patch Failures: If you’ve patched the inflatable multiple times and the leak persists, it’s likely that the patching methods you’ve used aren’t providing the right solution. A professional can offer a permanent fix that won’t fail after a few uses.
- Material Deterioration: If the material around the patch has started to degrade or shows signs of wear, it may not hold up to future use. A professional repair might involve replacing sections of the material or adding reinforcements that DIY methods can’t provide.
Cost Consideration:
While it can be frustrating to invest in DIY repairs that don’t work, seeking professional help for persistent issues is often more cost-effective than replacing the entire inflatable.
5. Inflatable Is Beyond Repair
Sometimes, no matter how much you try to fix an inflatable, it’s simply beyond repair. If the material is extensively worn, the seams are irreparably damaged, or the inflatable is showing significant signs of deterioration, replacement may be the only viable option.
Why Replacement is Necessary:
If the inflatable has suffered multiple large tears, has significant structural damage, or has been exposed to severe environmental conditions (like UV degradation or mold), a repair might not restore it to a safe or functional state. Continuing to patch an inflatable that is too damaged could lead to safety issues.
When to Consider Replacement:
- Extensive Degradation: If the material has become thin, brittle, or covered in holes beyond repair, replacing the inflatable is often the best choice.
- Safety Concerns: If the inflatable’s structural integrity is compromised, particularly for safety-sensitive products like life rafts or child play equipment, replacing it is the safest option.
Cost Consideration:
While replacing a severely damaged inflatable can be expensive, the costs associated with ongoing repairs may add up over time. If your inflatable is no longer safe to use, replacing it is the best way to ensure both safety and functionality.
Deciding when to seek professional repair or replacement for your inflatable is an important step in ensuring its safety and longevity. If the damage is extensive, affects the structural integrity, or persists despite DIY fixes, professional repair or a replacement may be the most cost-effective solution in the long run. By recognizing when to call in the experts, you can ensure that your inflatable continues to serve its purpose without compromising safety or performance.
Tip:
If you’re unsure whether your inflatable can be professionally repaired or if it’s time to replace it, consider the cost of repeated DIY fixes versus the price of professional repair or a new product.
Why Fixing Your Inflatable Early Saves You Money
When it comes to inflatables, whether it’s an air mattress, pool float, or inflatable boat, addressing damage as soon as it happens can save you significant amounts of money in the long run. While the initial impulse might be to ignore small punctures or tears, early repairs are not only more cost-effective but also help to prolong the life of your inflatable, reducing the need for constant replacements.
Fixing your inflatable early is a proactive and money-saving strategy. By addressing minor issues like small punctures or seam separations as soon as they arise, you prevent further damage, avoid costly repairs or replacements, and ensure that your inflatable continues to perform effectively over time.
Addressing inflatable damage promptly is a key part of responsible inflatable ownership. Here’s why early repairs are both cost-effective and necessary for maintaining the longevity of your inflatables.
1. Preventing Larger Issues from Developing
Small holes and tears can quickly turn into larger, more difficult-to-repair issues if left unchecked. What might start as a small puncture could soon tear further or affect other parts of the inflatable, leading to structural damage. By making repairs early, you stop the damage from escalating into a bigger problem that requires more extensive and expensive fixes.
Why Preventing Larger Issues Saves Money:
Repairing a small puncture or seam separation typically costs much less than repairing a large tear or structural damage. The longer you wait, the more expensive and complicated the repair becomes. By fixing minor damage quickly, you ensure that you won’t need to spend extra on repairs that could have been avoided.
Example:
A small hole in an air mattress can usually be patched with tape or glue for less than $5. However, if left unattended, that hole could grow, and you might end up needing a new mattress, which could cost anywhere from $30 to $100 or more, depending on the size and brand.
2. Extending the Lifespan of Your Inflatable
Inflatables aren’t cheap, and replacing them frequently can add up over time. By fixing damage early, you extend the life of your inflatable, making the most out of your initial investment. Timely repairs prevent the material from degrading further and preserve its structural integrity.
Why Extending Lifespan Saves Money:
With proper care and timely repairs, you can extend the lifespan of your inflatable, saving you the cost of frequent replacements. An inflatable that lasts for several seasons or years offers much better value for money than one that needs to be replaced every few months due to untreated damage.
Example:
A well-maintained inflatable kayak that gets patched early when small tears appear can last for years. If left unchecked, the damage could cause the kayak to become unusable after just a few outings. Replacing a damaged kayak could cost several hundred dollars, whereas simple repairs with adhesive or fabric glue cost a fraction of that price.
3. Reducing the Risk of Safety Hazards
Ignoring damage to inflatables, especially in high-pressure or high-stress areas like seams or structural supports, can lead to unexpected failures. This could result in safety hazards, particularly for products like inflatable boats, rafts, or pool floats. When an inflatable fails unexpectedly, it can lead to accidents or injuries.
Why Safety-First Repairs Save Money:
In the event of a safety issue, such as an inflatable collapsing while in use, you may not only face medical costs but also the potential for liability if someone else is injured. Fixing small leaks or seam separations early ensures the inflatable remains safe to use and reduces the likelihood of serious issues later on.
Example:
An inflatable boat with a seam separation might deflate while in use, causing it to capsize. Early repairs prevent this from happening and keep the inflatable safe for use in water. The cost of replacing the boat is significantly higher than the cost of an early seam repair.
4. Avoiding the Cost of Professional Repairs
While DIY repairs are usually inexpensive, ignoring minor damage can lead to bigger, more costly repairs that require professional help. Professional repair services, while effective, can be quite expensive. Early DIY fixes can save you from having to rely on costly professionals to fix extensive damage.
Why DIY Saves Money:
DIY repairs are typically far less expensive than hiring a professional repair service, which may charge for labor and materials. By addressing issues early, you can avoid the high costs associated with professional fixes and keep your inflatable in good condition without breaking the bank.
Example:
A professional inflatable repair service might charge $50 to $100 or more for a single repair, depending on the size and complexity of the inflatable. However, a DIY patch kit might only cost $5 to $15, and it can handle multiple repairs over time.
5. Saving Time and Stress
When you let damage go unchecked, you increase the risk of having to deal with emergency repairs when you need the inflatable most. By fixing minor damage early, you prevent last-minute stress and avoid scrambling to repair the inflatable just before a big event or trip.
Why Early Repairs Save Time:
Waiting until an inflatable fails can lead to inconvenient delays and stress. If you’re preparing for a trip or hosting a pool party, having to replace or repair an inflatable at the last minute can derail your plans. By taking care of minor repairs when they occur, you ensure that your inflatable is always ready for use when you need it.
Example:
If you have a pool float with a small puncture that you neglect, you might find yourself scrambling for a replacement the night before a family gathering. By fixing it early, you avoid the stress of a last-minute repair and ensure the inflatable is ready to go when you need it.
6. Avoiding Environmental Damage
In addition to punctures from sharp objects, inflatables can also degrade due to environmental factors like UV rays, moisture, or exposure to chemicals. Early repairs prevent water or air from getting into the inflatable and causing further deterioration. Additionally, addressing small tears can prevent moisture buildup, mold, or mildew from forming inside the inflatable.
Why Protecting Your Inflatable Saves Money:
Preventing environmental damage helps maintain the integrity of your inflatable material. It also reduces the likelihood of mold, mildew, or material degradation, which can render the inflatable unusable and require costly repairs or replacements.
Example:
If a small hole in a pool float is left untreated, water can seep into the inflatable, leading to mold growth over time. Cleaning and drying the float, followed by a quick patch, prevents the mold from forming, saving you from needing a new float or dealing with costly cleaning treatments.
Fixing your inflatable early is a simple yet effective way to save money, prolong the lifespan of your products, and ensure they remain safe and functional. By addressing minor damage as soon as it appears, you avoid the escalation of problems, the need for professional repairs, and the high costs associated with frequent replacements. Timely DIY repairs are affordable, easy to perform, and can keep your inflatables in top condition for years to come.
Tip:
Incorporate regular inspections into your maintenance routine to catch small issues before they turn into bigger problems. By being proactive, you’ll get the most value out of your inflatables while keeping repair costs low.
Ready to Buy or Custom Order from Epsilon?
At Epsilon, we specialize in high-quality PVC and composite material inflatables for various applications, including pool toys, pet pools, air mattresses, and more. With our reliable products and efficient customer service, we ensure that your outdoor and leisure time remains uninterrupted.
Contact us today for bulk orders or to inquire about custom-made products. We can offer competitive prices, fast shipping, and personalized designs to meet your unique needs. Whether you’re looking for inflatables for personal or commercial use, Epsilon has you covered.
Get A Fast quote
Here, bringing your inflatable concepts to life is no longer a challenge—it’s a collaborative journey where American Epsilon helps families, outdoor enthusiasts, and global brands transform creative ideas into safe, certified, and market-ready inflatable solutions.


Partner With Epsilon
Whether you are a family looking for safe backyard fun or a brand seeking large-scale OEM/ODM solutions, American Epsilon Inc. guarantees every inflatable is built with safety, durability, and excitement in mind. With flexible low MOQs, strategically placed warehouses in the U.S., Canada, U.K., and Germany, plus 24/7 professional support, we ensure smooth delivery and reliable service worldwide.
Ready to bring your inflatable ideas to life? Request free samples, fast prototypes, and customized designs today—your trusted inflatable journey starts here.